Go Back   Horizons Unlimited - The HUBB > Ride Tales, Trip Reports and Stories > Ride Tales
Ride Tales Post your ride reports for a weekend ride or around the world. Please make the first words of the title WHERE the ride is. Please do NOT just post a link to your site. For a link, see Get a Link.
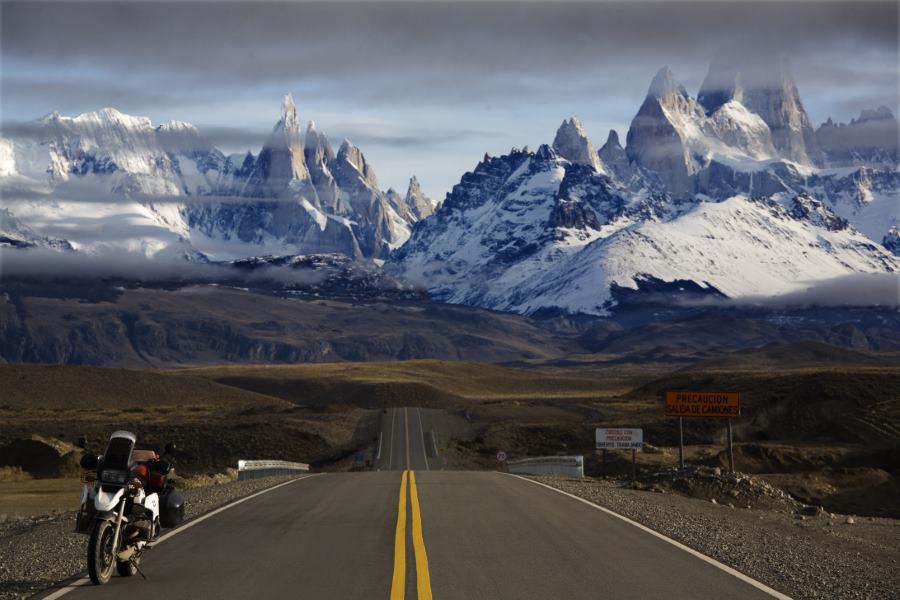
Photo by Marc Gibaud, Clouds on Tres Cerros and Mount Fitzroy, Argentinian Patagonia

25 years of HU Events


Destination ANYWHERE...
Adventure EVERYWHERE!


Photo by Marc Gibaud,
Clouds on Tres Cerros and
Mount Fitzroy, Argentinian Patagonia


Like Tree4Likes

Reply
 
LinkBack Thread Tools Display Modes
  #1  
Old 4 Jan 2011
Registered Users
HUBB regular
 
Join Date: Aug 2009
Location: Norfolk Coast UK
Posts: 65
What a brilliant write-up Pumpy, and the photos are amazing.

I must be twice your age and I keep thinking that I'd love to do a big trip, and what your story tells me is - why not?

Your tale is what HU was made for, well done you for completing it and thanks for being an inspiration to those of us still here.
__________________
__________________________________________
Live life now - you only get it once.
Reply With Quote
  #2  
Old 4 Jan 2011
Registered Users
HUBB regular
 
Join Date: Jun 2010
Location: Newcastle upon Tyne
Posts: 66
Some wonderful photos there When I got to the one of you on your bike in the mud bath I suddenly realised that I had read about you before, which was again confirmed when I saw you in your cast. Then I realised that I had been reading your web site as you headed towards the end of your journey

That's another talk already on my list for Ripley
Reply With Quote
  #3  
Old 5 Jan 2011
Pumpy's Avatar
Registered Users
HUBB regular
 
Join Date: Apr 2010
Location: Oxford, UK
Posts: 66
The Bike

BMW GS's are really capable and versatile motorcycles, I had several models as my main means of transport since 1994 and I really enjoy taking my 1150 everywhere - but it is a bit on the heavy side, especially when you think about loading it up with camping gear, luggage, tools and spares for a four-month trip.


Photo courtesy of Clive

So after quite a few people had pointed out that I might be better off with a vehicle that I could comfortably lift by myself should I drop it, the focus shifted to the little dual sports bike that I use for trail riding – a DRZ400S:


Photo courtesy of Louisdut

The majority of the modifications necessary to turn the DRZ into an adventure bike was carried out by my wonderful personal mechanic - so I let Steve tell you about his work himself.
__________________
www.pumpernickelontour.com - Four months through South America on a DRZ
Reply With Quote
  #4  
Old 5 Jan 2011
Steve Pickford's Avatar
Contributing Member
Veteran HUBBer
 
Join Date: Jul 2003
Location: Oxford, UK
Posts: 994
We’d already decided that a Suzuki DRZ 400 S would be the ideal bike for Ela’s trip to South America as it was reliable, had good aftermarket support and was relatively light (in comparison to her BMW R1150 GS anyway…), meaning that she could pick it up herself if for some reason the bike found itself on its side... Despite already owning a DRZ, we decided to buy another one specifically for this trip, one that was newer, in better condition and with fewer miles on the clocks. Another factor was that in November 2009, the chain had snapped on the old bike, holing the left-hand crankcase in process and dumping most of its oil on the road.

As the bike had covered the best part of 20,000 miles already, rather than strip it down to replace the case, I simply filed a piece of aluminium to shape that filled the 25mm x 5mm hole in the clutch arm housing and had a friend TiG weld over the top. Prior to this, I picked out all the debris I could and then changed the oil and filter twice before running the bike as normal. Not wanting the outcome of Ela’s trip decided by what could turn out to be an unreliable bike, starting afresh with another bike was the best option in our opinion. Ela eventually bought a tidy, low mileage (2,600 miles) 2004 DRZ 400 S from MadMikey near Bridgend, South Wales that had been advertised on UKGSer* ::::* For BMW GS Enthusiasts.


The bike was standard with the exception of a DEP silencer, decent bashplate and handguards. Ela had already bought a second-hand 16 litre Clarke fuel tank in blue whilst the newly purchased bike was yellow. Swapping the panels between the older blue bike and the newer yellow bike achieved two things, firstly, the tank was now the right colour and secondly, the blue panels were scuffed from trail riding and once the graphics were removed, it made the bike look less attractive to thieves but more importantly, it also looked less “flash”, important in poorer parts of the world.

I then drew up a list of modifications that were required to transform the bike from humble trailie to what could be termed an Adventure bike. I soon discovered that as soon as I crossed one item off the list, another idea or part cropped up and was added to the list, at times the list of things to do was growing faster than I could accomplish the tasks I’d set myself; what started out as base list of about 20 modifications ended up at just over 60 and that’s not including the little things that I did along the way that I never noted down.

Most of the ideas were a combination of common sense, experience from 26 years riding and spannering and also reading DRZ related threads on various online forums such as Advrider.com and Thumpertalk.com. As a former DRZ owner myself, I had a good grasp of the basics anyway. Having worked on and serviced all of our bikes for many years, owning a double length garage equipped with an old lathe, decent pillar drill, MiG welder, tyre changing equipment and a good selection of power tools meant I felt confident in tackling just about every task on the list.

For those tasks I knew I’d struggle with, I’m lucky enough to have a good friend in Simon Moore who I often run ideas past even when doing all of the work myself, just in case I was doing it the hard or the wrong way. Where I have what I term “hobby” equipment, Simon has industrial tooling to hand including a mill, lathe and all types of welding gear plus he’s into bikes big time, so could appreciate where I was coming from and what I was trying to achieve.

Luggage Racks

We bought a set of used tubular steel Givi pannier rails originally destined for an airhead GS. Once all brackets and mounts were removed, I was left with the hoops which are hardest part to manufacture yourself in my opinion.


I bought several metres each of 25mm x 6mm thick flat steel bar and 16mm diameter steel tube with a 2mm wall thickness. It was always our intention to incorporate a 5 litre fuel can in to the left hand pannier frame, an idea shamelessly stolen from Louisdut’s BMW HP2. The fuel container was in fact from a boat and measured only 70mm wide which made it ideal. I started by bending lengths of steel bar to shape to form the support for the fuel can before welding them to the pannier hoops. Once completed, I lined up the pannier hoops on each side of the bike via brackets I’d welded in place and through an existing 9mm hole on each side of the subframe that I drilled out to 10mm. Once happy with the location of each hoop, I started fabricating the necessary mounting hardware to hold it all in place.


I’d already decided to weld a 6mm thick steel plate to each side of the frame above the swingarm pivot point to which the pannier frames would be mounted via steel tubes. The idea (not my own) was that additional bracing to the bike’s frame itself would also help brace the DRZ’s aluminium subframe and help spread the load. In addition to the 10mm mounting in the subframe, I welded a bracket to each side of the DRZ rear rack to provide another mounting point via a welded on steel tube and another 10mm stainless Allen bolt. From there, mounts were fabricated to fasten the frames to the footpeg mounts on each side and to the previously mentioned lugs welded to the bike frame.

Finally, I added a removable crossbrace that ran across the rear of the bike, beneath the tailpiece and behind the rear wheel but positioned high enough so that rear wheel removal did not require removal of the crossbrace. This crossbrace would help strengthen the rear of the luggage racks. Extra lengths of flat bar were welded in place to protect the front leading edge of the fuel can in the event of a crash.


Whilst there, I incorporated a Tool Tube in to the left hand frame & tucked in tight to the bike to mimic the location of the right hand mounted silencer, this is to carry tools and tyre levers but was originally intended for a Tractor Operators manual and is a popular addition to this type of bike.


As Ela’s using Ortlieb soft panniers, I welded a steel hoop on to the top of each frame through which to pass mounting straps. All fasteners are 8mm and 10mm stainless steel Allen bolts retained with stainless washers and Nyloc nuts. Where fasteners screw directly in to the frame, longer bolts were utilised with stainless Nyloc nuts and washers on the back, locking the fastener in place to prevent it coming loose on the rougher sections of the trip.

The complete rear rack and pannier frames were powder-coated black at Oxford Industrial Finishers for £20 and weigh just over 5kg including fasteners but not the fuel can itself. The end result is a rack system in three parts, each of which can be removed from the bike independent of the other sections, making it easier to remove and fit to the bike.


Soft Luggage

As mentioned above, waterproof Ortlieb panniers will be mounted on the racks themselves with Wolfman Expedition Dry Tank Panniers up front. Across the back of the bike are two 30 litre waterproof sacks from Motorrad Louis in Germany. A Kriega US5 pouch is mounted on the front mudguard to carry two spare inner tubes. I extended the Velcro crossover straps on the Ortliebs with lengths of the necessary Velcro riveted on to the standard straps. Slots were cut in the rad shrouds through which the tank pannier straps passed, in addition to straps around the frame above the swingarm pivot.

Additional fuel capacity

The 5 litre fuel can was sourced from an online marine chandlers; it came with a cap but no spout. Trying to pour a full can into the bike fuel tank led to us losing at least 0.5 litres each time as the fuel dripped down the side of the can. To prevent fuel wastage, I cut a hole in the centre of a spare cap and using silicon sealant, stuck the plastic spout from a 5 litre oil can to the cap; Ela just screws it on as and when needed.

Chassis

To keep the bike manageable for Ela, I fitted Talon lowering links to the suspension linkage to lower the rear of the bike. To maintain a level bike and retain decent steering geometry, the front needed to be lowered also, this entailed pushing the forks through the yokes but the position of the handlebars prevented me from doing so, a problem resolved by fitting Talon handlebar risers which allowed us to push the forks through by 20mm.

We used the seat from the other DRZ which had already had about 20-25mm of seat foam removed by a local guy, reducing the seat height even further. The seat was topped off with a sheepskin Ela had given to me years ago but which I’d never used, so it was “appropriated” for the trip, cut to shape and held in place with Cordura straps.


Ela had always found it a bit fiddly to remove the DRZ front spindle as once it was pushed through from the left; there was only a short section of greased spindle to grab on the right. This was remedied by making a spindle puller for each bike. I started by cutting the hex spindle removal tool in half, drilling the centre out to 12mm to save weight and then drilling a 6mm hole near one end of each piece at right angles. Into this hole was inserted a 100mm length of 6mm round steel bar which was then welded in place before the whole thing was welded in to the end of the wheel spindle for ease of use and to save space in the toolkit.


Having experienced the trauma of a snapped chain, I doubled the thickness of the stock case saver to 6mm with the aid of a steel plate cut to shape and then welded to the standard part. Footpegs were also swapped between bikes as the older bike had significantly wider footpegs that offered greater support in the event of needing to stand on the ‘pegs for any length of time. I also cable tied every pair of spokes where they crossed over, hopefully preventing any broken spokes from catching in calipers and discs etc.


I also replaced the standard 5mm and 6mm screws that retained the headlight cowl as they were fiddly to use, especially the 5mm screw beneath the light that screwed in to the front of the top yoke. All three were replaced with long stainless Allen bolts with two Nyloc nuts screwed on to the thread and then tightened together before being fitted to the bike. These extended length fasteners made cowl removal and refitting a lot easier. One of the last things to be done on the chassis side was to weld a large diameter washer to the underside of the sidestand foot to increase its footprint, the idea being to prevent the stand sinking in sand or soft ground.


Consumables

Not wanting mechanical issues to delay or even ruin the trip, the chain, both sprockets, brake pads and wheel bearings were all replaced with new parts. The stock rubber brakes lines were replaced with plastic coated stainless lines with stainless fittings from HEL Ltd. I also replaced the seal that sits behind the front sprocket along with a stainless spacer instead of the stock mild steel part that corrodes and then chews up the up seal, causing the bike to dump its oil with the inevitable consequences, a known DRZ fault…
Replacement stainless rear wheel spacers were purchased online and fitted in due course. The matching front wheel spacer was no longer available, so Simon Moore kindly turned two up on his lathe, one for each of Ela’s DRZ’s.


Another weak point of the DRZ is the brake pad retaining pins that are hard to remove and prone to either rounding out or corroding in place (both if you’re really unlucky). Stainless hex headed versions were purchased from Leisure Trail in Nottingham and fitted when the calipers were overhauled and new pads fitted, money well spent in my opinion. These pad pins designed for the Honda CRM250 which uses the same calipers as the DRZ.

The bike came fitted with nearly new Michelin AC10 tyres, which although great for trailriding, were not ideal for the trip due to the limited mileage Ela would get from them; they were replaced with Pirelli MT21’s front and rear along with 4mm thick heavy duty tubes to hopefully limit punctures. I replaced the rear sprocket bolts with heavy duty plated steel items as the ones I’d bought from Talon were too short as they were intended for use with one of their billet hubs.

I also used two nuts on each number plastic number plate screw, locking them together to prevent them shaking loose. The stock mirrors are not that great and screw directly in to the clutch lever and front brake perches. Dropping the bike can tear the perch clamps off, rendering the bike unrideable. This potential issue was resolved by buying a set of Double Take mirrors from Adventurespec.com. Basically the mirror stem is connected to the bike by a set of GPS RAM mounts each side, the idea being that in the event of a crash, the mirrors are pushed out of the way on the ball mountings.

Fasteners

As many as possible of the stock mild steel fasteners were replaced with stainless Allen bolts and Nyloc nuts where safe to do so. Stainless is strong but has a low sheer strength and is not ideal for mounting parts that are subject to high side loads such as brake calipers etc. Plenty of Copperslip was used as despite its low mileage, there were more than a few seized/corroded bolts on the bike, all of which took time and in some cases, brute force and power tools to remove. I also turned up a series of six aluminium top hat shaped spacers that were glued in place in to the rad shrouds, they help spread the load of the fasteners and the glue prevents them being lost if the shrouds are removed for any reason.

Electrics

Not wanting to overload the bike’s electrics or to complicate things for Ela, I limited the electrical modifications to relocating the fuse holder to beneath the seat for ease of access as the stock location near the battery would have meant stripping the left hand pannier frame from the bike to access it. I fitted a 12v cigarette lighter socket to a one-off steel bracket I’d made, mounted on the right of the headlight and fasted via the top yoke bolts.


Ela bought a Garmin Zumo 220 GPS system that was powered by an internal battery that could be charged up by plugging in to the 12v socket. Having an internal battery meant that when the Zumo was not being charged, the 12v socket could then be used for charging other electronic devices on the move.

Heated Grips from Oxford Products were fitted; these later versions are a massive improvement over the primitive items I fitted to Ela’s DR350 a few years ago although the mounting bracket supplied as part of the kit is next to useless. To remedy this, I turned up four aluminium spacers on the lathe to fill the recesses in the Talon ‘bar risers normally occupied by recessed heads of the Allen bolts used here and then mounted an aluminium plate across the riser mounts to which the heated grips switch was stuck on using the supplied adhesive pad. The control box was located beneath the seat with all wiring cable tied to the stock wiring harness.


We thought that replacing the rear bulb with an LED equivalent would be a good idea, in practice it was a waste of time as all of the LED’s faced rearwards with no light aimed at the reflector, resulting in a small dim glow instead of the high intensity light I’d expected, a full refund was soon obtained...

A cheap 12v compressor that plugs in to the 12v socket was stripped of its casing to save space and weight. All accessible electrical connectors were taken apart, cleaned and greased prior to reassembly to limit corrosion etc. The ignition switch bracket was disassembled, flipped through 180 degrees and mounted on the ‘bars using the original handlebar clamp tops that had been rendered surplus by the use of the Talon risers.

Crash protection

After rough jigsawing to shape, I turned up three round plates of differing sizes from 2.5mm thick sheet aluminium on the lathe and stuck them to the clutch, generator and starter motor covers with black automotive silicon sealant. As DRZ cases are not known for their strength, these will hopefully save them from being holed, similar parts on my KTM 950SE seem to have worked on more than one occasion...


Simon Moore then TiG welded an aluminium extension plate I’d made on to the bashplate, to protect the water pump and oil filter cover. A 1” cube of closed cell foam was then “siliconed” in place between the welded on plate and the oil filter cover for additional cushioning and to prevent the plate being pushed inwards in the event of a spill.


I was given a sheet of Perspex by Steve of UKGS’er from which a headlight guard was fabricated, held in place by two aluminium brackets and a few stainless Allen bolts and Nylocs.


Unabiker rad guards from the US were ordered and fitted, only requiring a minor mod with a die grinder to ensure a good fit. We’d originally ordered some UK made rad guards for the DRZ400E, thinking I could modify them to fit Ela’s 400S. Unfortunately there was no way they’d fit, they were then sold on to Timpo as he had a 400E only to find they didn’t fit his bike either? He thinks they’re intended for the very early 400E which is different to the later E versions and all 400S versions. An aluminium front fender brace was also fitted for protection and to provide a decent support for the Kriega US5. A Kriega Haul Loop was also fitted to the forks in case it was ever required.


Engine

The valves were checked, with one exhaust and one inlet valve found to be tight by 0.05mm. Once shims of the correct size were fitted and the head reassembled, the spark plug, oil, oil filter and air filter were replaced plus an inline fuel filter was fitted in case Ela ended up buying dirty fuel at any point. The filter was sleeved in a block of closed cell foam to protect it. Although the DEP silencer was significantly lighter than the heavy steel Suzuki item, it was also significantly noisier. To resolve this, a length of 25mm OD stainless tube was cut to length with one end crushed in the 3-jaw chuck on Simon’s lathe to close the end up and hopefully reduce the noise level. Simon then TiG welded it in place, resulting in a quieter bike.


Spares

Spare tubes, levers, selection of fasteners and fuses, brake pads front and rear, spare throttle cables, lubed spare clutch cable with sealed ends cable tied in place for quick renewal.

Tools

Shortened Buzzetti style tyre levers, chain tool and 24mm spanner/ tyre lever combo from Motion-Pro, spoke key milled from 6mm flat steel bar courtesy of Simon Moore, a selection of spanners, Allen keys and 3/8” drive sockets plus an extension bar. The Motion-Pro spanner/tyre lever came with a hex insert that featured a 3/8” drive tool in lieu of carrying a ratchet or T-bar. Other items in the toolkit include stainless lockwire, emery paper, small Molegrips, various screwdrivers plus Ela’s Leatherman, tow straps and spark plug spanner in addition to small tubs of Copperslip and grease plus a small refillable plastic can of oil for lubing the chain.

The Adventure Bike


A very happy adventuress


... and her personal mechanic
__________________
My photos: www.possu.smugmug.com
Reply With Quote
  #5  
Old 5 Jan 2011
Registered Users
Veteran HUBBer
 
Join Date: Aug 2008
Location: NFA
Posts: 222
Brilliant pics, great mech write up. Fantastic, and looking forward to the rest of the report!
Reply With Quote
  #6  
Old 5 Jan 2011
Registered Users
Veteran HUBBer
 
Join Date: Jul 2009
Location: USA
Posts: 143
Small world i suppose. I'm still at the farm where we met and still awaiting my new engine from the US. I hope that life is going good in London. It was very nice to meet you.

Chris Sorbi

__________________
Many thanks to all the members who've contributed to this noble cause.
Visit the expedition website to get up to speed: www.MotorcycleMemoir.com
Reply With Quote
  #7  
Old 6 Jan 2011
Pumpy's Avatar
Registered Users
HUBB regular
 
Join Date: Apr 2010
Location: Oxford, UK
Posts: 66
Quote:
Originally Posted by T.H.E View Post
Small world i suppose. I'm still at the farm where we met and still awaiting my new engine from the US. I hope that life is going good in London. It was very nice to meet you.
O no, Chris, you are still in Otamendi?!

Hope you will get your engine, a new bike or a donkey sorted soon so that you can continue your journey - fingers crossed!

Please say hello to Jorge and Facundo (and could you please explain to them how an X-ring chain works? I'm still embarrassed that I couldn't... ).

Here's another photo for you:
__________________
www.pumpernickelontour.com - Four months through South America on a DRZ
Reply With Quote
  #8  
Old 6 Jan 2011
Pumpy's Avatar
Registered Users
HUBB regular
 
Join Date: Apr 2010
Location: Oxford, UK
Posts: 66
Quote:
Originally Posted by deenewcastle View Post
Some wonderful photos there When I got to the one of you on your bike in the mud bath I suddenly realised that I had read about you before, which was again confirmed when I saw you in your cast. Then I realised that I had been reading your web site as you headed towards the end of your journey
That's another talk already on my list for Ripley
Thank you for your interest, Deenewcastle - see you at Lumb Farm then!
__________________
www.pumpernickelontour.com - Four months through South America on a DRZ
Reply With Quote
  #9  
Old 7 Jan 2011
Pumpy's Avatar
Registered Users
HUBB regular
 
Join Date: Apr 2010
Location: Oxford, UK
Posts: 66
The journey begins…

The weeks before departure were quite emotional and that’s not only because I was incredibly excited about the journey.

First there was my unfortunate off on ‘Dark Lane’ (how appropriate…) on the May bank holiday. I can still hear Possu suggesting just a few days earlier that I should take it easy in the run-up to August and maybe refrain from trail riding in the meantime. I also remember getting quite puffed-up about this patronising remark and replying that “I won’t put my life on hold just for this trip!” Famous last words…


Three screws had to be inserted into my navicular bone… My sister came over from Germany to provide moral support.


Steve was not particularly happy about this set-back which meant that he had to look after a handicapped person and do the majority of the house work and the bike preparation himself. He had intended to train me as much as possible on maintenance of the bike - but have you ever tried to change tyres with only one available limb?

Still on crutches I went to the Horizons Unlimited Meeting in June. I am still indebted to Dr JM who abstained from a nice bike ride up to Lumb Farm, gave me a lift in her car instead and even pitched my tent for me – thus enabling me to gather the last tips and tricks for solo travel in foreign continents and survival in the wilderness.


In Ripley I also stocked up on equipment and made the final decision who I would entrust with shipping my bike to the other side of the world.


At the end of July the plaster came off and I was officially discharged. I was still hobbling about with a Samson boot – but down to one crutch and doing loads of physio – and could finally focus on the important things in life.

I had a wonderful send-off on 6th August at The Chequers with friends coming from all over the country – from as far as Benson (400 yards - Strobingred) to the Wirral (180 miles - Timpo).


During the remaining ten days before I set off to Buenos Aires, friends and relatives kept calling, sending lovely messages, commenting on my blog and visiting me in Oxford - it was very humbling and I am very lucky to have such wonderful people in my life. They probably all thought they would never see me again…

Bert and his kids drove up all the way from Belgium


Emma came from Herefordshire


... and Forry from (back then) North Wales


One day Chris JK called me and just asked if I had thought about getting a SPOT messenger (SPOT SATELLITE MESSENGER :: HOME PAGE) that would let my friends and family know that I was ok and still moving.

Knowing that Tiffany uses such a device for keeping in touch during her travels, I had briefly contemplated the acquisition but then dropped the idea when I saw the price. Well, Chris insisted on giving me one as a present and I, my family and friends will be forever grateful for his generosity – we all could sleep better in the months that followed.

Chris and his wife Mary


On 10th August we delivered the bike to James Cargo to be crated and shipped to Argentina.

Giles and Steve


Raring to take off


Then I spent a few days with Steve's side of the family in Kent for good wishes and big hugs. I promised that I wouldn't be doing anything (too) silly...

The last week was pretty hectic with still a thousand things to do. Dr JM helped me sorting out my medical supplies but didn’t want to be photographed - so it’s just Berin looking nice for the camera here although he didn’t do anything, really…


And then on 17th August I finally followed the DRZ to Buenos Aires!

Sharing the last cake with Possu at Gatwick...


Leaving the British summer behind - ¡hasta luego, Inglaterra!


There was a three-hour stop-over at Madrid where I was lucky enough to snatch the last sandwich before the Bistro closed. The Duty-free shops were open the whole night though – priorities, priorities...

Although I had booked a window-seat four months in advance, they gave me a seat right in the middle at the rear of the aircraft on the day - no Madrid by night, no brightly lit Canary Islands, no Amazonian rainforest nor the Iguazú Falls from the air, boohoo! But, crowded as that flight was, I should probably count myself lucky that they took me to South America at all. A brief glimpse out of the crew compartment showed that I hadn't missed a lot anyway:

South America from the air...


Going south, very, very south


After 13 hours we finally touched ground at Ezeiza International Airport in Buenos Aires. The sky looked similar to the English one but it was a lot warmer! Expecting the equivalent of February in the northern hemisphere in Argentina, I was accordingly dressed and too hot already whilst queuing for immigration. However, it didn't cross my mind for a second to complain...

Welcome to Buenos Aires...


The journey with the excellent Manuel Tienda León Shuttle Bus and the subsequent transfer to the hotel (5 Argentinean Pesos extra - less than a pound!), gave me a great introduction to the local traffic conditions - even the cars are "filtering" here and "lane-splitting" means that up to five cars/trucks/buses/motorcycles share three lanes between them. I was already looking forward to joining this chaos on my own bike the next day…

An interesting mixture of architecture can be seen next to the motorway into the city centre.


I could only hope that the slip roads were sign-posted correctly…


Eventually arriving at my hotel in San Telmo, I was looking forward to meeting my friend John “The Bede” Tremayne from the UK who is currently residing in Buenos Aires.

Let the sight-seeing begin...
__________________
www.pumpernickelontour.com - Four months through South America on a DRZ
Reply With Quote
  #10  
Old 7 Jan 2011
Registered Users
Veteran HUBBer
 
Join Date: Apr 2006
Location: Tallinn, Estonia
Posts: 1,049
Great pics and they bring back memories!

A question:
In you first post there is a picture labelled Carretera Austral.

It shows a set of hairpins.
Do you remember if this section was about 45km North of a town called Mañiguales or about 100km North of Coyhaique?

It looks like a section we struggled on when we were there as that whole section was being converted to tarmac.

It was all loose earth and sand which was a killer after the hard-packed clay and ripio that had covered the Carretera all the way from Chaiten!
__________________
Adventure: it's an experience, not a style!
(so ride what you like, but ride it somewhere new!)
Reply With Quote
  #11  
Old 7 Jan 2011
Pumpy's Avatar
Registered Users
HUBB regular
 
Join Date: Apr 2010
Location: Oxford, UK
Posts: 66
Quote:
Originally Posted by Warthog View Post
A question:
In you first post there is a picture labelled Carretera Austral.

It shows a set of hairpins.
Do you remember if this section was about 45km North of a town called Mañiguales or about 100km North of Coyhaique?


This section is about 50 km south of Coyhaique going down into the Valle del Rio Ibáñez - you can see the river in the background.

The next settlement on the Carretera Austral would be Villa Cerro Castillo where the tarmac ends.

The section 100 km north of Coyhaique or 45 north of Mañihuales is probably the pass road over the Cordillera Queulat, which is still quite challenging to ride.

From the junction of Ruta 7 and SN 25 (to Puerto Cisnes/Piedra El Gato) the Carretera is almost completely paved now until Coyhaique. There is only a small stretch (22 km) of Ripio left, starting roughly 12 km after the Mirador Lago Las Torres.

Did you ride the Carretera Austral till the end?
__________________
www.pumpernickelontour.com - Four months through South America on a DRZ
Reply With Quote
  #12  
Old 7 Jan 2011
Registered Users
Veteran HUBBer
 
Join Date: Apr 2006
Location: Tallinn, Estonia
Posts: 1,049
Quote:
Originally Posted by Pumpy View Post

Did you ride the Carretera Austral till the end?
We were two-up on a heavily laden R1150GS, and that section, as I said, was all road works and I found it extremely tough, given my crappy off-road skills!! Deep, loose earth and sand for the most part.

Regrettably no, we did not go to the end.
Time for us was running a little short by then. Early on in our trip (the second day) we had ditched our planned route and travelling style.

We had started staying for a few days in places we liked and so we did not do big miles everyday. The good side to this was that we got more of a taste of some parts we visited, but the bad is that we had to scrap some destinations.

We had heard that the conditions were even more challenging South of Lago Cabrera/Buenos Aires. If I am brutally honest, it was partly the fact that the long 45km section of road works had really worn me out, and I guess I did not fancy another rushed 500km round trip to O'Higgins!

Part of me regrets it, but I also know it was supposed to be an amazing trip (and it was) rather than a test of our mettle and endurance! So in that respect I think we made the right choice to head East from Coyhiaque.

Our two days travelling the Carretera Austral remain one of the road going highlights of our trip

To do more of what we wanted, another 6 weeks would have been ideal, then we would not have felt any need to rush either.

Glad you did it and enjoyed it: the pictures do give me very itchy feet!!!
__________________
Adventure: it's an experience, not a style!
(so ride what you like, but ride it somewhere new!)
Reply With Quote
  #13  
Old 16 Apr 2011
Registered Users
New on the HUBB
 
Join Date: Apr 2011
Posts: 4
Thanks for the great pictures!!
Reply With Quote
  #14  
Old 17 Apr 2011
Pumpy's Avatar
Registered Users
HUBB regular
 
Join Date: Apr 2010
Location: Oxford, UK
Posts: 66
Quote:
Originally Posted by heckelman View Post
Thanks for the great pictures!!
My pleasure, heckelman!

Good luck with your own trip - don't forget to visit the Norton Rats in Cuzco to meet likeminded people and get lots of useful advice. And please say hello to John from me - thanks.
__________________
www.pumpernickelontour.com - Four months through South America on a DRZ
Reply With Quote
  #15  
Old 18 Apr 2011
Registered Users
New on the HUBB
 
Join Date: Jan 2009
Posts: 7
Great read so far, looking forward to the rest of it.
Reply With Quote
Reply


Currently Active Users Viewing This Thread: 1 (0 Registered Users and/or Members and 1 guests)
 

Posting Rules
You may not post new threads
You may not post replies
You may not post attachments
You may not edit your posts

BB code is On
Smilies are On
[IMG] code is On
HTML code is Off
Trackbacks are On
Pingbacks are On
Refbacks are On


Similar Threads
Thread Thread Starter Forum Replies Last Post
Currently in Cabo heading South Solo mellojeffrey Travellers Seeking Travellers 0 18 Dec 2010 01:04
Solo To Latin America mhelmuth Which Bike? 7 7 Feb 2010 21:25
SOUTH AMERICA dream journey (ideally Argentina)!!!!! December meet-up??? wanderwander Travellers Seeking Travellers 3 25 Nov 2009 15:03
Women solo trip from Alaska to South America Biker Chick Women's Topics 16 1 Oct 2009 05:21
North america- south america- Africa- South Asia- Middle east- USSR- Northern Europe twinkle star Travellers Seeking Travellers 6 14 Aug 2009 01:29


Announcements

Thinking about traveling? Not sure about the whole thing? Watch the HU Achievable Dream Video Trailers and then get ALL the information you need to get inspired and learn how to travel anywhere in the world!

Have YOU ever wondered who has ridden around the world? We did too - and now here's the list of Circumnavigators!
Check it out now
, and add your information if we didn't find you.

Next HU Eventscalendar

25 years of HU Events
Be sure to join us for this huge milestone!

ALL Dates subject to change.

2025 Confirmed Events:

Virginia: April 24-27
Queensland is back! May 2-5
Germany Summer: May 29-June 1
Ecuador June 13-15
Bulgaria Mini: June 27-29
CanWest: July 10-13
Switzerland: Aug 14-17
Romania: Aug 22-24
Austria: Sept. 11-14
California: September 18-21
France: September 19-21
New York: October 9-12 NEW!
Germany Autumn: Oct 30-Nov 2

2026 Confirmed Dates:
(get your holidays booked!)

Virginia: April 23-26
Queensland: May 1-4
CanWest: July 9-12

Add yourself to the Updates List for each event!

Questions about an event? Ask here

See all event details

 
World's most listened to Adventure Motorbike Show!
Check the RAW segments; Grant, your HU host is on every month!
Episodes below to listen to while you, err, pretend to do something or other...

Adventurous Bikers – We've got all your Hygiene & Protection needs SORTED! Powdered Hair & Body Wash, Moisturising Cream Insect Repellent, and Moisturising Cream Sunscreen SPF50. ESSENTIAL | CONVENIENT | FUNCTIONAL.

2020 Edition of Chris Scott's Adventure Motorcycling Handbook.

2020 Edition of Chris Scott's Adventure Motorcycling Handbook.

"Ultimate global guide for red-blooded bikers planning overseas exploration. Covers choice & preparation of best bike, shipping overseas, baggage design, riding techniques, travel health, visas, documentation, safety and useful addresses." Recommended. (Grant)


Ripcord Rescue Travel Insurance.

Led by special operations veterans, Stanford Medicine affiliated physicians, paramedics and other travel experts, Ripcord is perfect for adventure seekers, climbers, skiers, sports enthusiasts, hunters, international travelers, humanitarian efforts, expeditions and more.

Ripcord Rescue Travel Insurance™ combines into a single integrated program the best evacuation and rescue with the premier travel insurance coverages designed for adventurers and travel is covered on motorcycles of all sizes.
(ONLY US RESIDENTS and currently has a limit of 60 days.)

Ripcord Evacuation Insurance is available for ALL nationalities.


What others say about HU...

"This site is the BIBLE for international bike travelers." Greg, Australia

"Thank you! The web site, The travels, The insight, The inspiration, Everything, just thanks." Colin, UK

"My friend and I are planning a trip from Singapore to England... We found (the HU) site invaluable as an aid to planning and have based a lot of our purchases (bikes, riding gear, etc.) on what we have learned from this site." Phil, Australia

"I for one always had an adventurous spirit, but you and Susan lit the fire for my trip and I'll be forever grateful for what you two do to inspire others to just do it." Brent, USA

"Your website is a mecca of valuable information and the (video) series is informative, entertaining, and inspiring!" Jennifer, Canada

"Your worldwide organisation and events are the Go To places to for all serious touring and aspiring touring bikers." Trevor, South Africa

"This is the answer to all my questions." Haydn, Australia

"Keep going the excellent work you are doing for Horizons Unlimited - I love it!" Thomas, Germany

Lots more comments here!


Five books by Graham Field!

Every book a diary
Every chapter a day
Every day a journey
Refreshingly honest and compelling tales: the hights and lows of a life on the road. Solo, unsupported, budget journeys of discovery.
Authentic, engaging and evocative travel memoirs, overland, around the world and through life.
All 8 books available from the author or as eBooks and audio books


Back Road Map Books and Backroad GPS Maps for all of Canada - a must have!

New to Horizons Unlimited?

New to motorcycle travelling? New to the HU site? Confused? Too many options? It's really very simple - just 4 easy steps!

Horizons Unlimited was founded in 1997 by Grant and Susan Johnson following their journey around the world on a BMW R80G/S.

Susan and Grant Johnson Read more about Grant & Susan's story

Membership - help keep us going!

Horizons Unlimited is not a big multi-national company, just two people who love motorcycle travel and have grown what started as a hobby in 1997 into a full time job (usually 8-10 hours per day and 7 days a week) and a labour of love. To keep it going and a roof over our heads, we run events all over the world with the help of volunteers; we sell inspirational and informative DVDs; we have a few selected advertisers; and we make a small amount from memberships.

You don't have to be a Member to come to an HU meeting, access the website, or ask questions on the HUBB. What you get for your membership contribution is our sincere gratitude, good karma and knowing that you're helping to keep the motorcycle travel dream alive. Contributing Members and Gold Members do get additional features on the HUBB. Here's a list of all the Member benefits on the HUBB.


All times are GMT +1. The time now is 04:00.