 3Likes 3Likes
 |
|

13 Nov 2013
|
|
Registered Users
Veteran HUBBer
|
|
Join Date: May 2012
Location: Lithuania
Posts: 204
|
|
|
I don't have a tank bag. Yet.
|
20 Feb 2014
|
|
Registered Users
Veteran HUBBer
|
|
Join Date: May 2012
Location: Lithuania
Posts: 204
|
|
GUTTED!
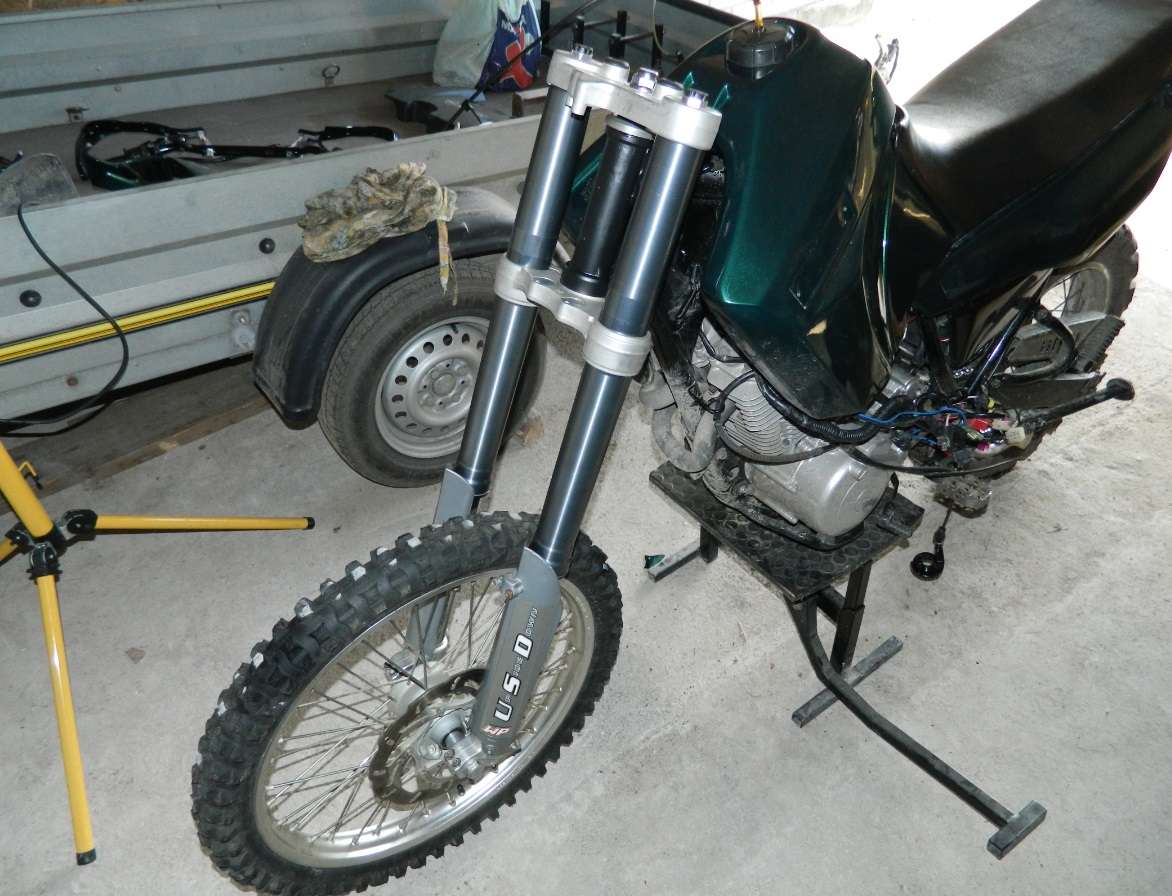
Front fork swap 2.0
So, more than a year ago I had an idea to make a front fork swap for my XT. And it didn't end well (didn't even started!). I bought a 2003+ KTM EXC 525 wheel hub and axle, and I was after a front fork. I bought, what supposed to be a 2003 EXC 525, front fork. And it was a 2000 EXC 520... Pissed off, I sold the hub, sold the axle, scrapped the idea of a fork swap. Tried to sell the forks, but no one bought them...
The forks were standing in a corner of my room for all this time, and the fork swap idea started brewing again. I don't have where to use the fork, nobody buys it, so heck, I might end up what I started! (plus 48mm front fork setup would be WAAAAY more expensive...)
I bought the wheel (with a brake disc (not sure yet if it's truly straight) tire and axle),
bought the caliper,
steel braided brake hose and a Magura master brake pump (my original XT pump isn't worth reusing),
28mm handlebar risers (still missing the handlebars, in a worst case scenario I will temporarily use original XT risers and handlebars),
new steering head bearings for the XT,
new oil seals for the forks.
Total spend so far ~600Euro.
Today I received the bearings and gutted the bike's front end. My old bearings were horrible, lower bearing had quite a bit of rust and water (even though I greased everything well a couple of years ago).
Off they went, and also the outer bearing races.
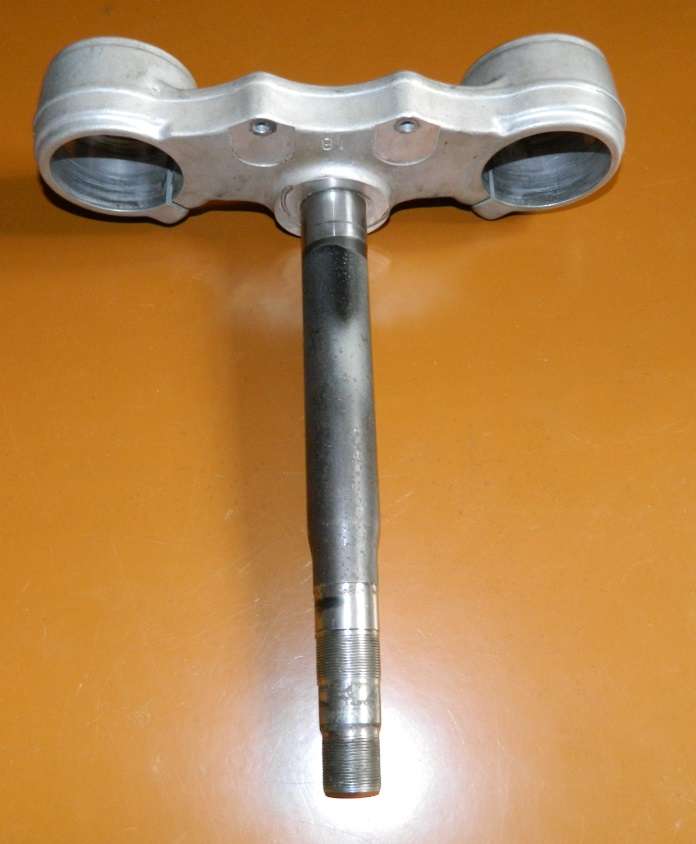
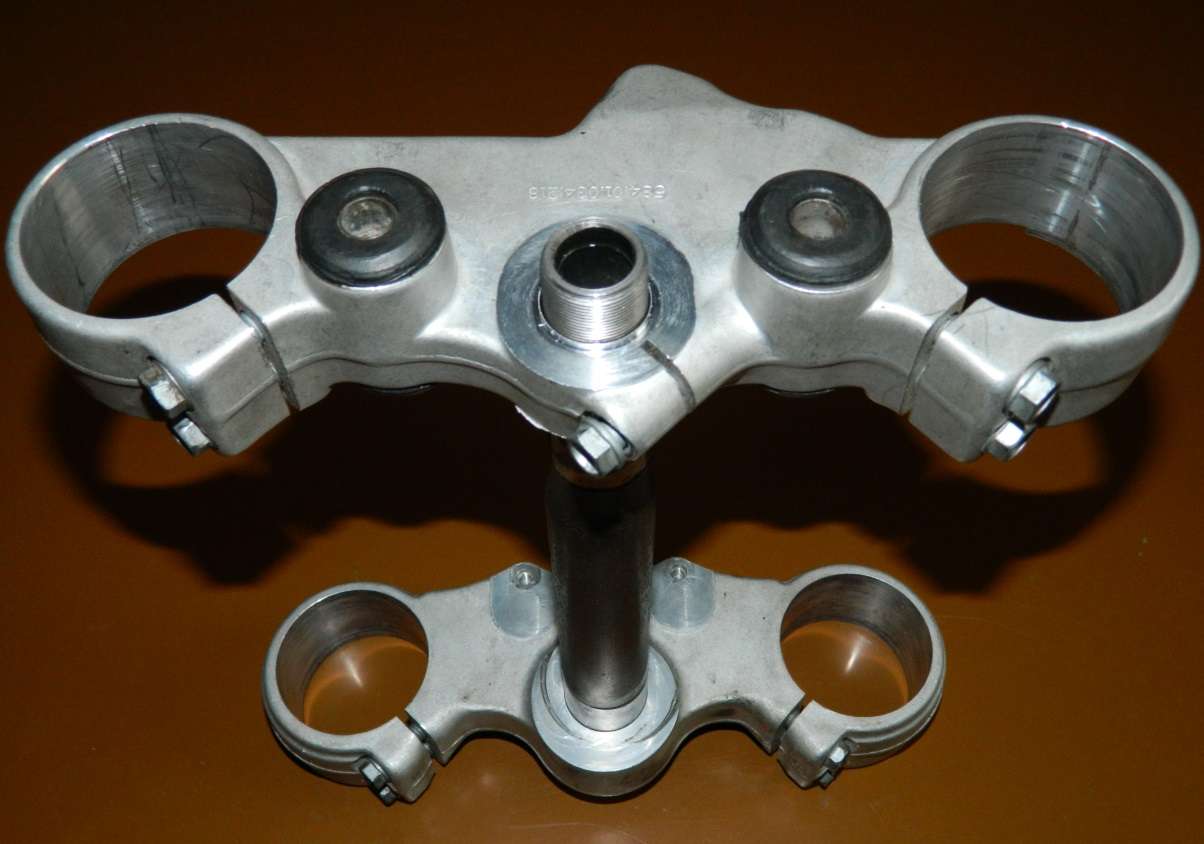
A good friend 30 ton hydraulic press done some pumping and pressed out the KTM and Yamaha steering stems.
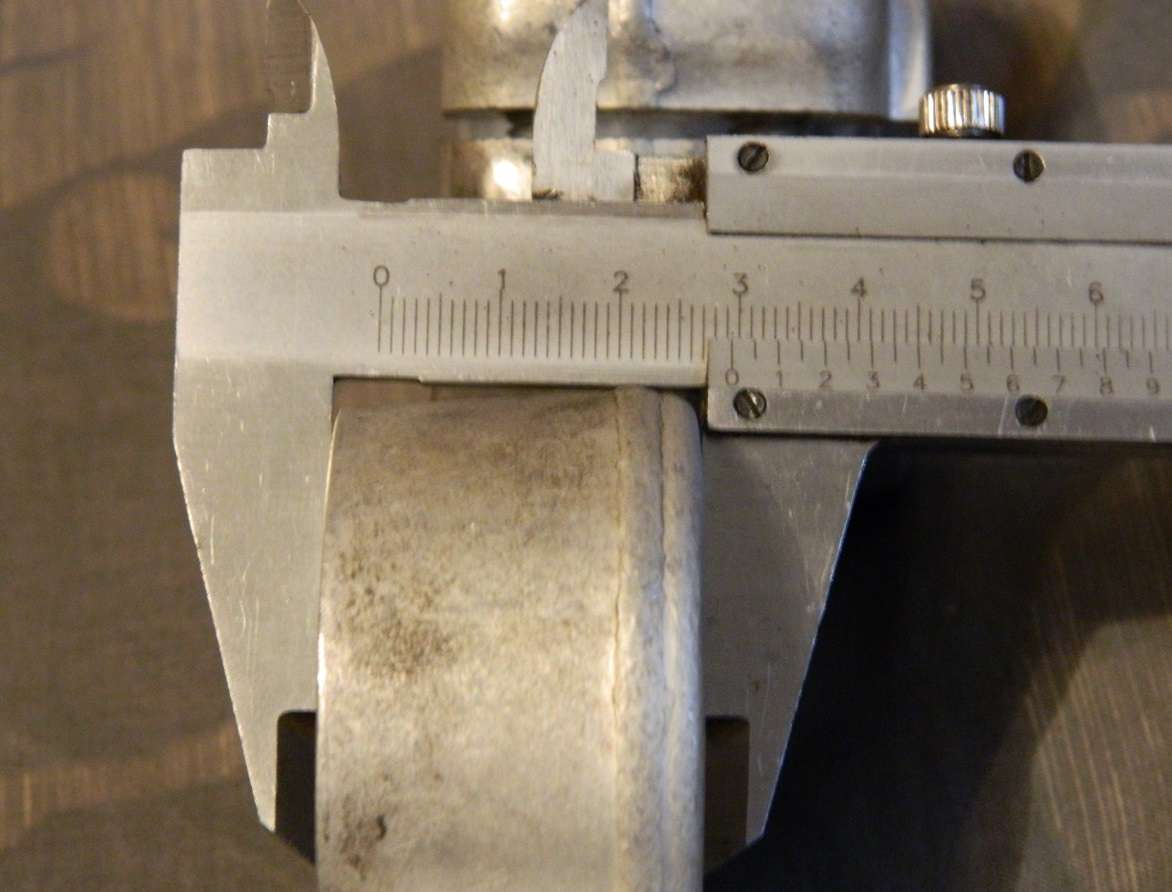
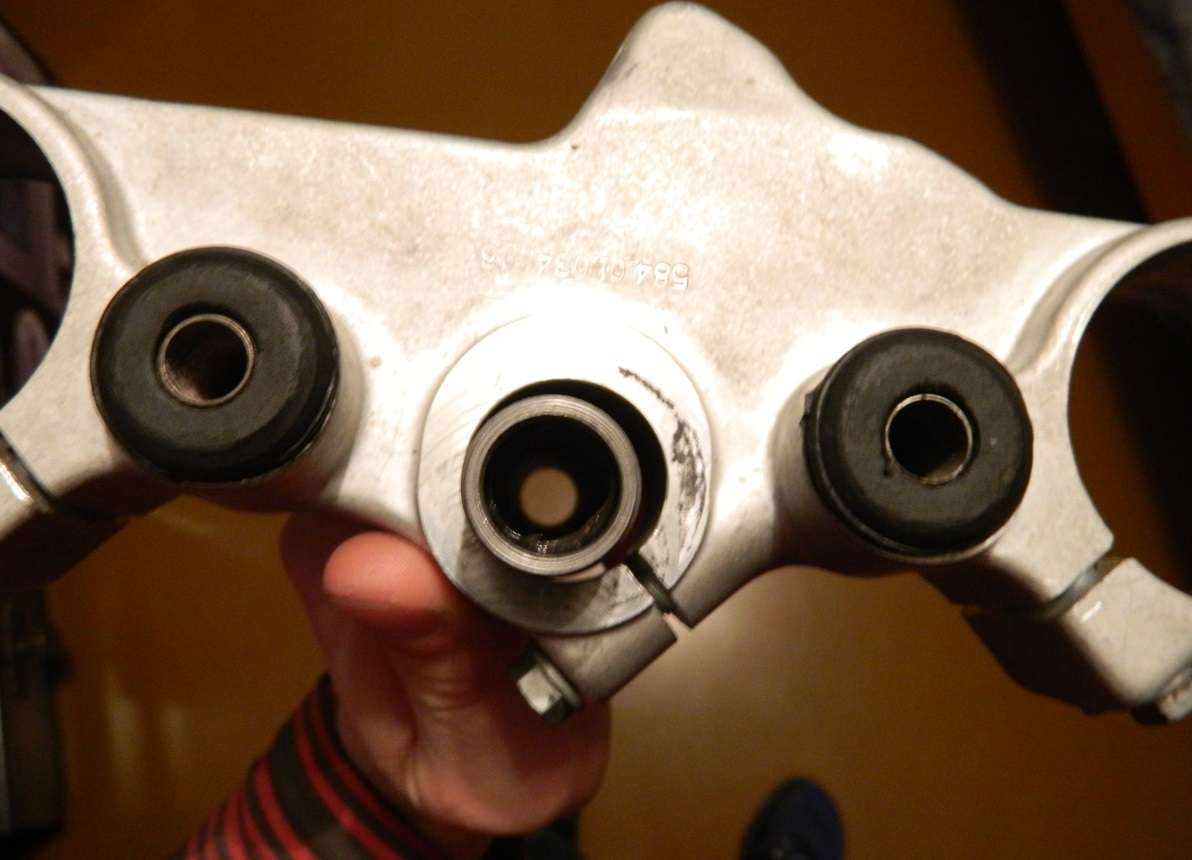
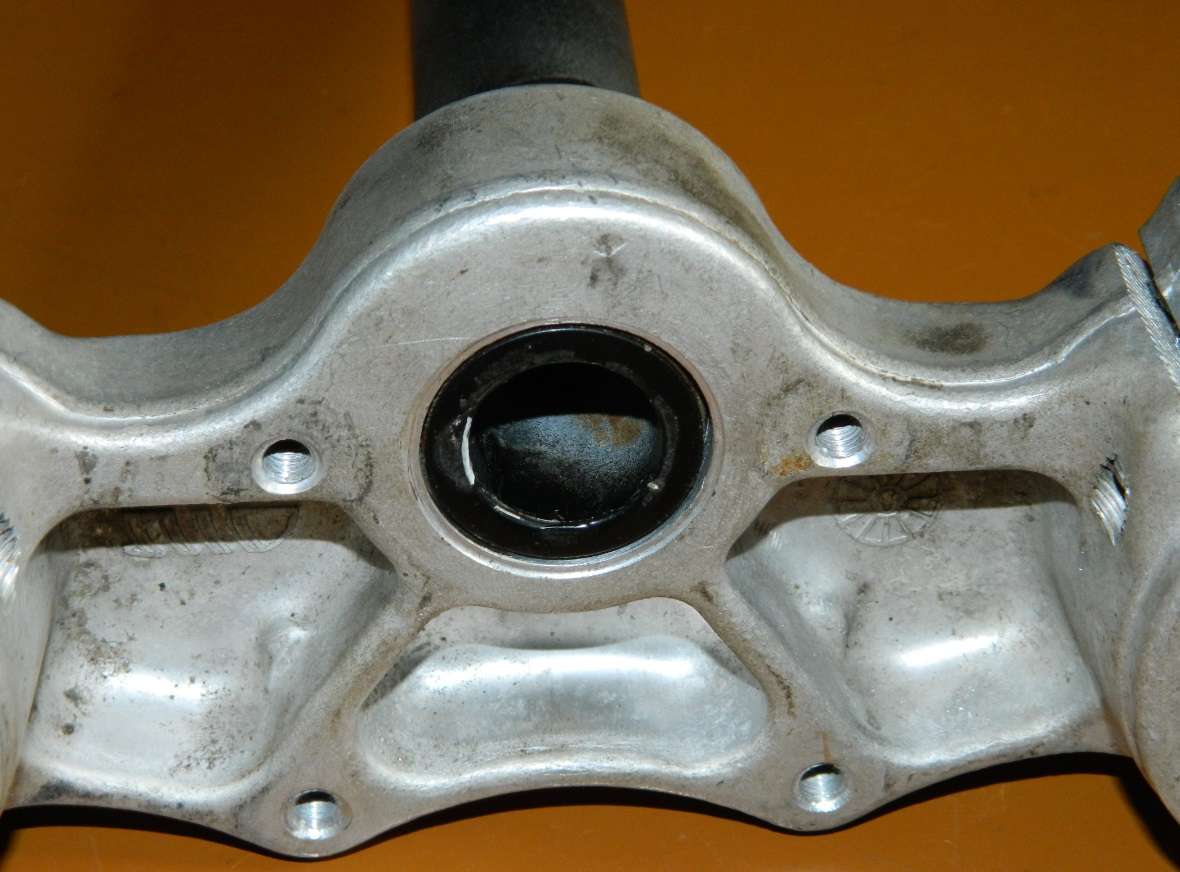
OOOOHHHH boy was a happy! The steering stem diameter for the lower aluminum clamp is the same! 30mm!
KTM
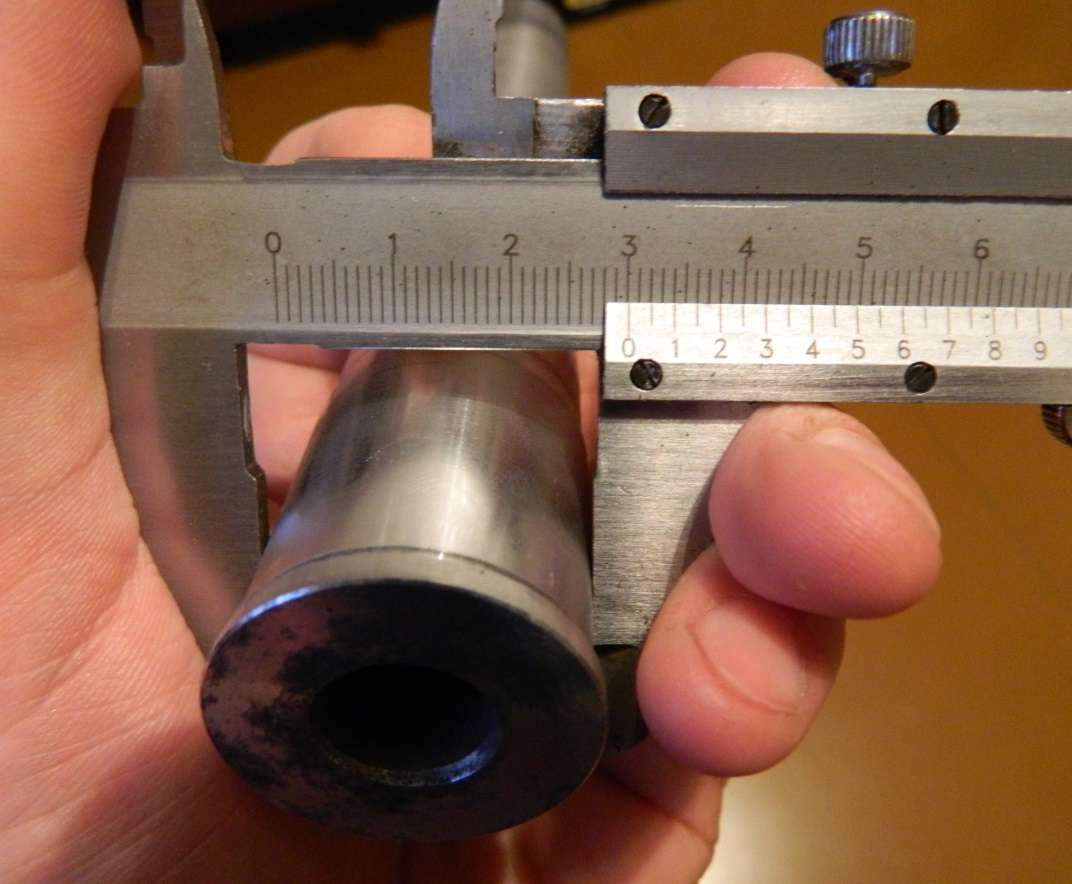
XT
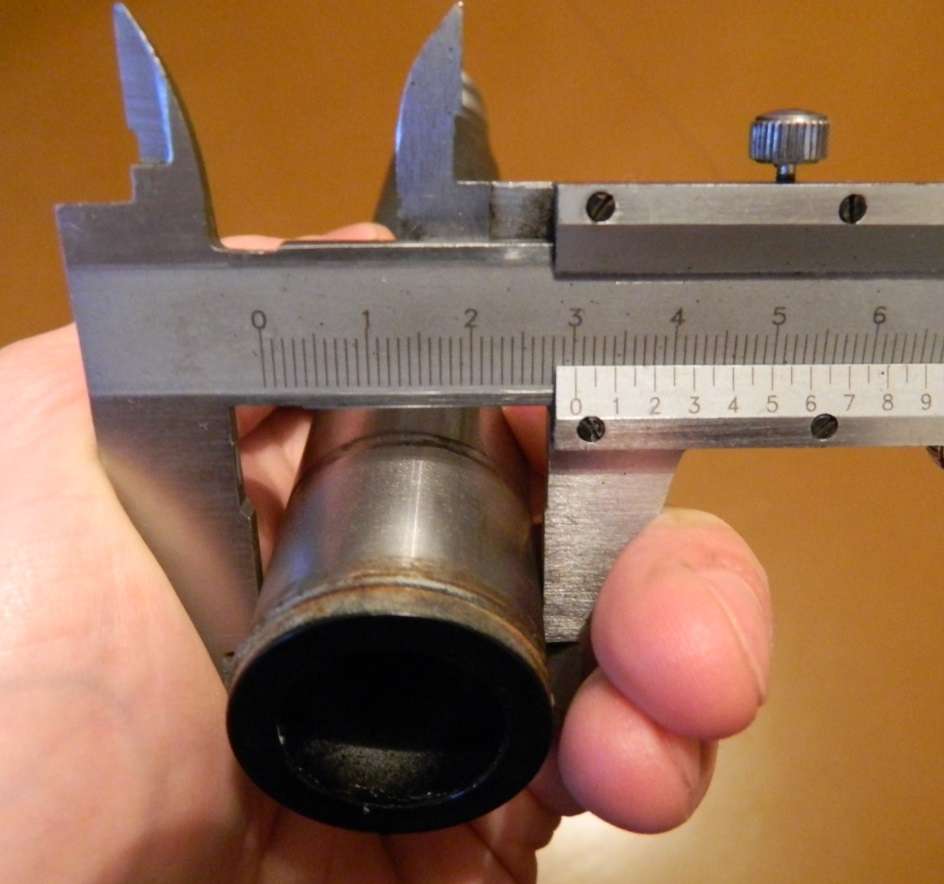
Only the length of the stem that is pressed in the lower clamp is different. XT has 23mm and KTM has 29mm.
XT
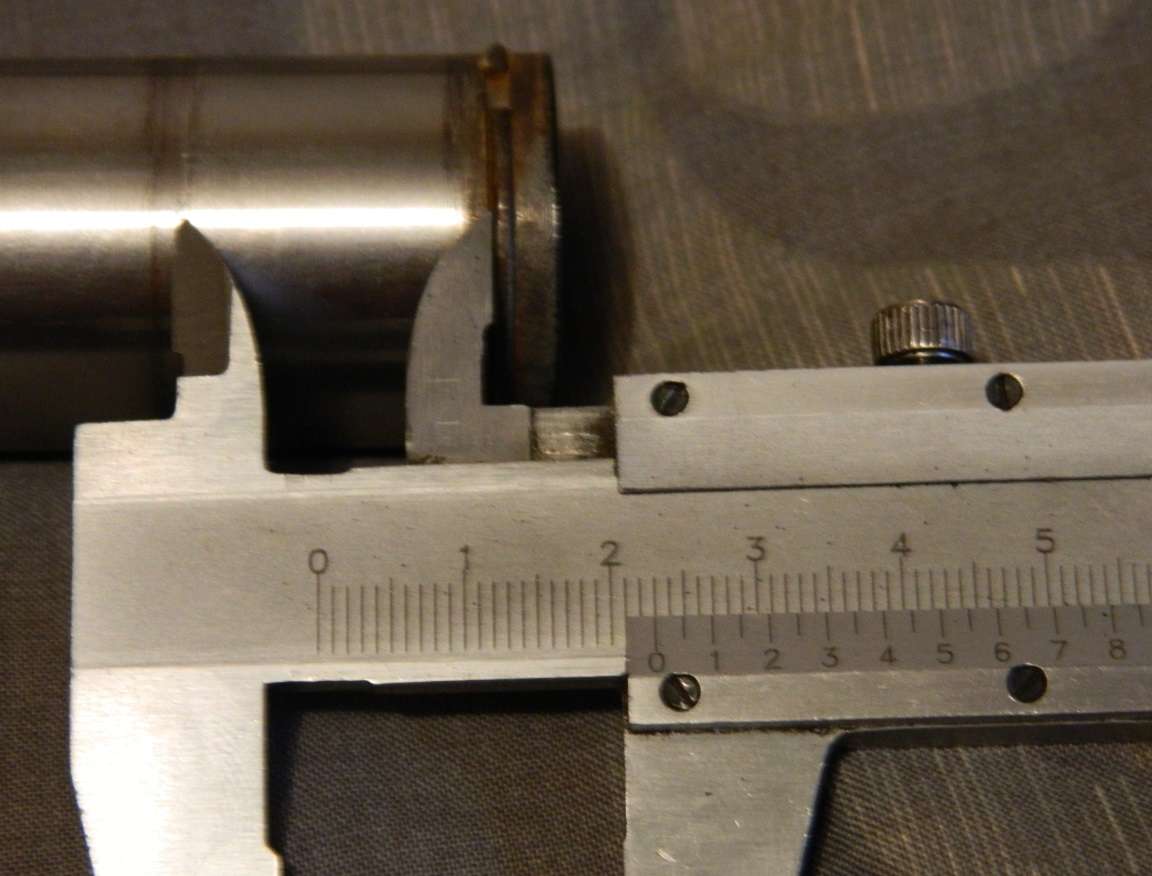
KTM

Solutions? Not sure yet. I have two options:
1. Machine the bottom of the lower clamp to a ~32mm diameter, so that the steering stem goes 6mm further in the clamp.
2. Loose the retaining ring on the XT stem, press it in the lower clamp 6mm further than it would with the ring on, and then drill a 5mm hole through the clamp and stem, tap the hole for a 6mm bolt, and it would secure the stem to the clamp. But that seems to be a hillbilly way of doing it. And I want to do it right.
Now let's say it's done. Then the lower triple will be in it's place, secured with all original XT nuts and bearings, and I'm a happy camper 
Then the top triple doesn't fit right. What to do?
Solutions? I only got one:
1. Cut off the top of KTM steering stem and make a "spacer" from it, drill it's hole to the diameter of the XT top clamp hole, and cut through the "spacer" so that it could compress when I'm tightening the top KTM clamp.
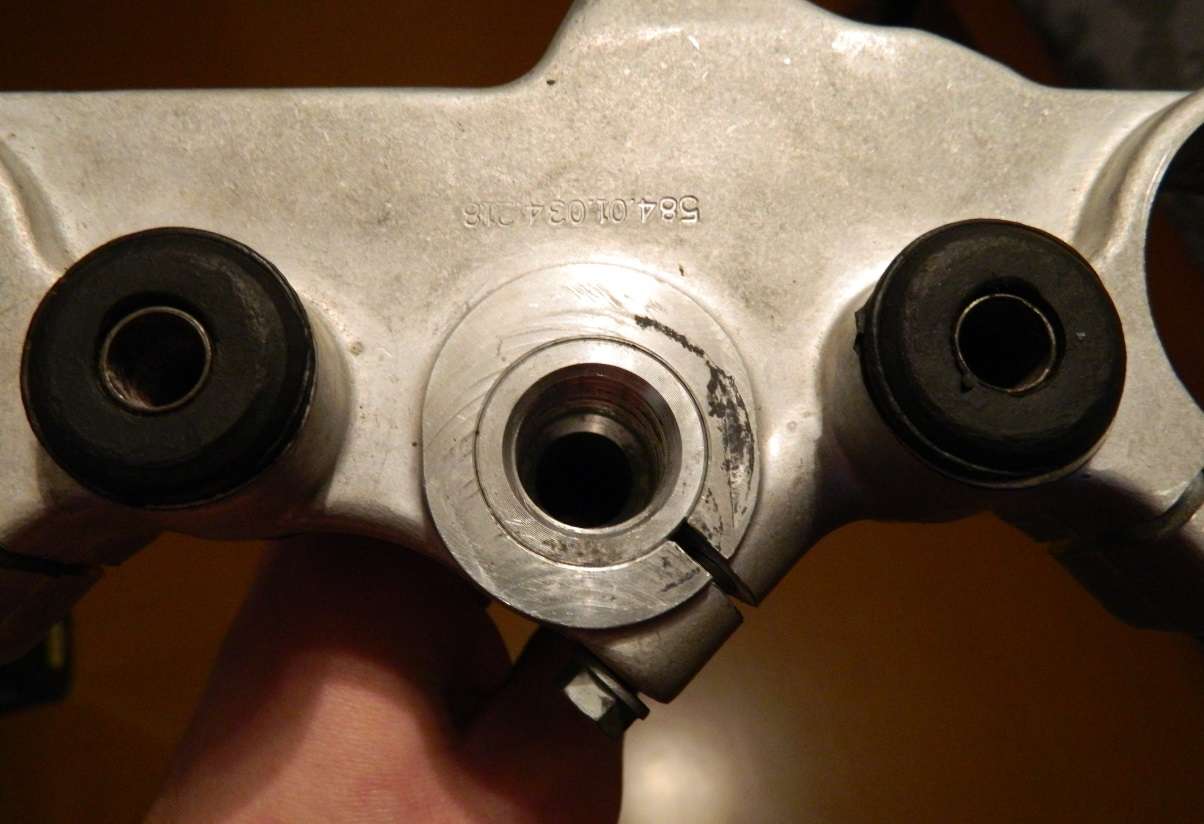
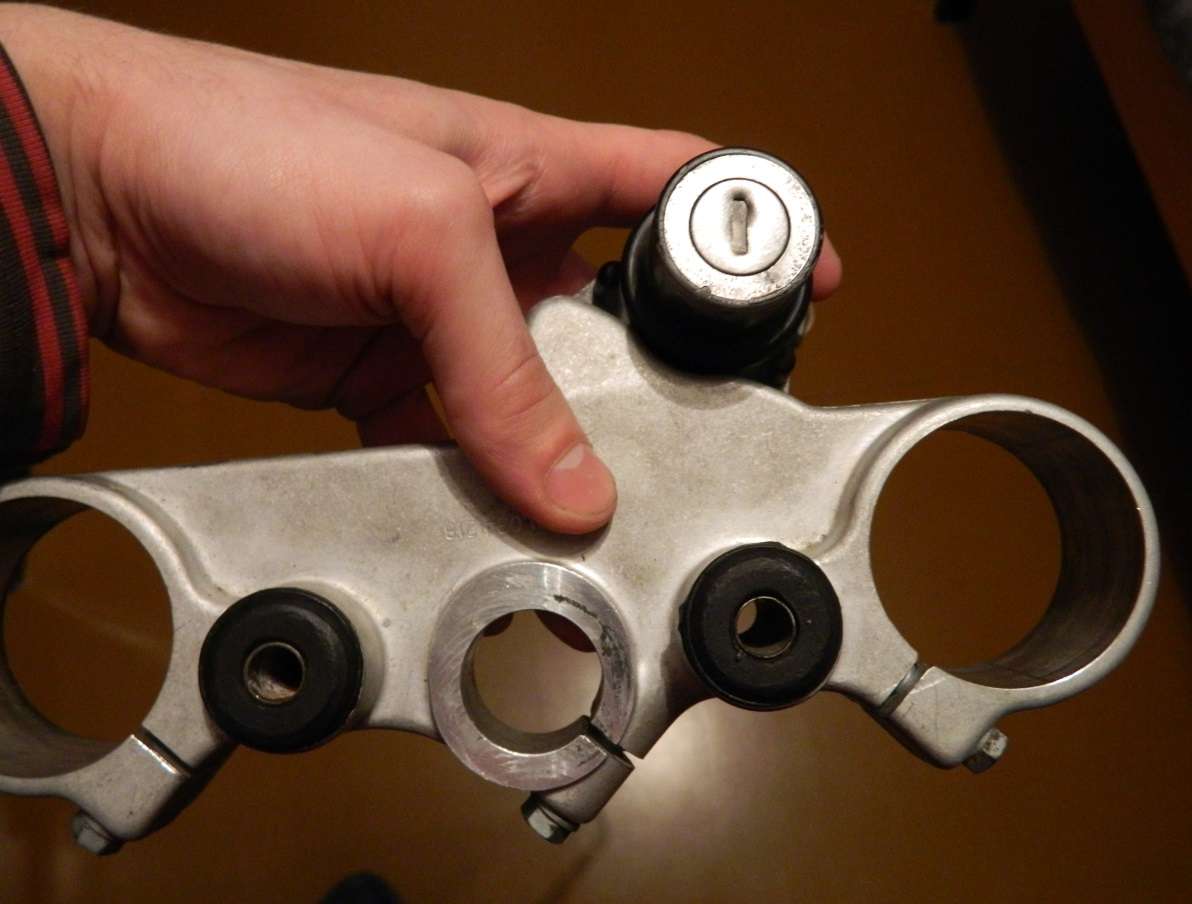
Even the original XT ignition switch will fit it! I will need other bolts (KTM 8mm XT 6mm) and to slightly shave off some aluminum off the top clamp, because right now the ignition lock is touching the clamp and the bolt holes don't quite align.
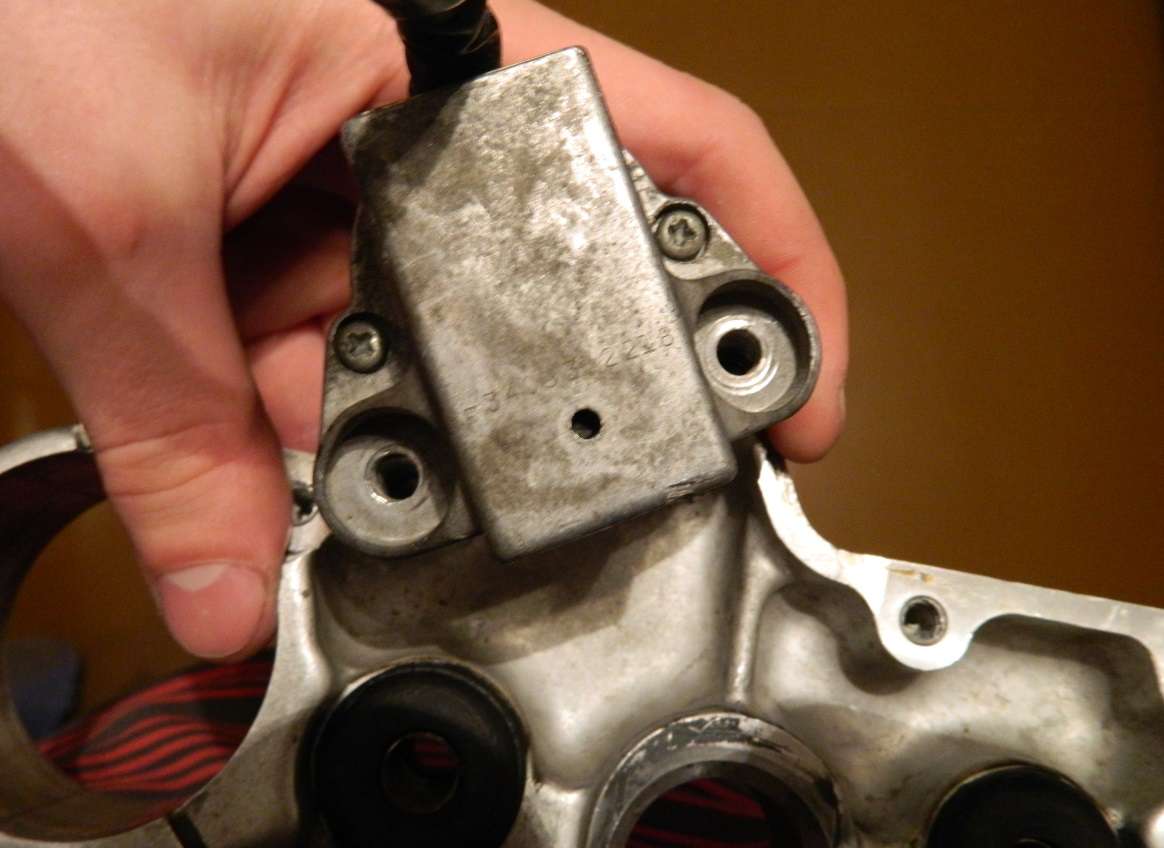
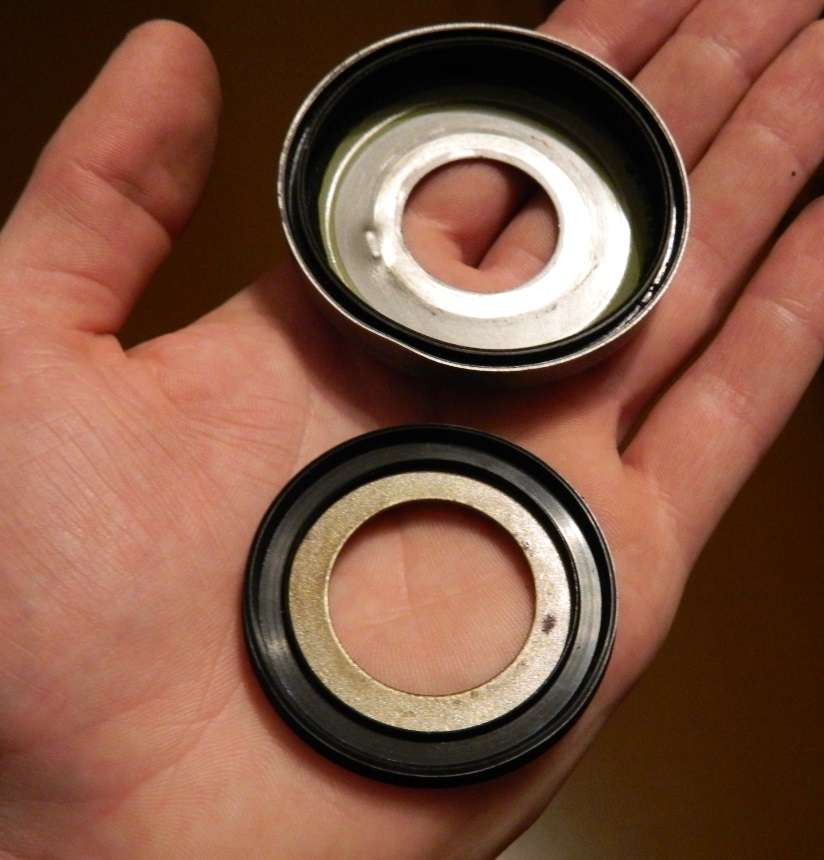
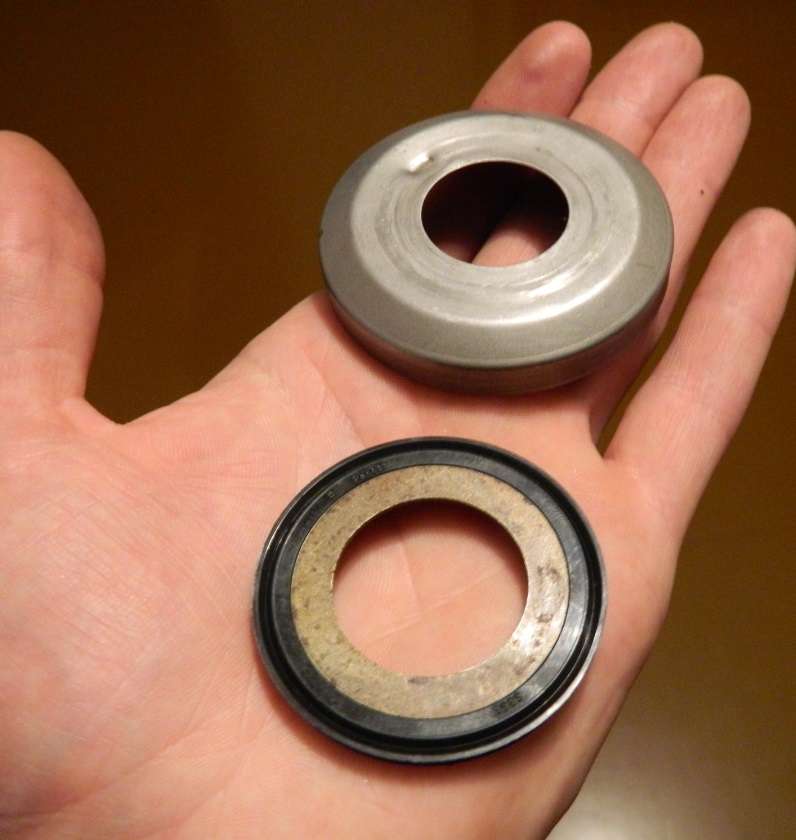
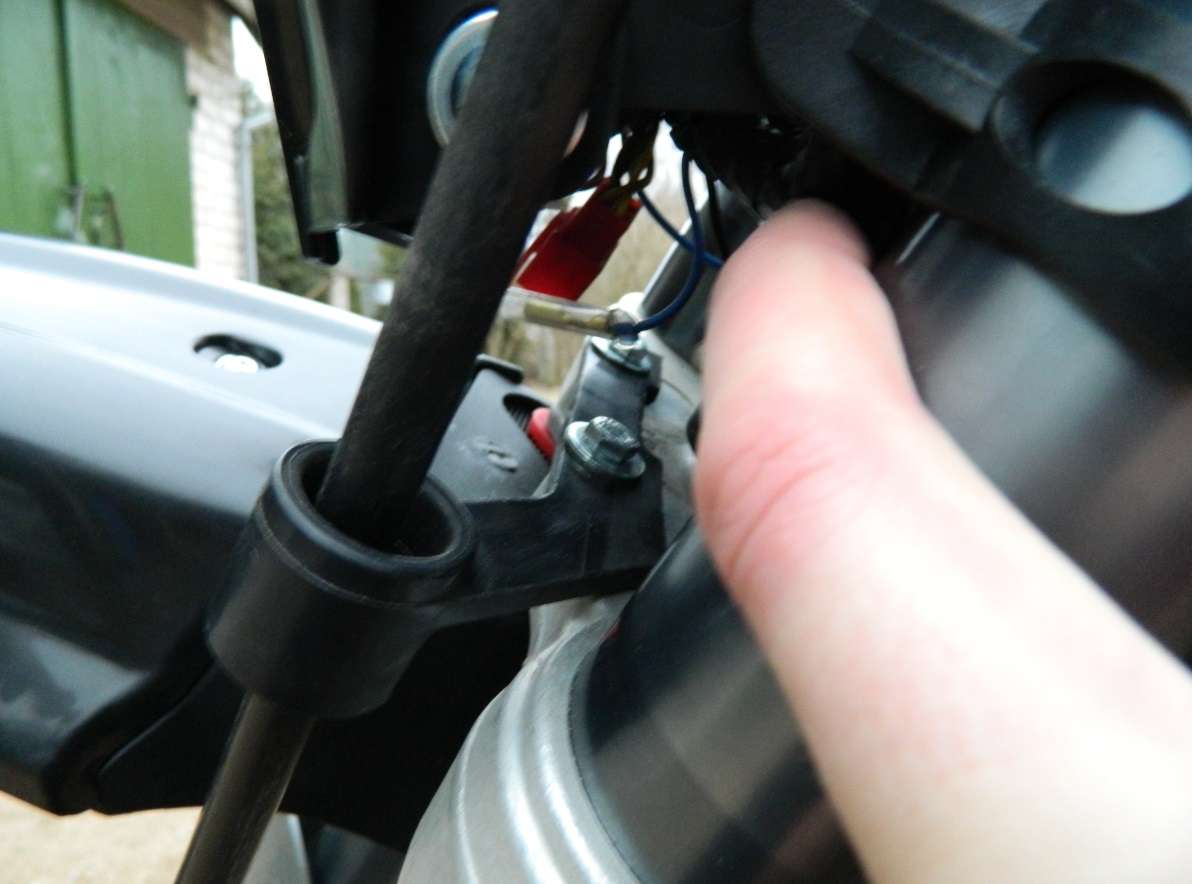
Now... the last headache I have is how to replace the old top steering head bearing seal with a completely different new seal. I bought those from Pyramid Parts, and they are "Yamaha XT600 E 90-03" as described.
Any ideas?
Top one is old, bottom one is new.
Comments, suggestions, etc. are welcome!
|
23 Feb 2014
|
|
Registered Users
Veteran HUBBer
|
|
Join Date: May 2012
Location: Lithuania
Posts: 204
|
|
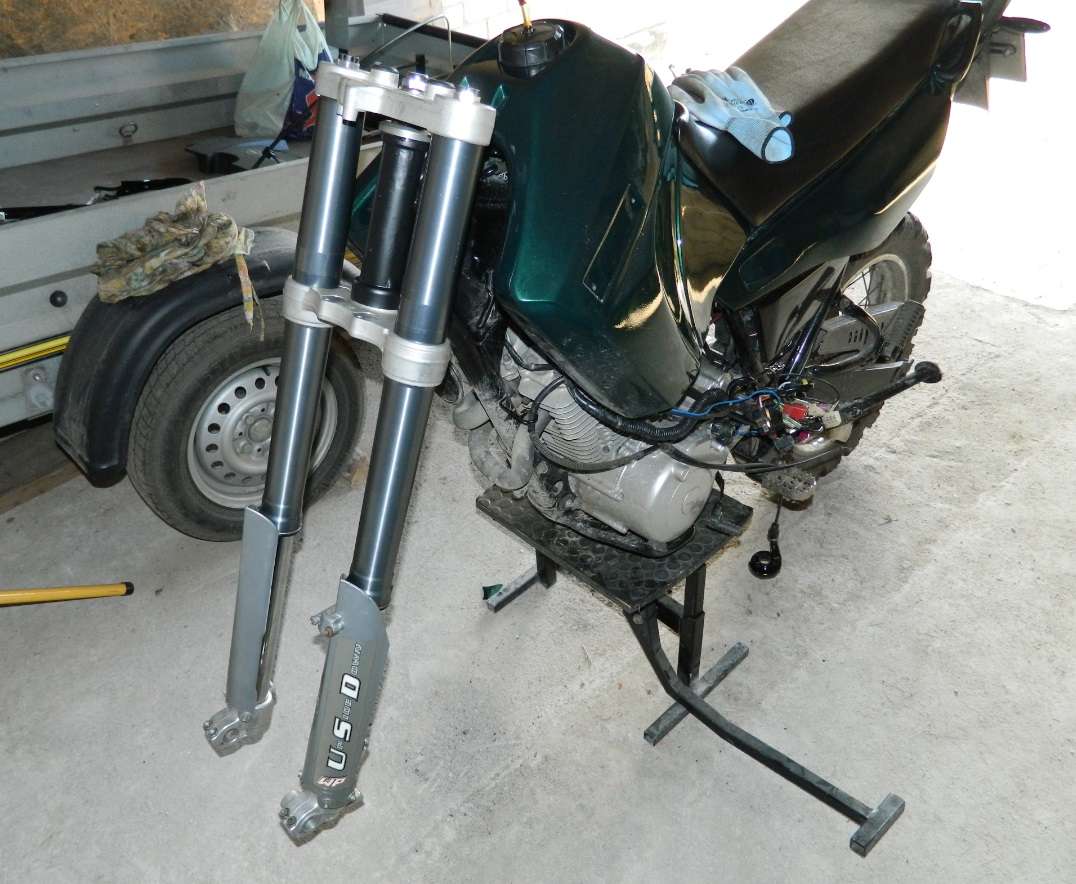
Done. Sort of...
I've visited a "lathe master" on Friday. Cool dude. He's hitting 70 this year (round birthday), and in his living room, 2 meters away from his bed, he has a lathe. Yeah... that's what you get for working 49 years with lathes and stuff.
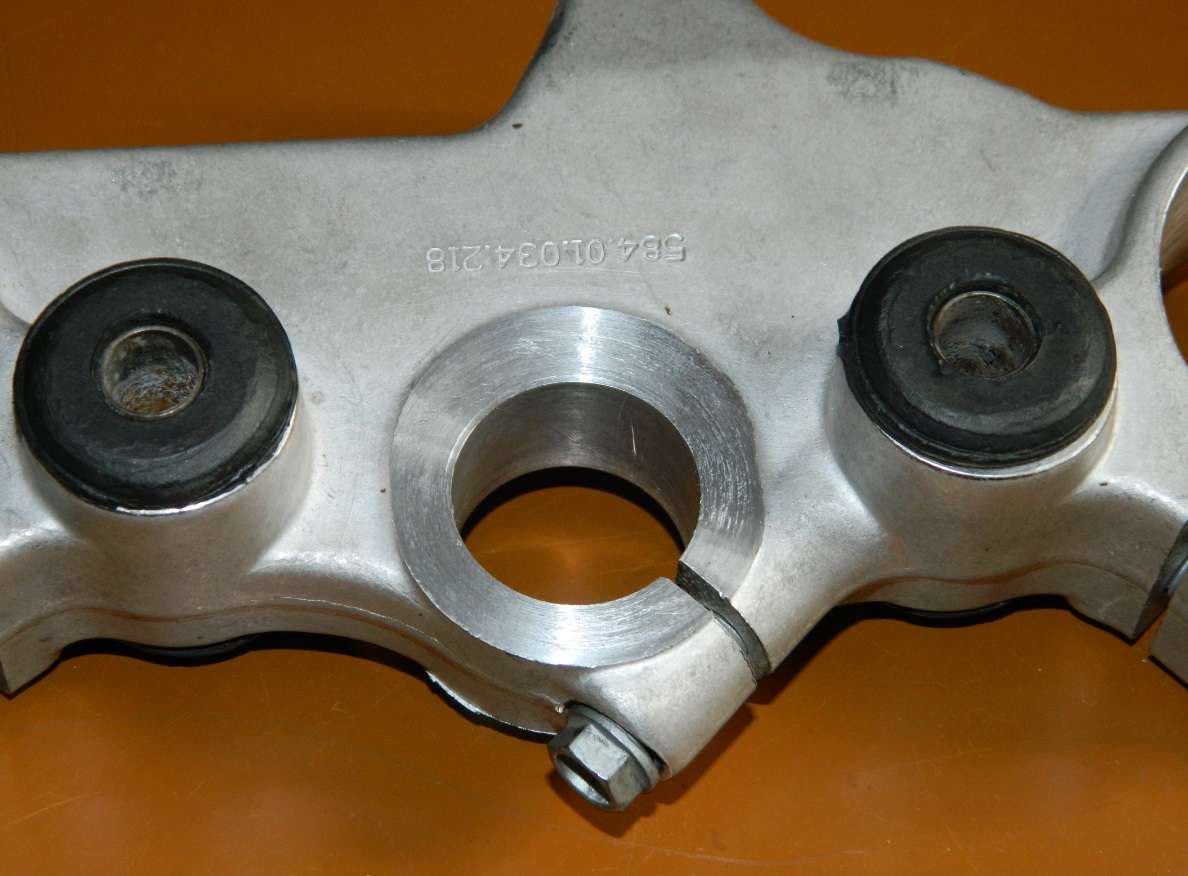
So he trimmed all the parts I needed: bottom clamp, top clamp, and also made a spacer from a bit of a KTM steering stem.
Lower part needed machining so that the XT steering stem presses 6mm deeper into the KTM lower clamp.
I had the original KTM steering stem pressed back in the KTM lower clamp, and then the stem was machined along with the clamp (those extra 6mm).
Then original KTM stem pressed out and XT's stem pressed in.
TADAAAAMMMM! An "XTM" custom lower triple 
Sitting 6mm deeper than the "surface".
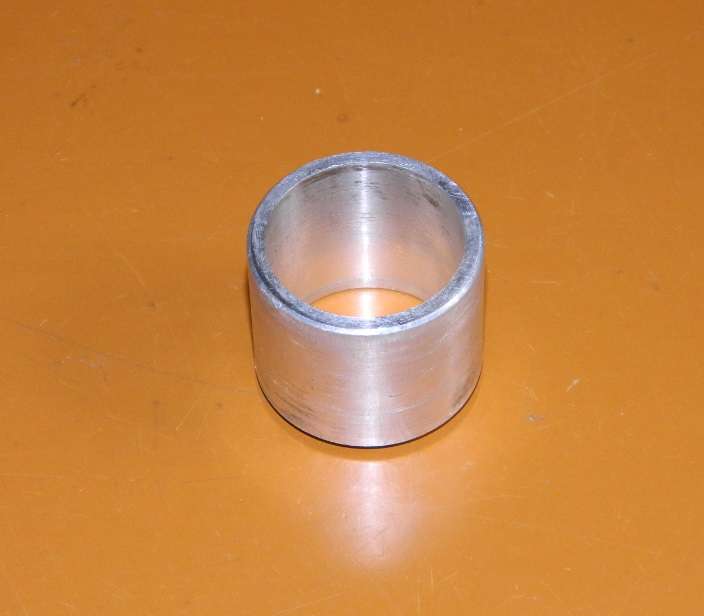
Also machined the top clamp 2mm on both sides (to make the thickness the same as XT top clamp's thickness).

Spacer (which was later cut diagonally, so that it could compress).
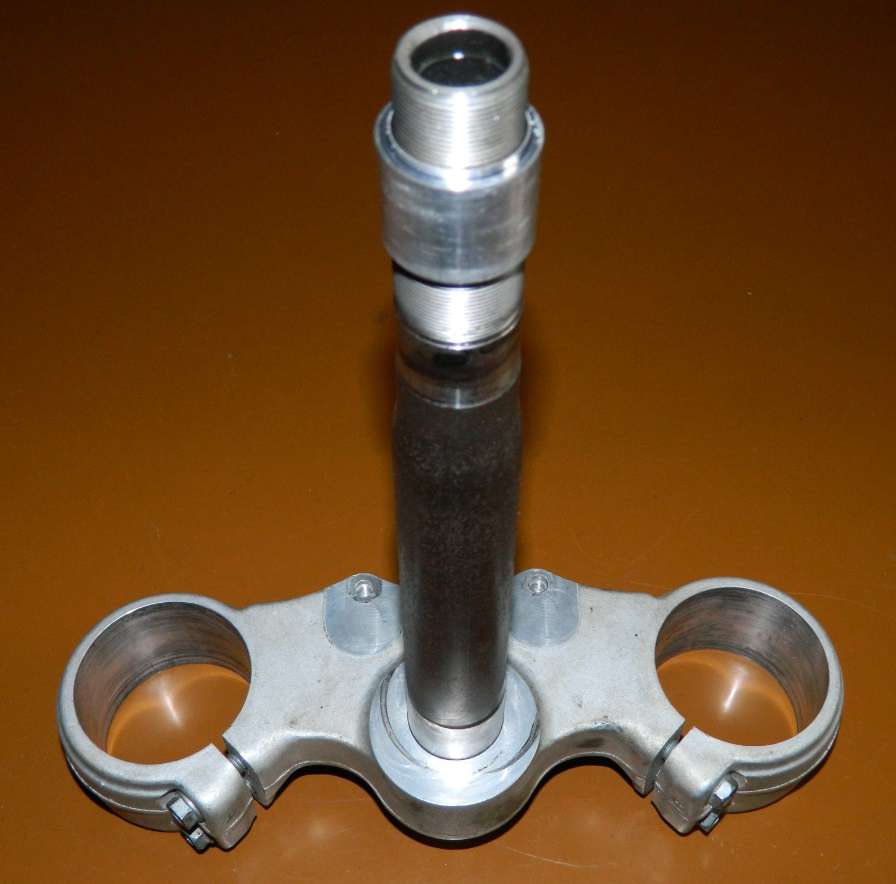
Pressed down and greased the bearings up, and the clamps went in.
The dilemma was how to make the steering stoppers. The solution might not be the prettiest one possible, but at least for now it's going to be okay. Until I think of something better.
By the way, I still don't get it how the new Pyramid Parts top bearing seal must be used, and how it works (because it's different than the original) so I used both.
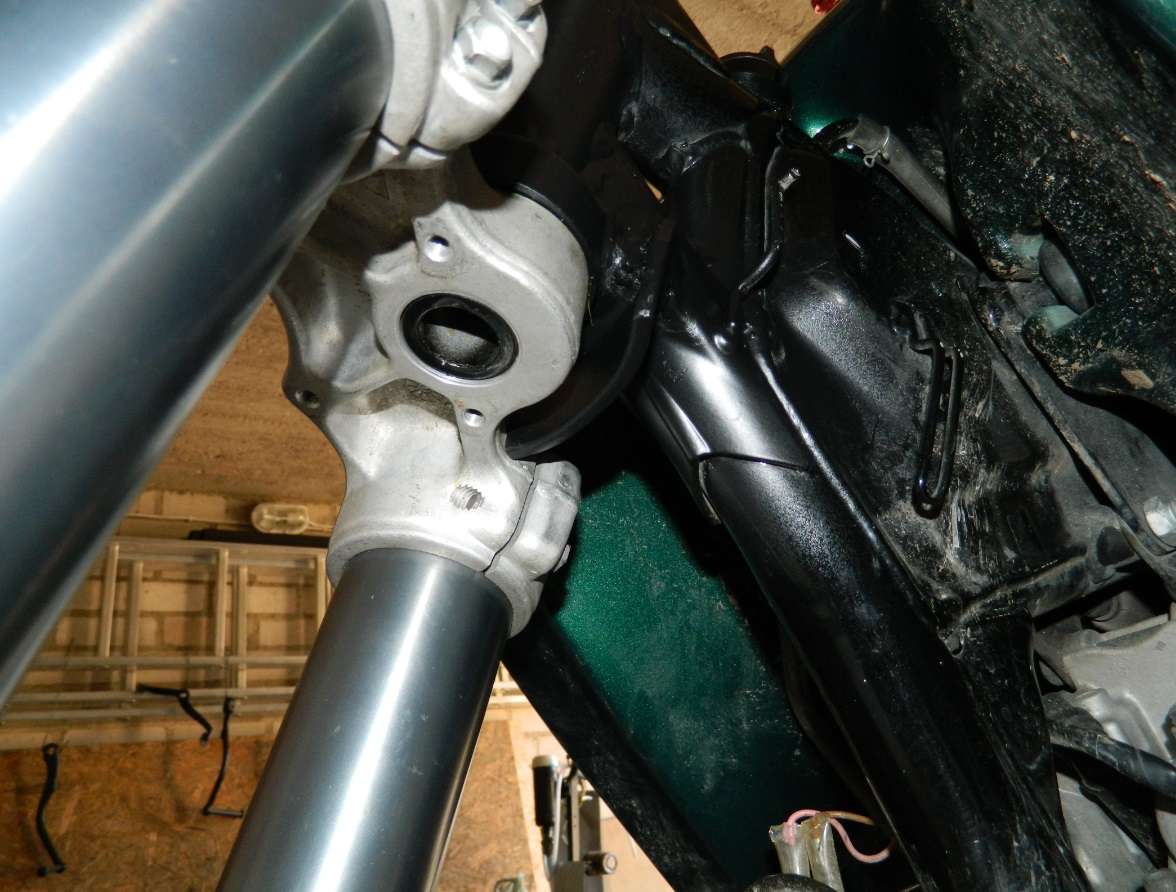
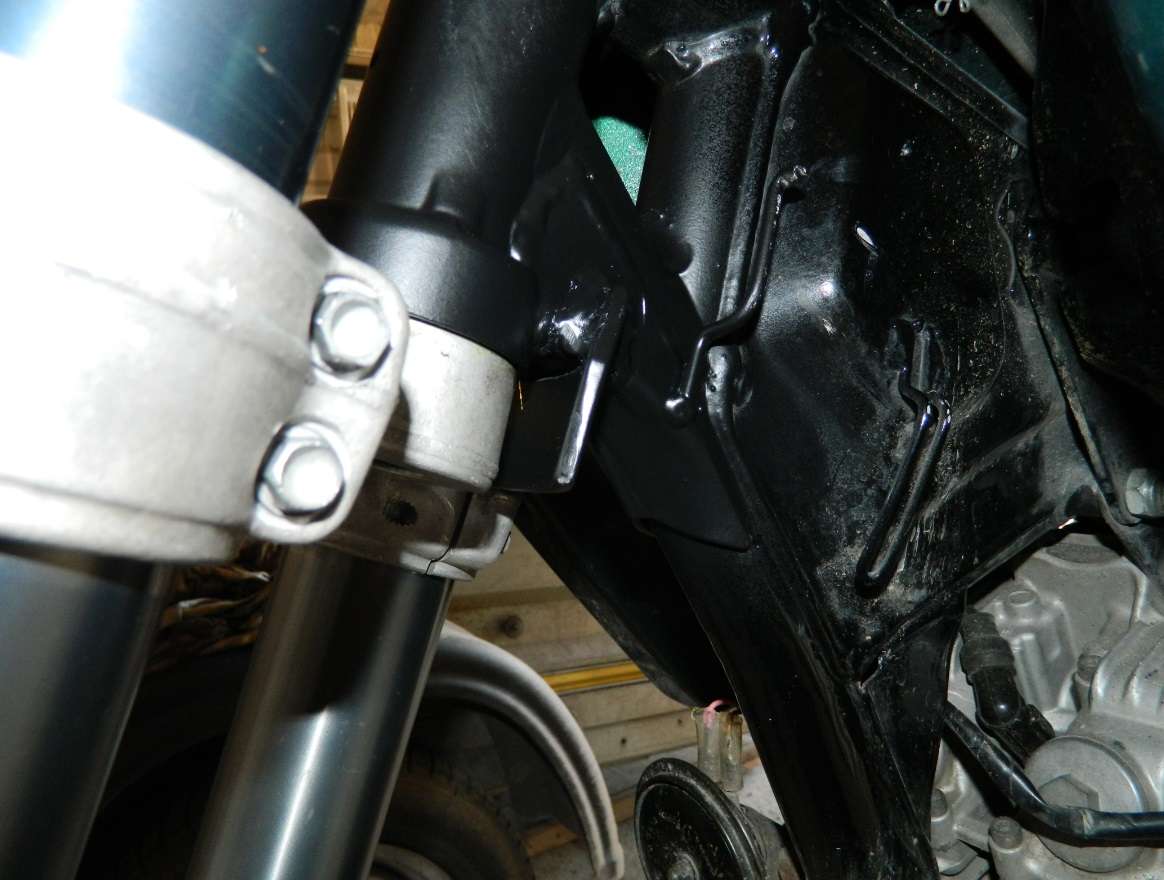

Had to grind the top clamp a bit so the ignition lock fits. That's it.
I also cut off the steering lock parts off the frame, spray painted it (will do until more mods and frame re-paint), kinda put it back together, bled the brakes and took it for a test ride.
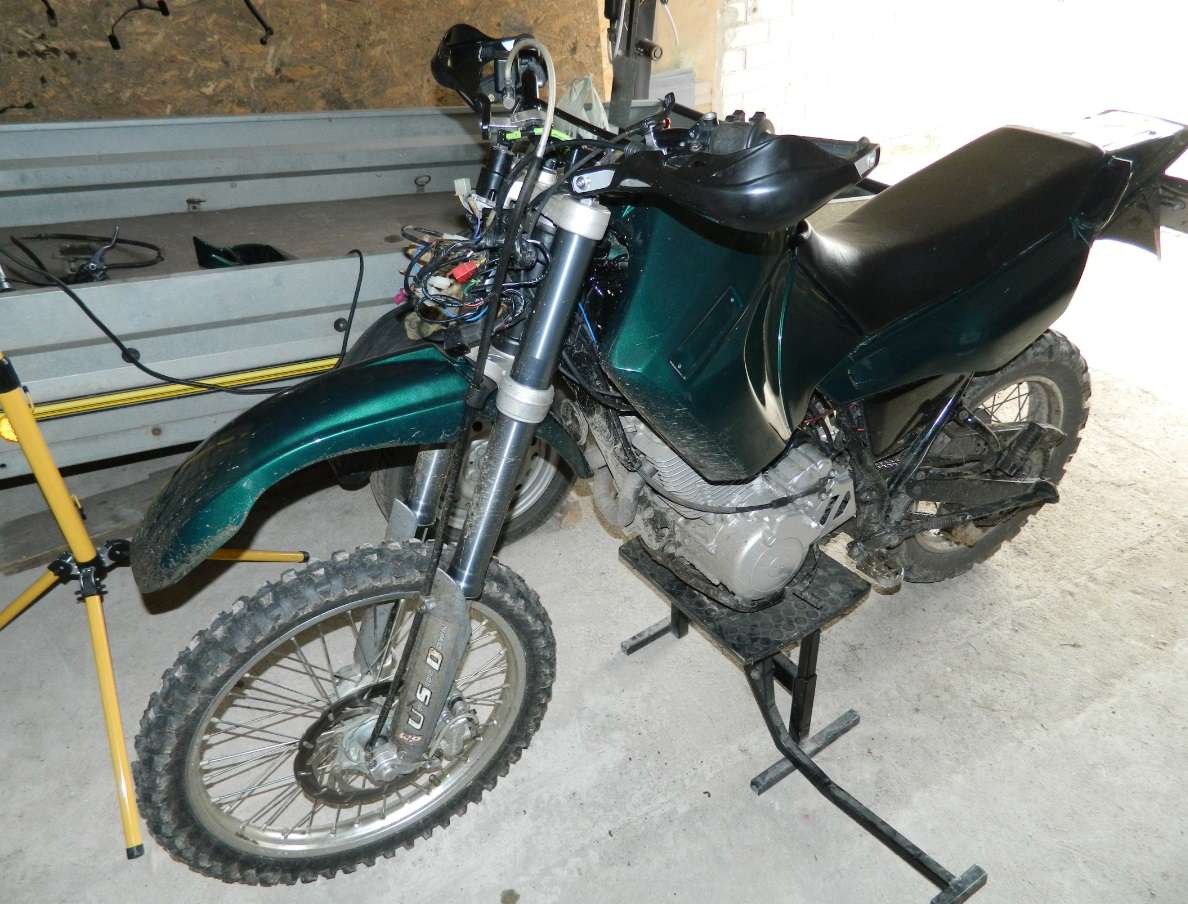
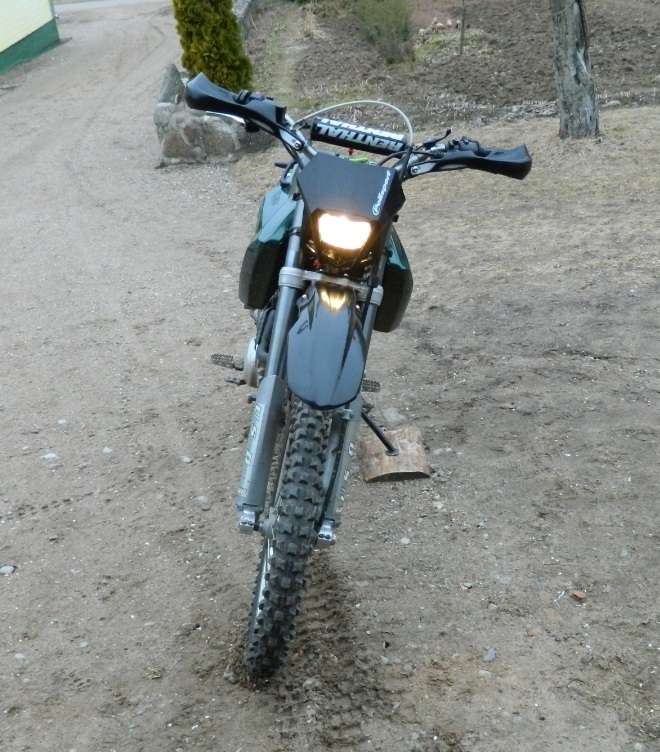
The forks doesn't have enough oil in them, the seals must be changed too, but already the forks work much better than the original XT forks, and the front feels lighter, easier wheelies.
I have everything ready, now I just need a 2000 KTM EXC 520 repair manual to figure out how they disassemble.
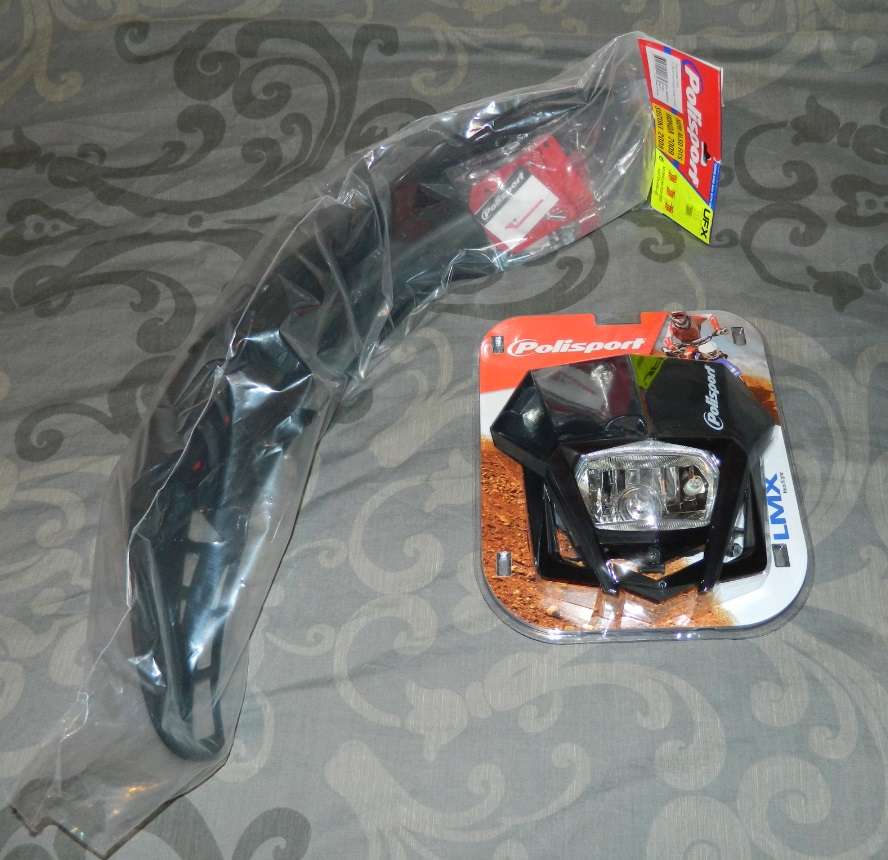
Polisport LMX headlight and Free Flow fender ordered. We're going from green to BLAAAAACK!
Polisport LMX Halogen Lampenmaske SCHWARZ Scheinwerfer +BEFESTIGUNG Bike Enduro | eBay
Polisport Schutzblech FREE FLOW Schwarz +BEFESTIGUNG Bike Fender Kotflügel | eBay
Still need to buy:
a speedometer (Trail Tech Vapor...?),
28mm handlebars,
heavier/progressive front fork springs (??? don't know yet, need to rebuild the forks and ride a bit more to decide, they feel a bit soft for this heavier bike)
and some stuff I might have forgotten now...
Still need to do:
rebuild the front fork (seals and oil change),
sort out the wiring (it's okay, just doesn't fit well under the headlight...),
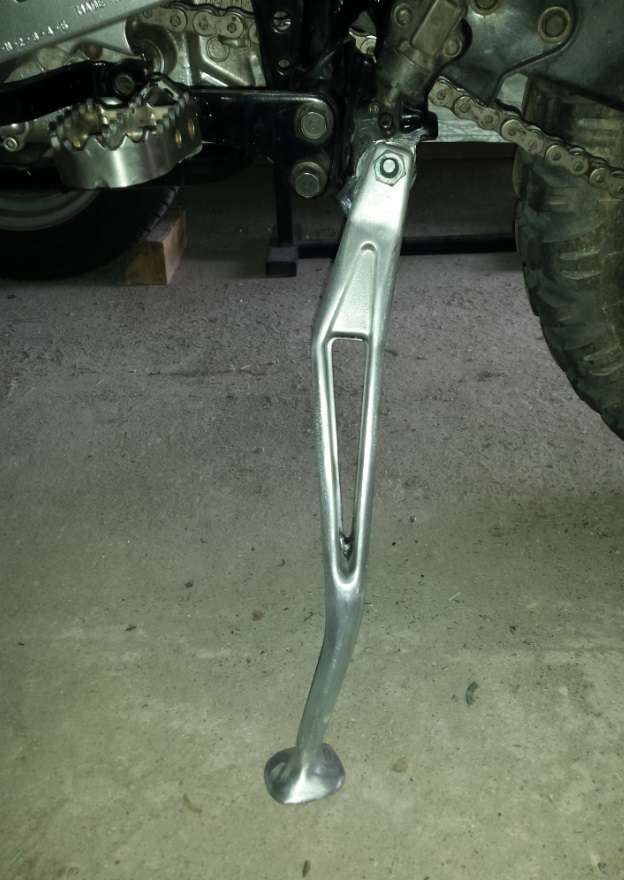
lengthen the side stand,
rebuild the front wheel (seals and bearings),
probably make/buy new wheel spacers (old ones look worn),
re-mount my enduro tire instead of this MX tire,
and some other stuff along the way.
|
24 Feb 2014
|
|
Registered Users
New on the HUBB
|
|
Join Date: Sep 2013
Posts: 1
|
|
good job!
|
28 Feb 2014
|
|
Registered Users
Veteran HUBBer
|
|
Join Date: May 2012
Location: Lithuania
Posts: 204
|
|
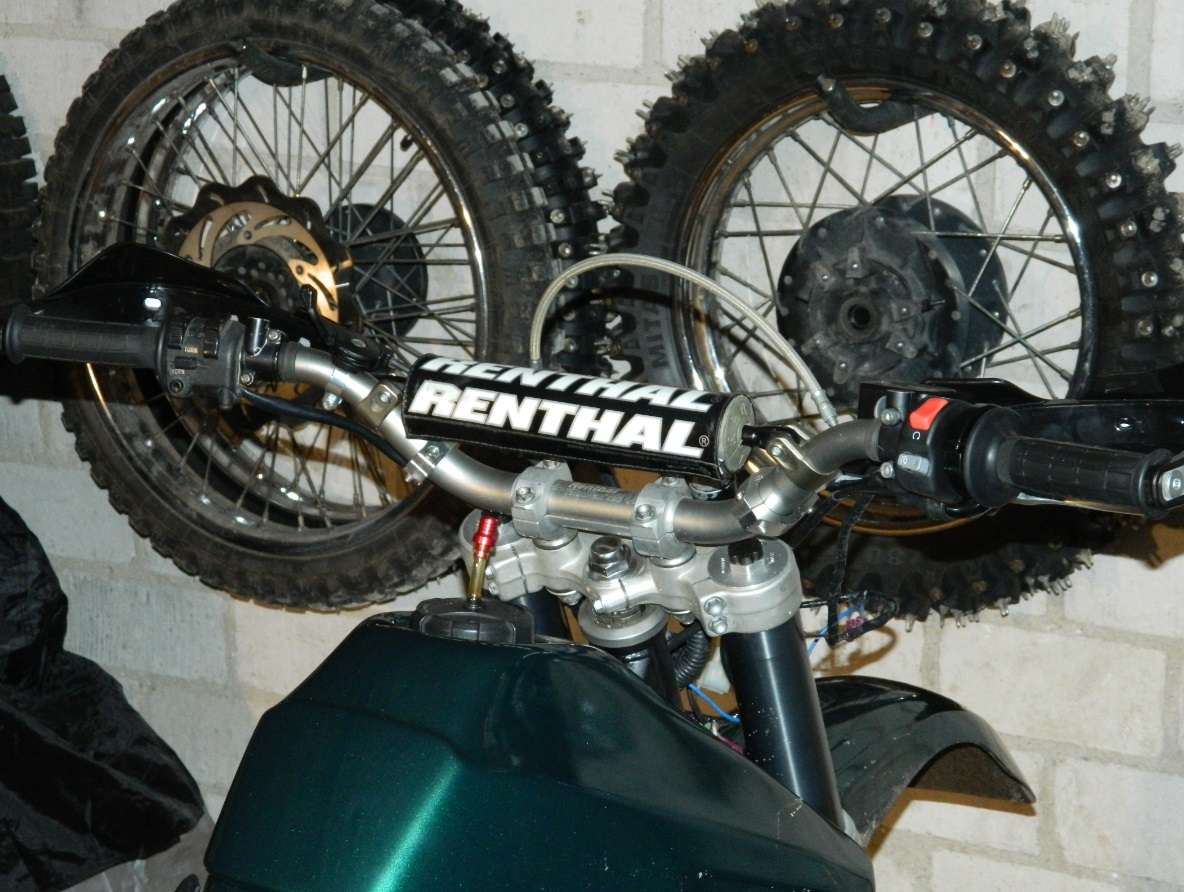
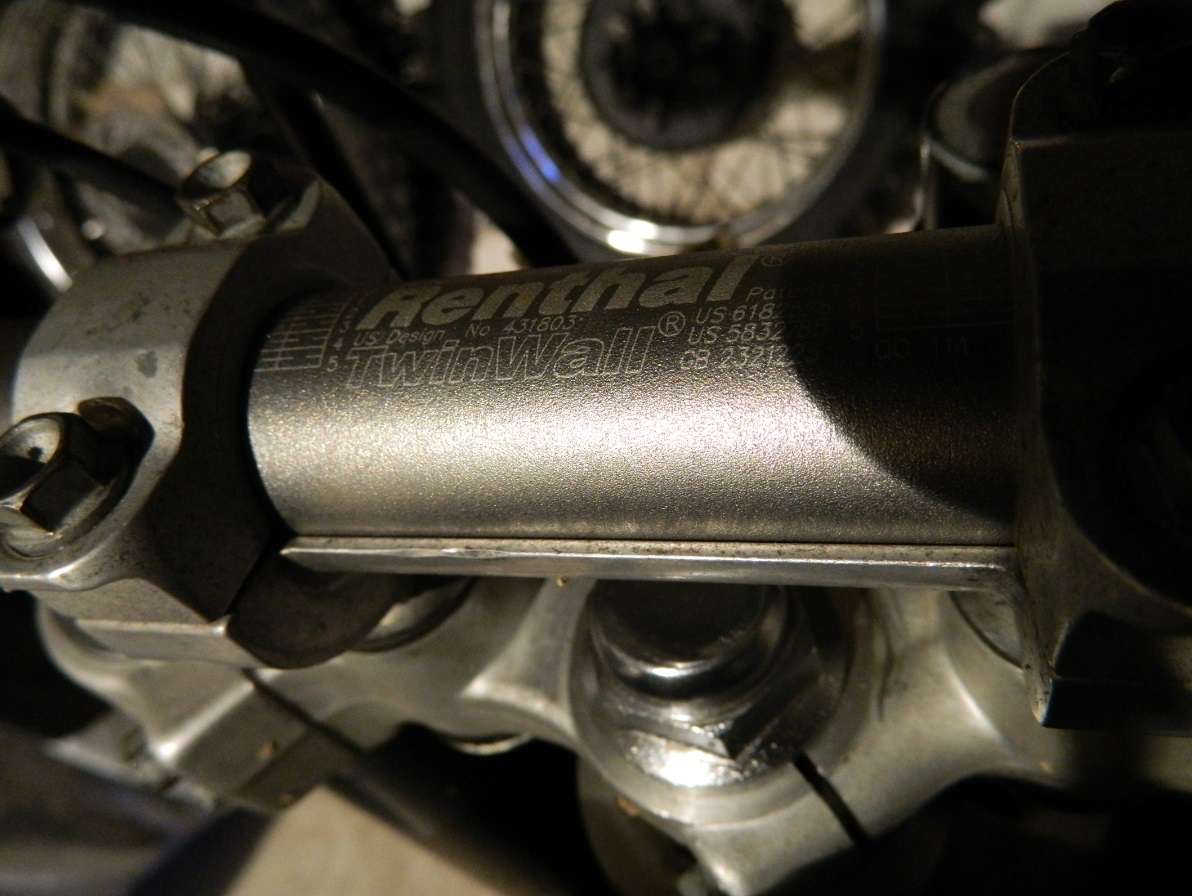
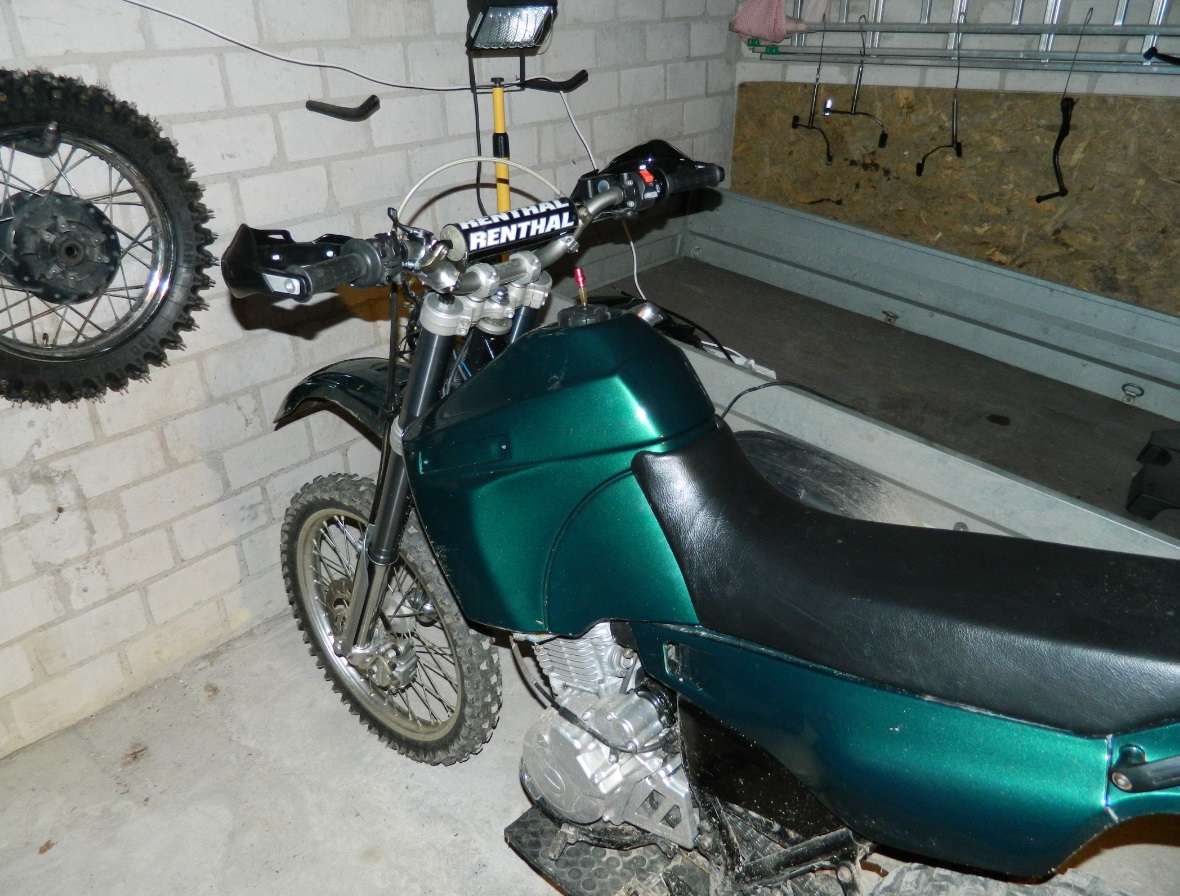
Monday: bought Renthal Twin Wall RC High handlebars. Little used, straight, top condition, and a price...half of what they cost new.
Tuesday: received the handlebars and fitted them immediately. Sweet!
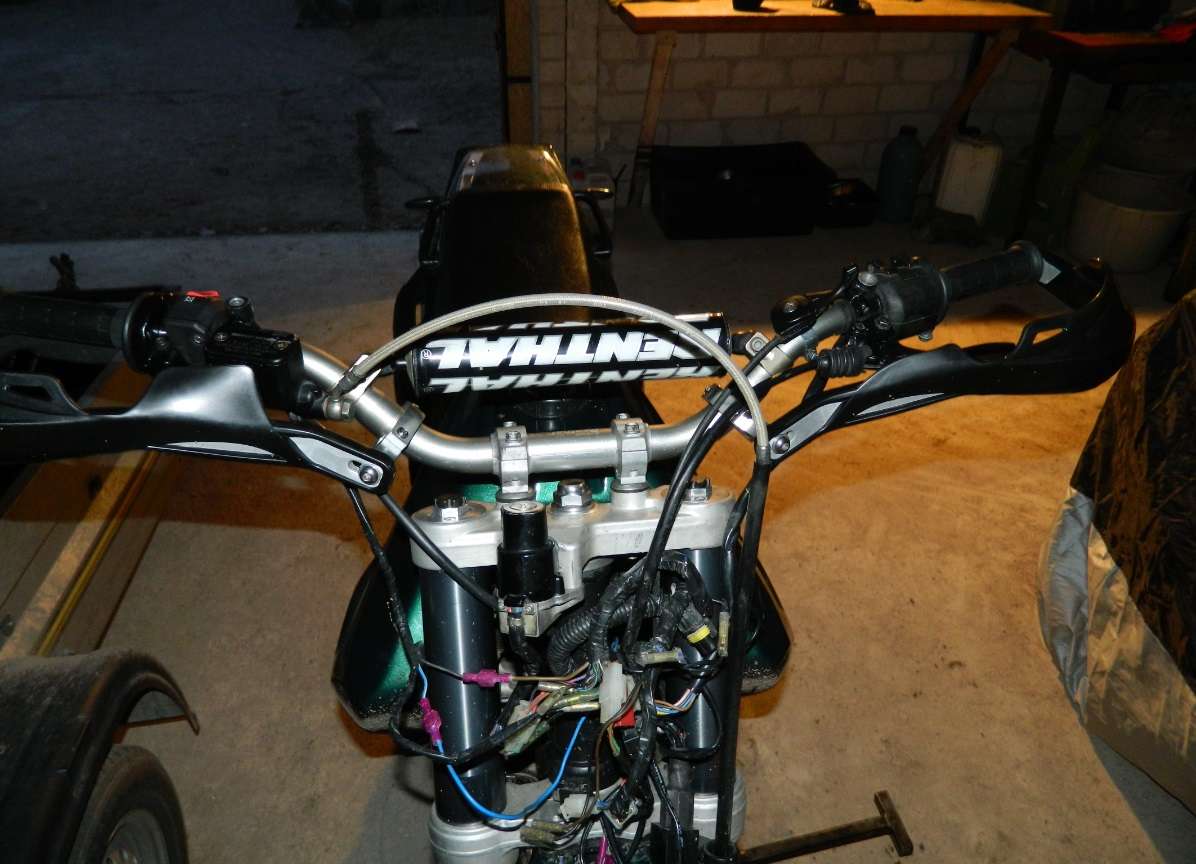
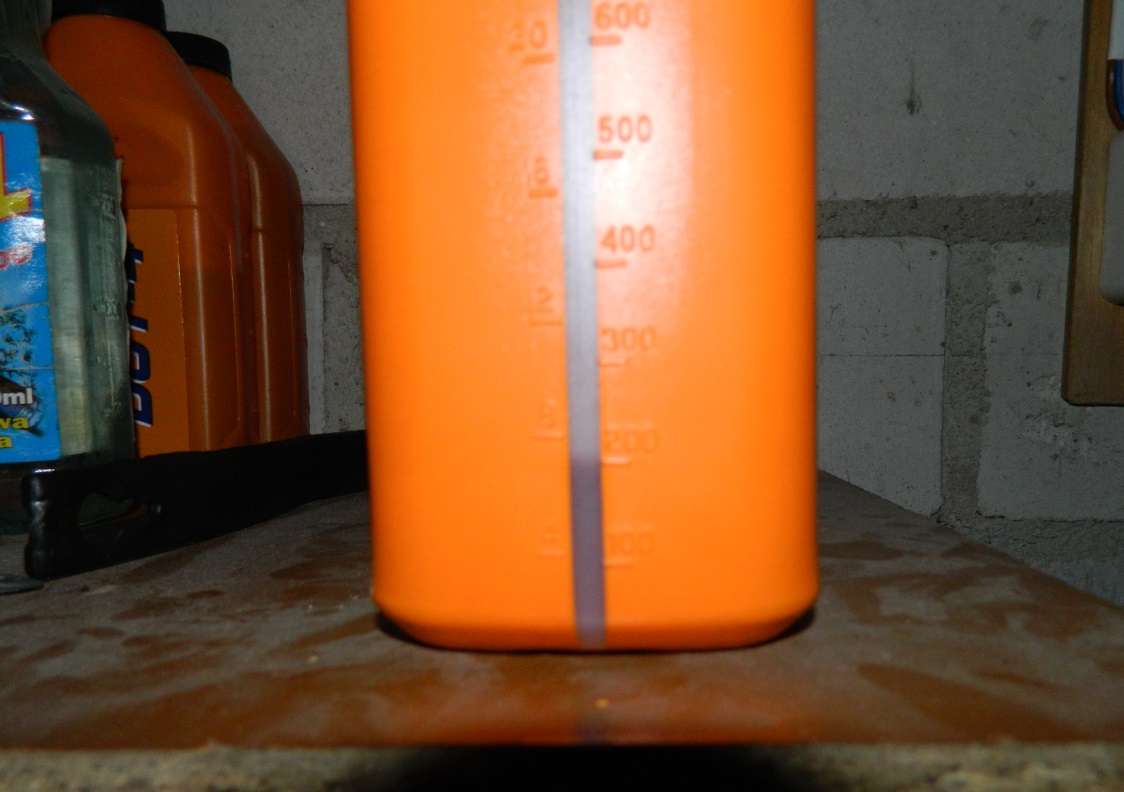
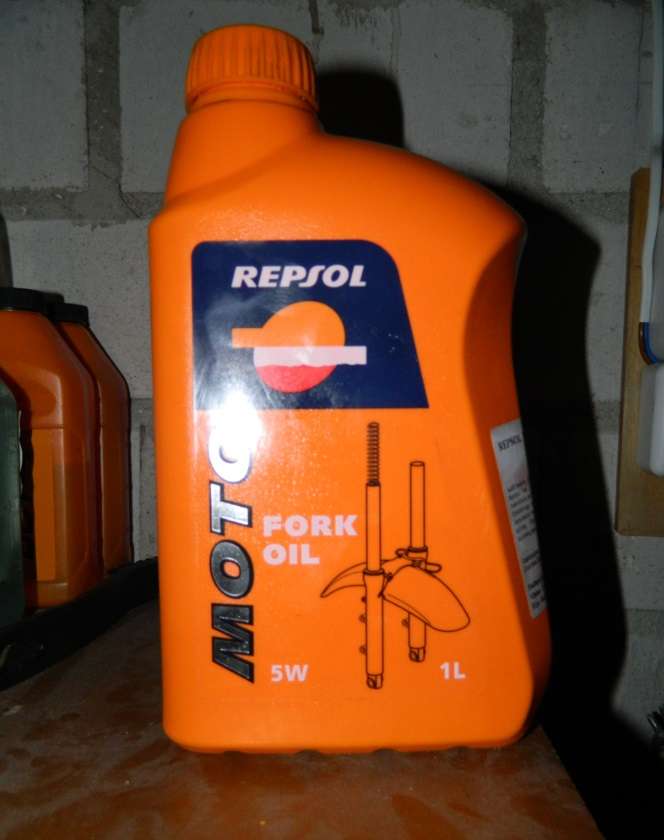
Today (Thursday) rebuilt the forks with new oil/dust seals and new oil. Old oil was pretty dark, with some metal particles. And from both fork legs only ~400ml came out, that's approximately half of what should come out.
I cleaned everything, put back together, installed Pyramid Parts seals and filled with Repsol 5W fork oil. Both legs were filled with ~400ml each (each leg) leaving oil level at 120mm from top.
Still waiting for the headlight and the fender to be shipped...
|
1 Mar 2014
|
|
Registered Users
Veteran HUBBer
|
|
Join Date: May 2012
Location: Lithuania
Posts: 204
|
|
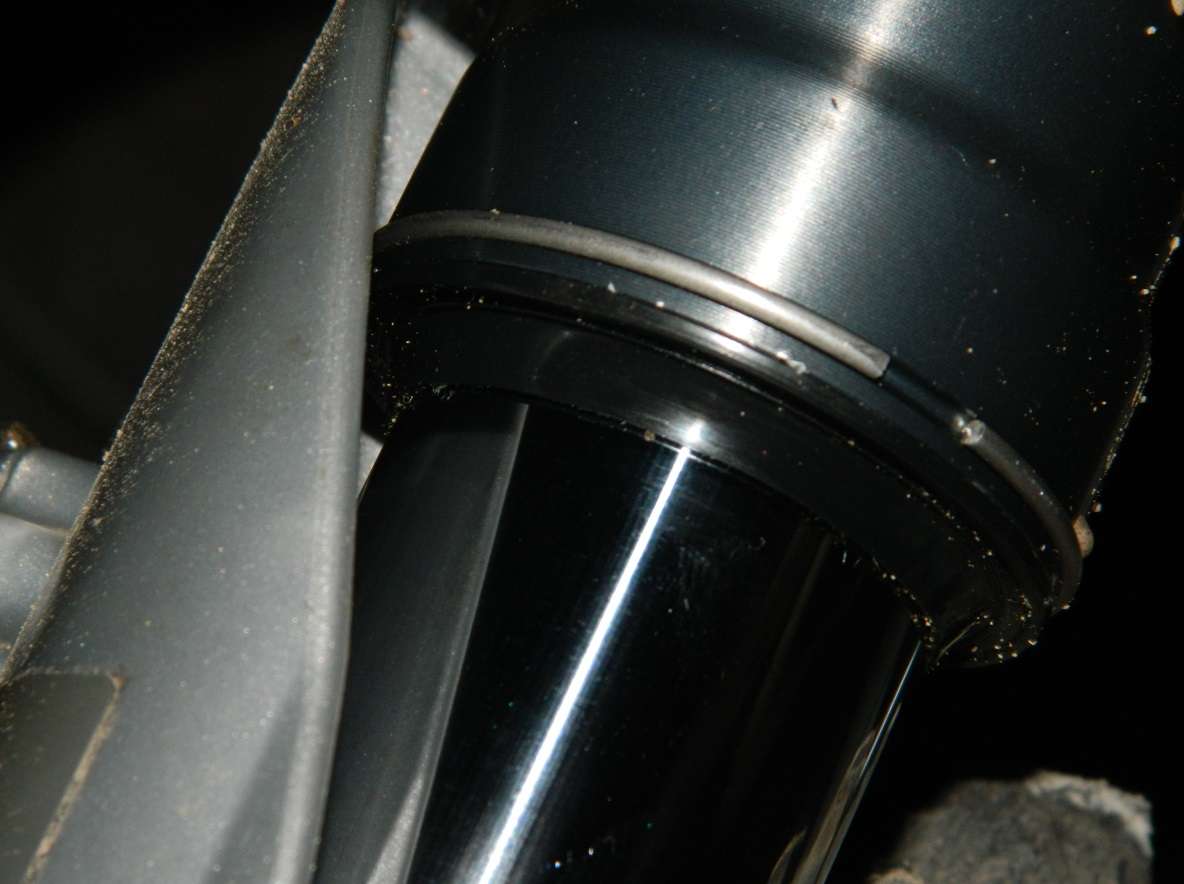
I had Pyramid Parts oil/dust seals installed in my original XT fork two years ago. Held up well, just the right side dust seal sometimes wanted to pop up... The XT clip for holding the seals (both) in place didn't fit with Pyramid's seals.
As for KTM fork they fitted perfectly, and we'll see how they hold up.
But I still don't get it how the top steering stem bearing seal should work... :confused1:
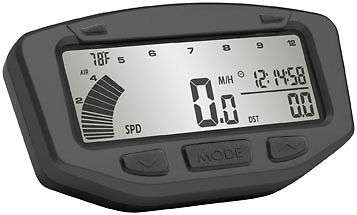
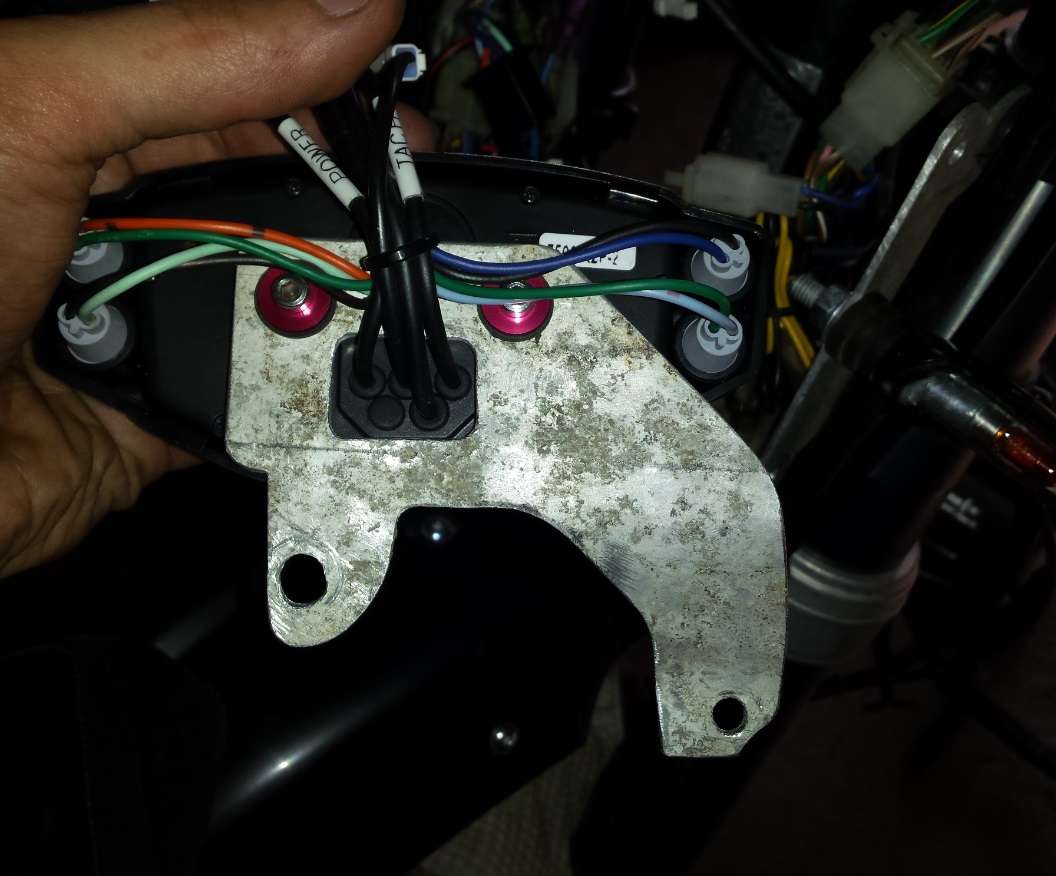
Now for the cockpit there will be a Trail Tech speedo with the indicator lighting kit, just need to order it. The biggest challenge will be CLEANLY sorting out the wiring.
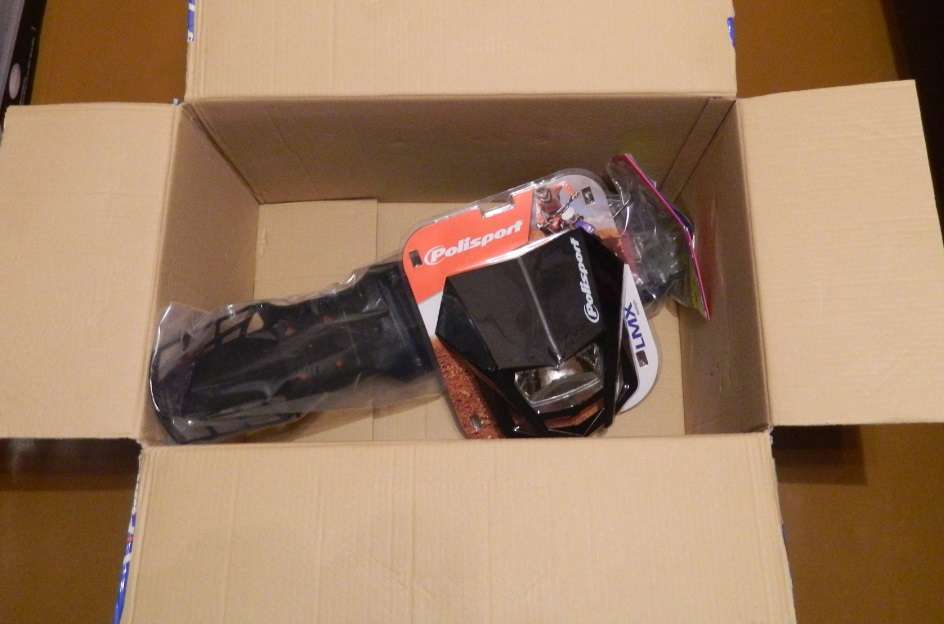
Headlight and fender shipped to me yesterday. Mmmm... The smell of NEW.
|
2 Mar 2014
|
|
Registered Users
Veteran HUBBer
|
|
Join Date: May 2012
Location: Lithuania
Posts: 204
|
|
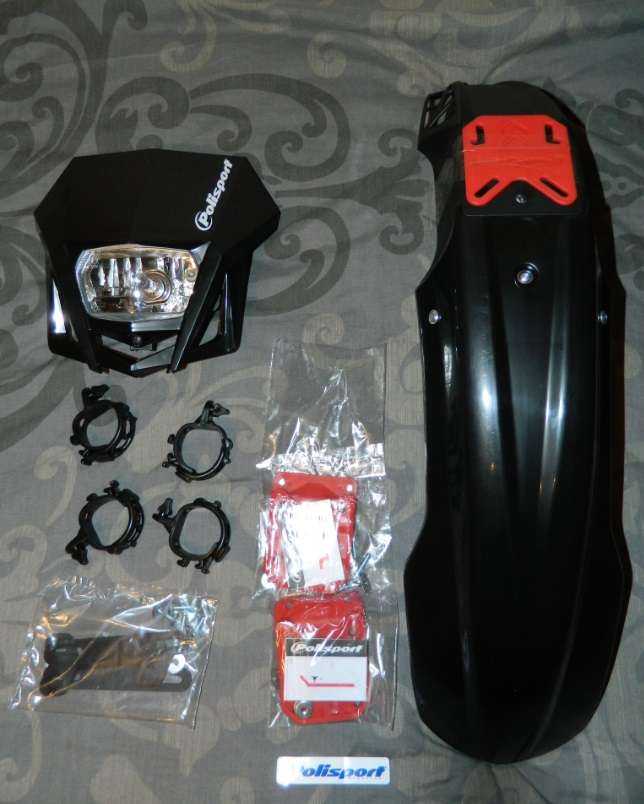
Fitted the new stuff.
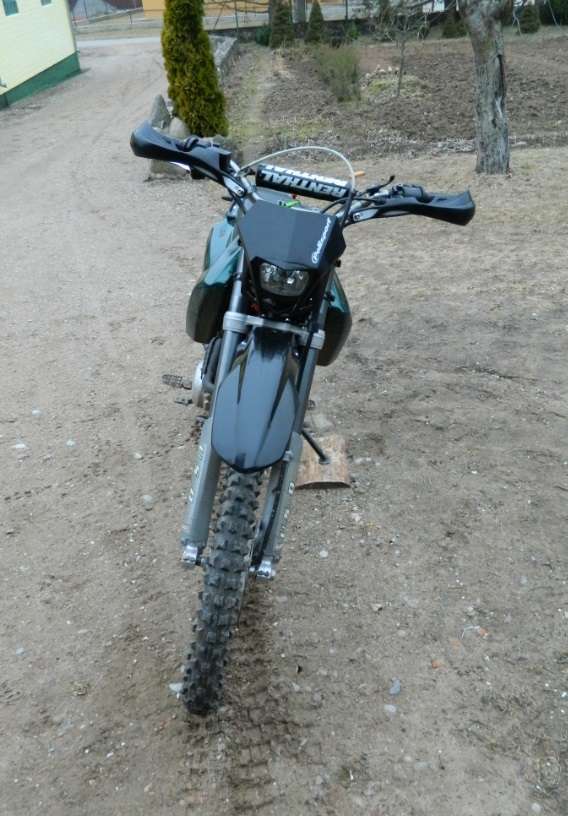
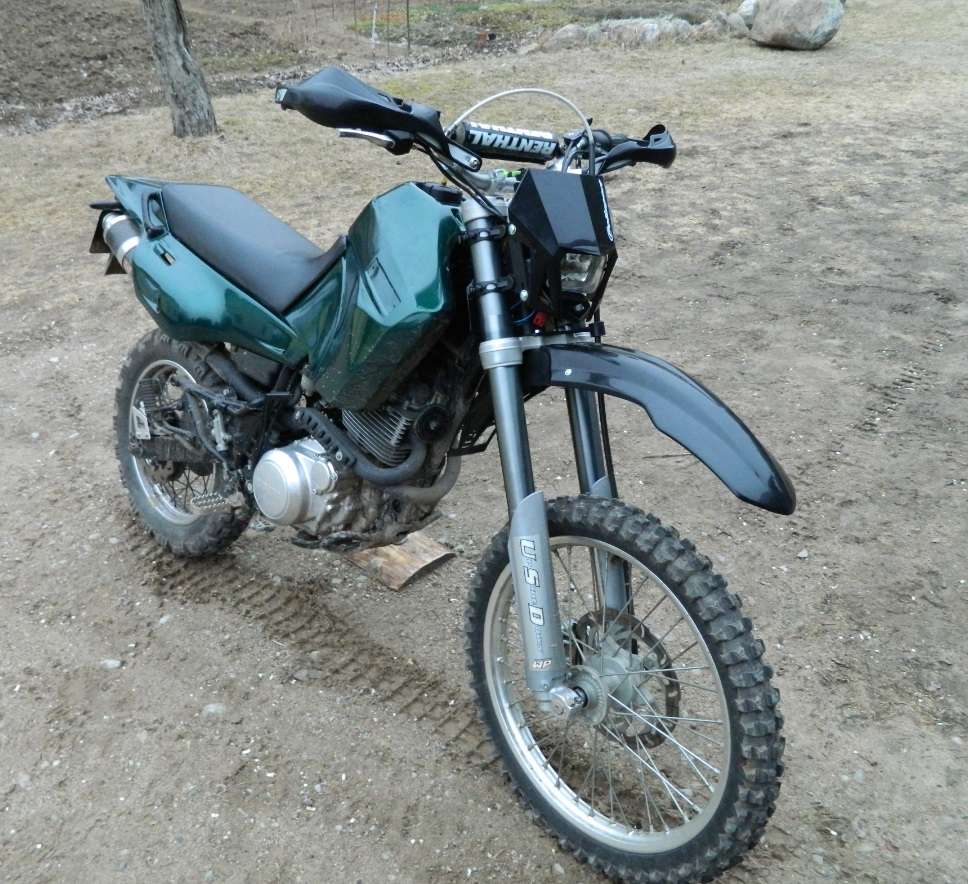
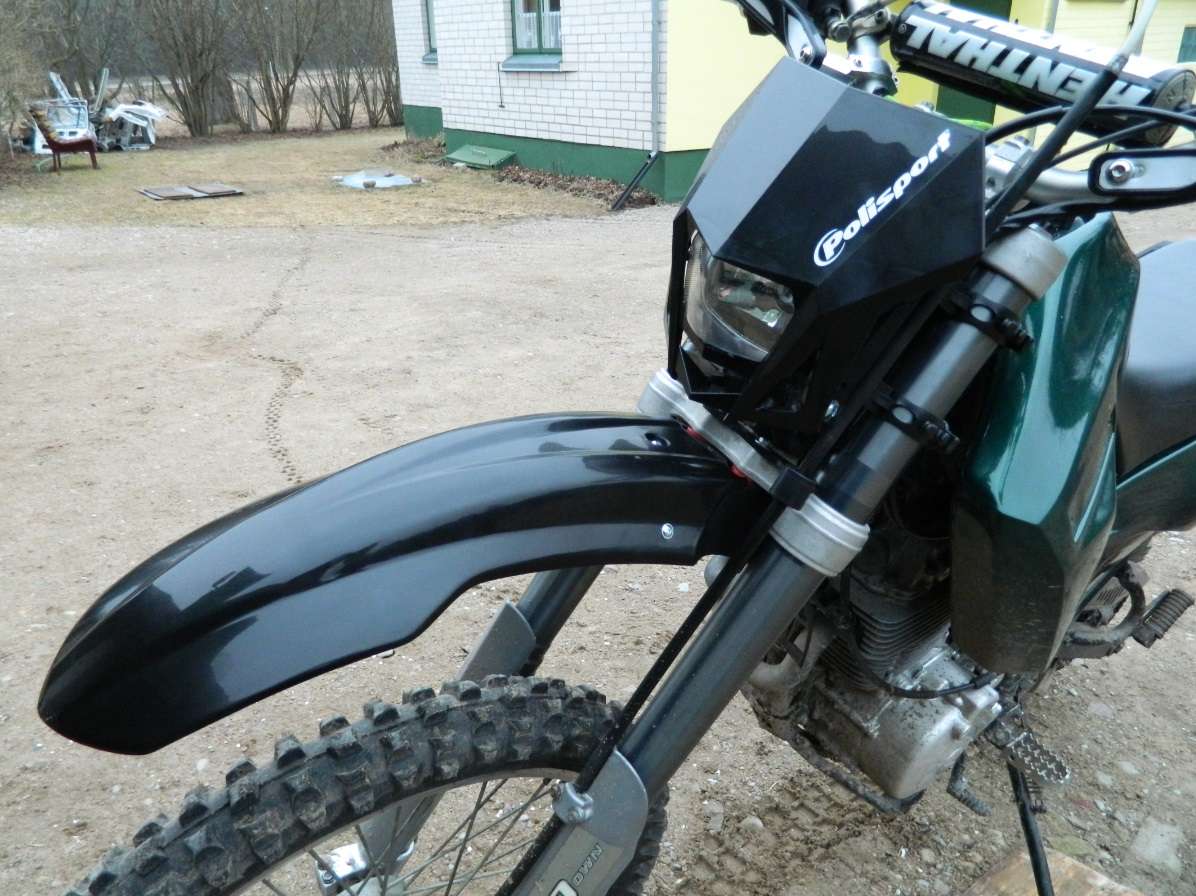
Polisport universal fender fittings worked great, no drilling required. Fender will stay on.
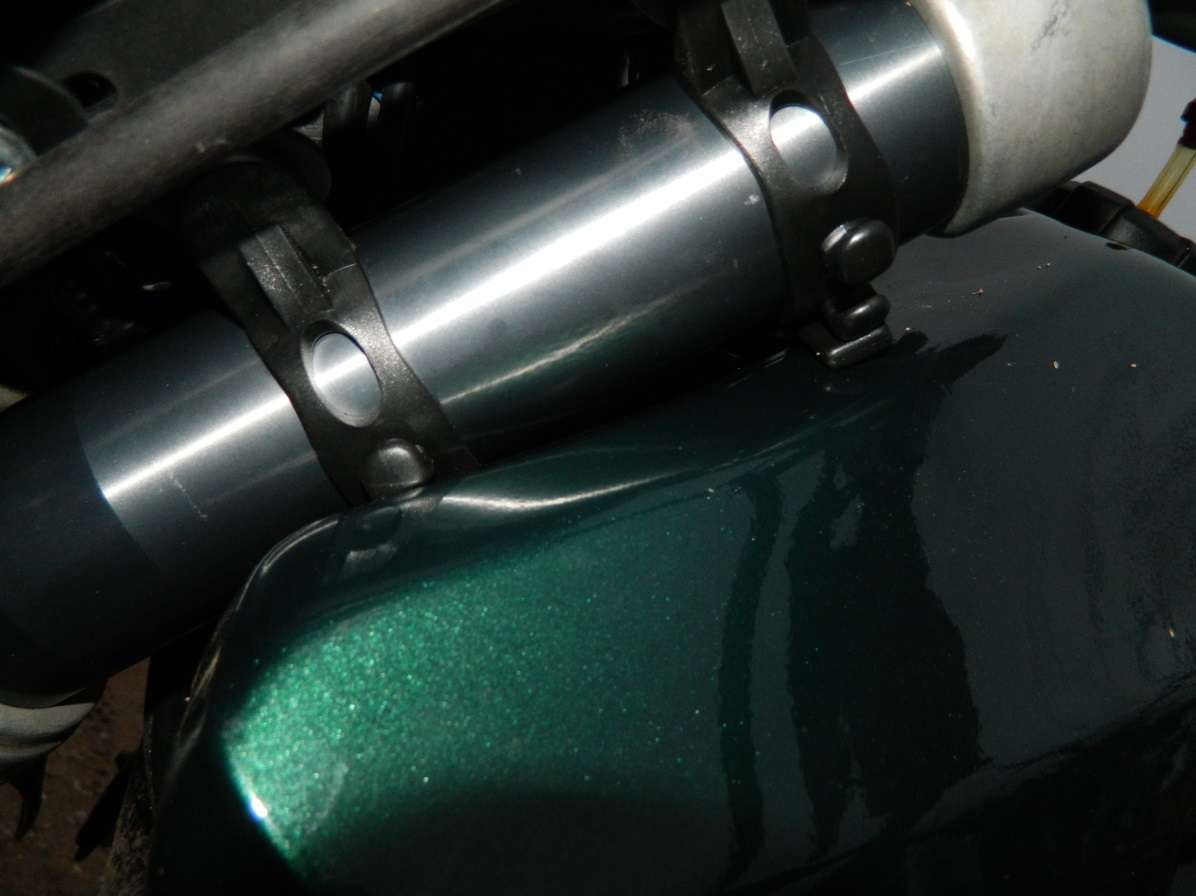
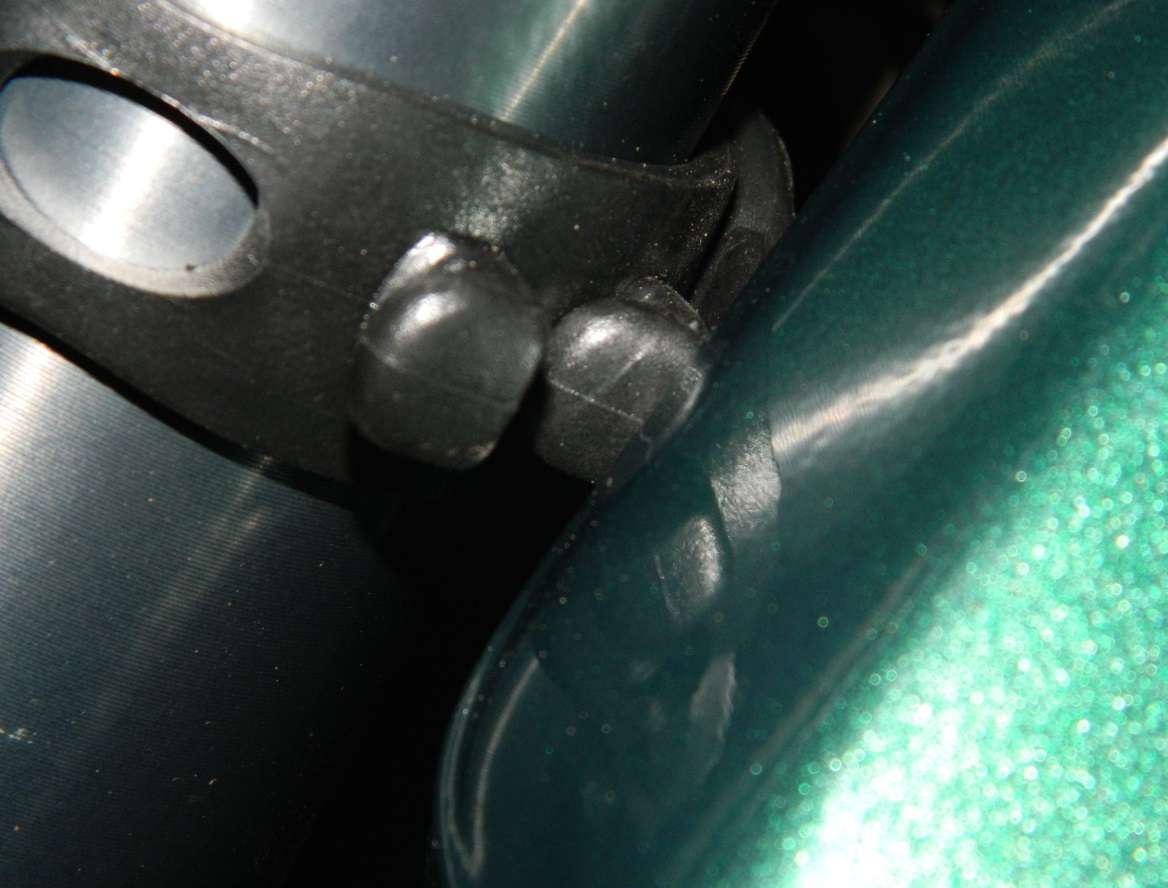
Relocated the brake line guide.
The headlight is temporarily fitted. I will have to make a set of aluminum headlight holders (instead of these plastic ones, don't mistake them for the rubber clamps!). The holders will also have to function as the mountings for the blinkers. Also the Xenon HID kit will have to be re-installed, and the ballast relocated (along with the relays probably).
Tiny problem: the rubber clamp hooks are hitting the gas tank on the left side. Will probably have to cut them off...
Plenty of space for the Trail Tech Vapor...

|
3 Mar 2014
|
|
Registered Users
Veteran HUBBer
|
|
Join Date: May 2012
Location: Lithuania
Posts: 204
|
|
|
Ugh! Yes! After a year or so since the bike was re-painted, the color/clear coat of the paint started bubbling in some places. Firstly around the petcocks. Then under the seat (a huge bubble, not visible though with the seat on), then smaller bubbles here and there (I popped them with a needle, pressed with a finger and they are invisible).
But only the color/clear coat, primer is staying on stuck to the plastic.
I had started considering wrapping the plastics with a black vinyl sticker. Now I might only wrap the gas tank, and the plastics will be changed along the way during other mods...? We'll see.
|
3 Mar 2014
|
|
Registered Users
Veteran HUBBer
|
|
Join Date: Dec 2008
Location: Denmark
Posts: 1,417
|
|
|
The only solution would be to coat/seal the tank from the inside, so the fumes cant go through.
|
4 Mar 2014
|
|
Registered Users
Veteran HUBBer
|
|
Join Date: May 2012
Location: Lithuania
Posts: 204
|
|
|
How would you seal a plastic gas tank from the inside?
There's two options, I guess:
1. get a black gas tank (or other color you want that is possible to obtain)
2. wrap the gas tank in vinyl
When wrapping I think the problem would remain, but the vinyl sticker is easier to "repair" than paint coats.
Sticker should be "lifted" in a form of bubble, just like the paint. You could then just pop the bubble and smoothen out the surface with a finger, and it would be pretty much invisible that something happened there.
But paint cracks, falls off... And you're screwed.
|
4 Mar 2014
|
|
Registered Users
Veteran HUBBer
|
|
Join Date: Sep 2012
Location: Middle USA
Posts: 349
|
|
I have used Caswell on 4 tanks, good stuff. I do have a bubble appearing on one tank since gas has been in it. I suspect I did not get it coated completely. It takes quite some time to get it all around the inside. This tank had the restricted unleaded filler and I could not shine a light all around to see. I guess I'll get another smaller kit and do it again concentrating on the area in question then fix the paint bubble... 
__________________
'84 XT600 is now bored to 2nd oversize and new OEM pistons and rings installed. No more smoking.
|
5 Mar 2014
|
|
Registered Users
Veteran HUBBer
|
|
Join Date: May 2012
Location: Lithuania
Posts: 204
|
|
Ohhh, that looks like a possible solution
|
5 Aug 2014
|
|
Registered Users
Veteran HUBBer
|
|
Join Date: May 2012
Location: Lithuania
Posts: 204
|
|
Done some shopping
Ordered (finally!):
Trail Tech Vapor speedo (stealth)
Trail Tech Vapor dashboard
Motion Pro fork bleeders
MSR forged clutch lever with perch (my original one is too worn and wobbly, can't stand it)
MSR front wheel bearing/seal kit
MSR front wheel spacers
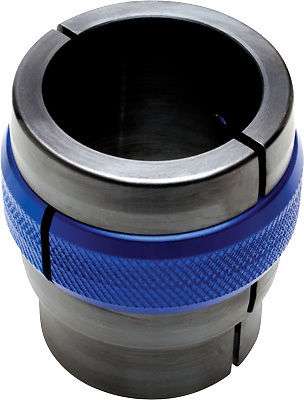
All Balls front fork oil seal/dust seal kit, as my Pyramid Parts oil seal on left side fork leg is leaking oil (can't blame it on the manufacturer, it might be my fault, as right side fork leg is OKAY)
and so that I don't mess up the seals again(???)
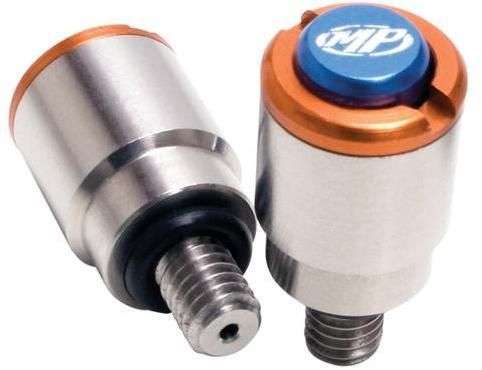
Motion Pro fork seal driver and Motion Pro bullet.


Installation pictures will be uploaded once I receive the parts
|
9 Sep 2014
|
|
Registered Users
Veteran HUBBer
|
|
Join Date: May 2012
Location: Lithuania
Posts: 204
|
|
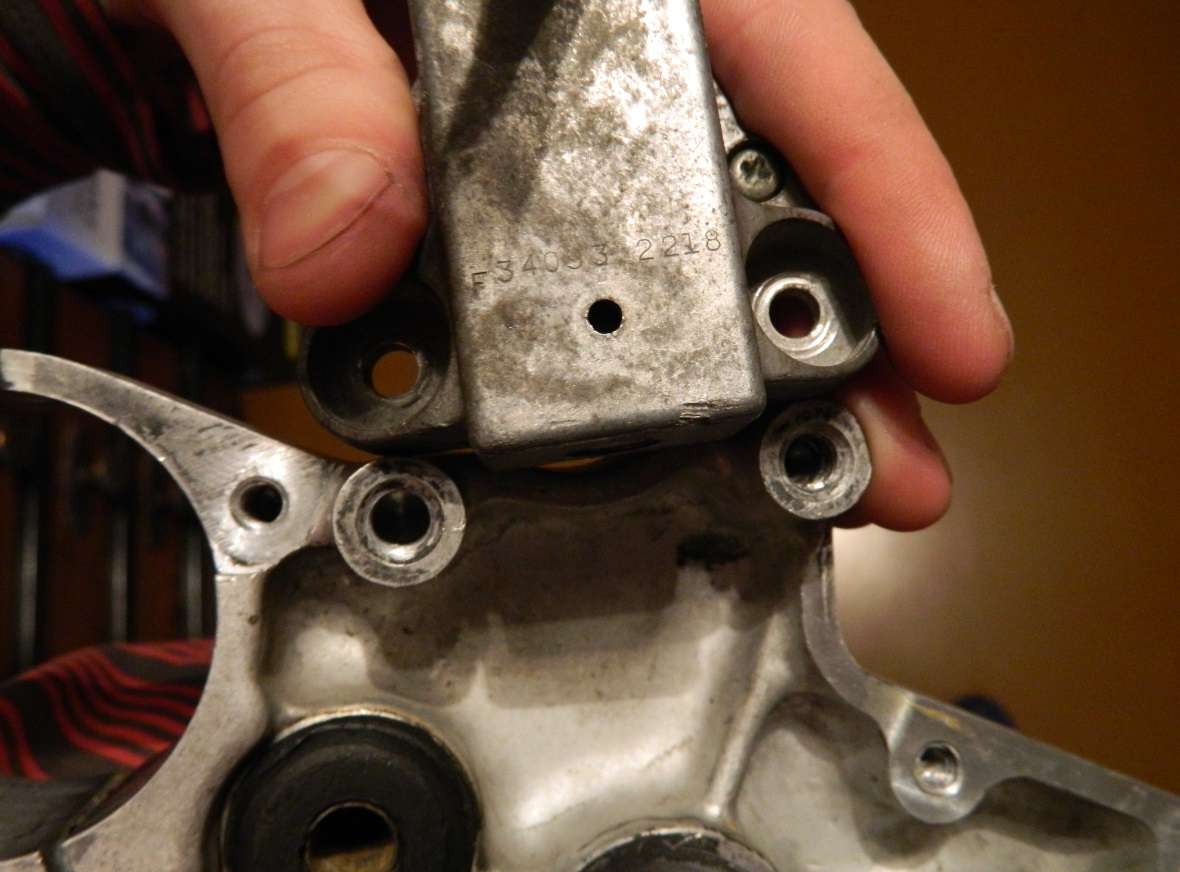
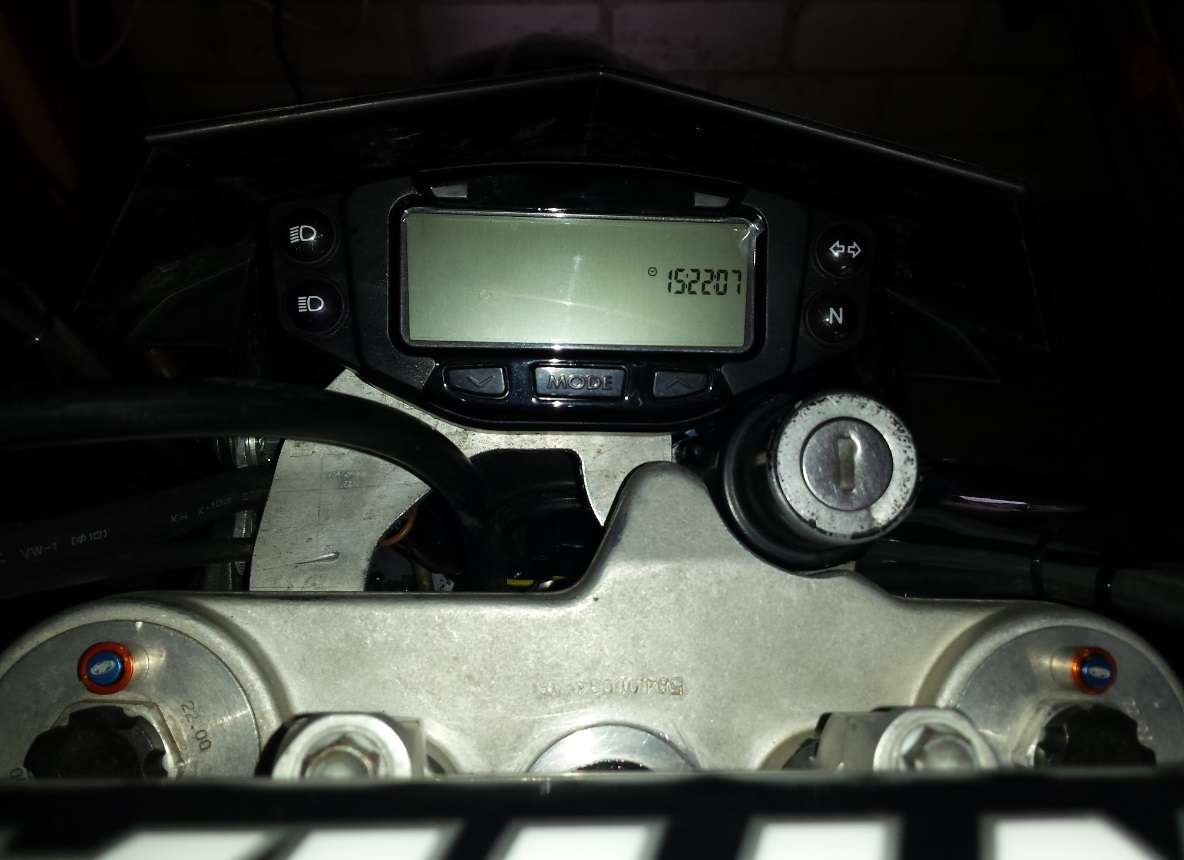
At last the parts have arrived. I have installed the fork bleeders, not much to show there. Also installed the clutch lever (and immediately chopped it off to my required length, haha). I also installed the Vapor speedo and dash. The wiring isn't complicated, so not much to show there too.
I tapped into the orange wire (CDI to Ignition Coil) for the RPM, and for the speedo I'll need another sensor (this one is a plastic one, I need a screw-in type, like KTM original).
The most complicated bit was mounting it. With lots of cardboard templates I made a crude mount from some 3mm scrap aluminum. It's mounted under one side of the ignition lock and there's one screw hole in the top triple (elongated mounting holes are there because the "legs" of the mount are 2-3mm too short). So all good Now I'll force my friend to make an autocad 3D drawing of it and laser cut it (and headlight mounts) from a new piece of aluminum.
The engine needs a rebuild now. More here:
http://www.horizonsunlimited.com/hub...uy-where-78159
|
7 Nov 2014
|
|
Registered Users
Veteran HUBBer
|
|
Join Date: May 2012
Location: Lithuania
Posts: 204
|
|
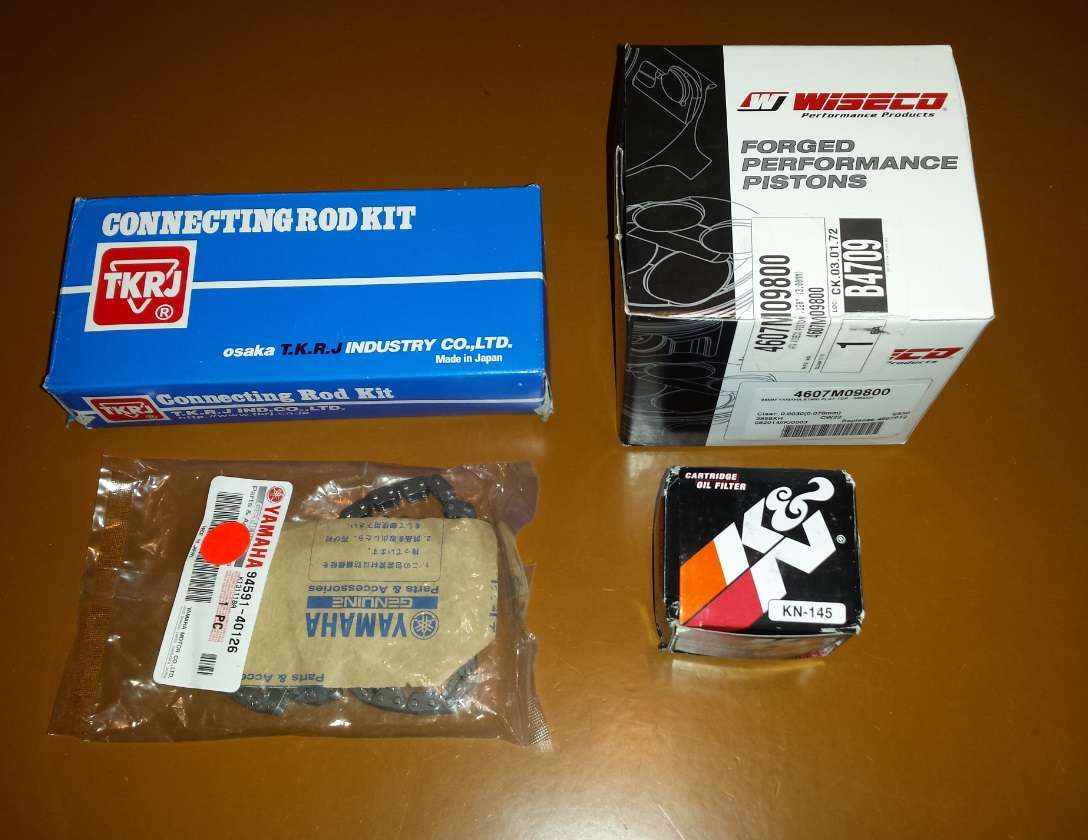
I'm slowly buying the parts needed for an engine rebuild...
So far I've bought a 10:1 Wiseco forged piston, TKRJ connecting rod, NOS cam chain, K&N oil filter and Repsol oil, valve guide seals.
I still need a cam sprocket, but also I want to replace the lower sprocket, the only problem is I can't find it for sale...
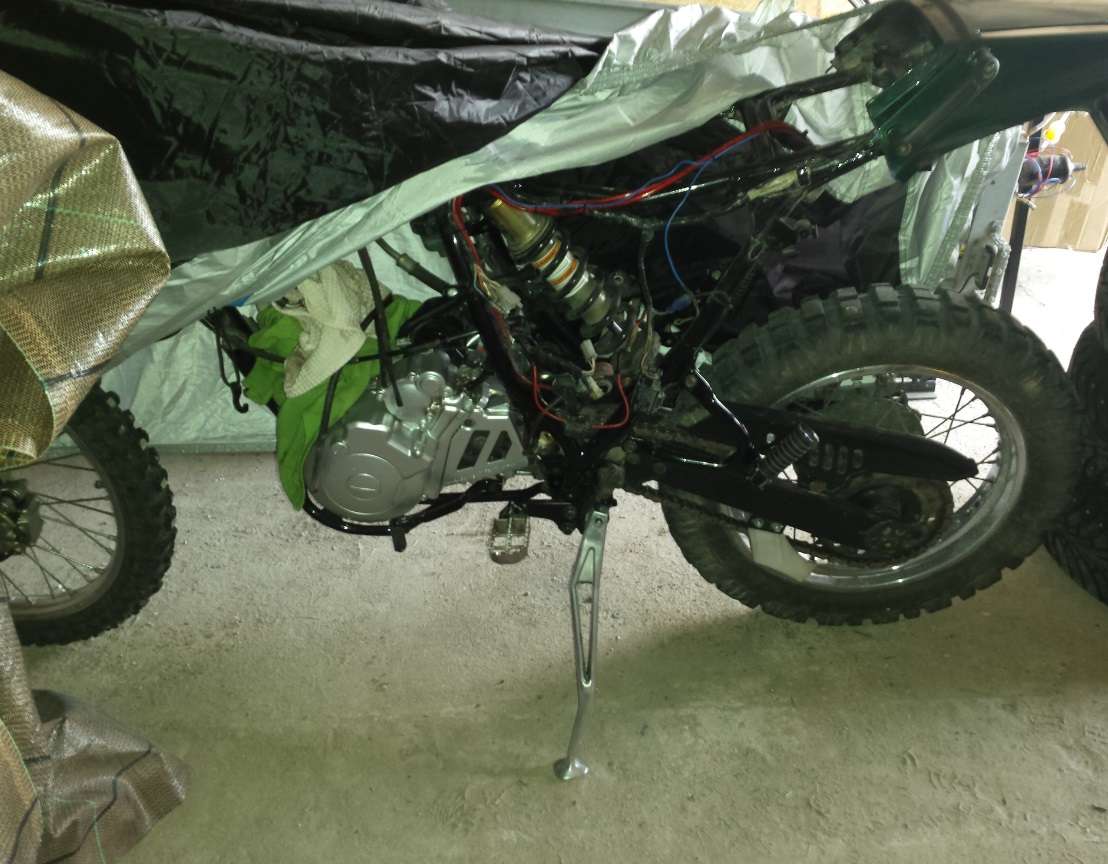
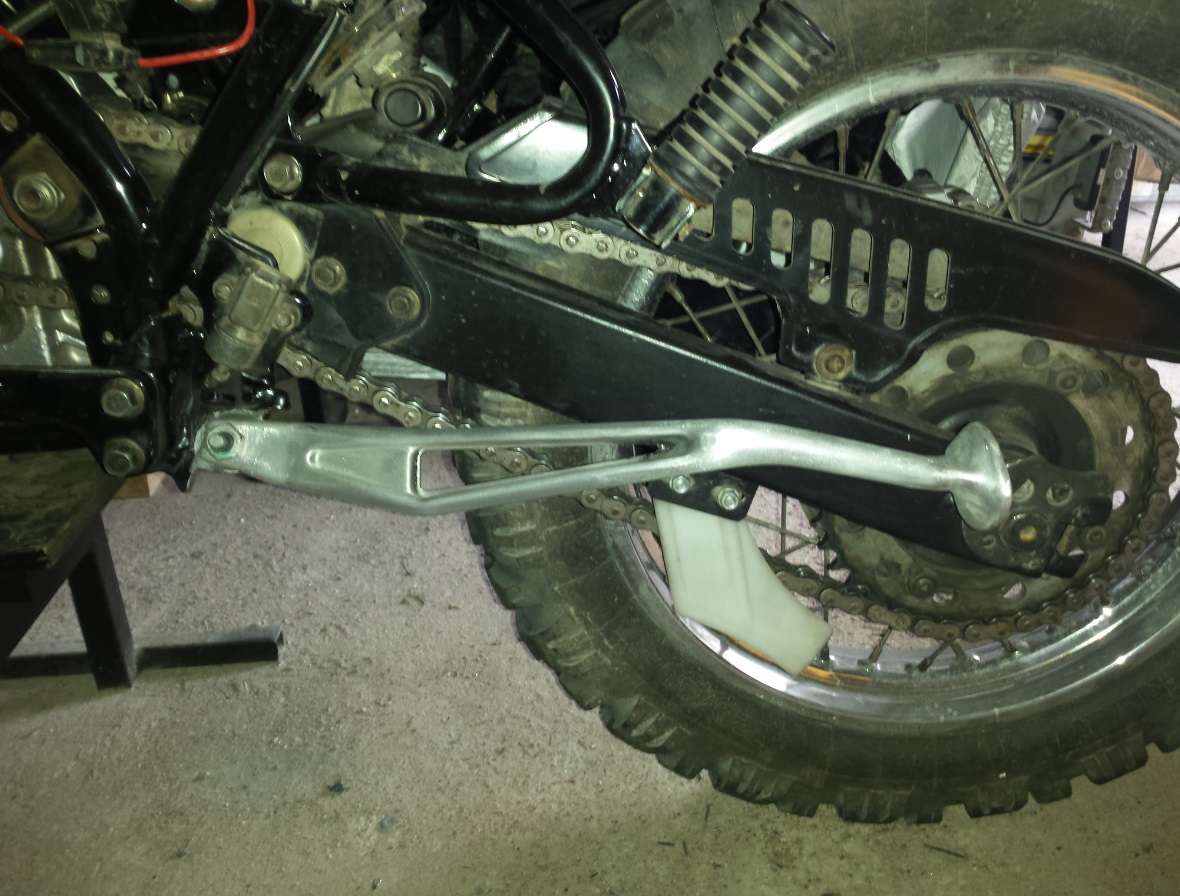
Also bought, shortened, got welded, and adapted a new side stand off an Aprilia RXV 550. Sexy, aluminum, and Italian  now I just need a new spring and it's good to go.
|
|
Currently Active Users Viewing This Thread: 4 (0 Registered Users and/or Members and 4 guests)
|
|
|
 Posting Rules
|
You may not post new threads
You may not post replies
You may not post attachments
You may not edit your posts
HTML code is Off
|
|
|
|

Check the RAW segments; Grant, your HU host is on every month!
Episodes below to listen to while you, err, pretend to do something or other...

2020 Edition of Chris Scott's Adventure Motorcycling Handbook.
"Ultimate global guide for red-blooded bikers planning overseas exploration. Covers choice & preparation of best bike, shipping overseas, baggage design, riding techniques, travel health, visas, documentation, safety and useful addresses." Recommended. (Grant)

Ripcord Rescue Travel Insurance™ combines into a single integrated program the best evacuation and rescue with the premier travel insurance coverages designed for adventurers.
Led by special operations veterans, Stanford Medicine affiliated physicians, paramedics and other travel experts, Ripcord is perfect for adventure seekers, climbers, skiers, sports enthusiasts, hunters, international travelers, humanitarian efforts, expeditions and more.
Ripcord travel protection is now available for ALL nationalities, and travel is covered on motorcycles of all sizes!
What others say about HU...
"This site is the BIBLE for international bike travelers." Greg, Australia
"Thank you! The web site, The travels, The insight, The inspiration, Everything, just thanks." Colin, UK
"My friend and I are planning a trip from Singapore to England... We found (the HU) site invaluable as an aid to planning and have based a lot of our purchases (bikes, riding gear, etc.) on what we have learned from this site." Phil, Australia
"I for one always had an adventurous spirit, but you and Susan lit the fire for my trip and I'll be forever grateful for what you two do to inspire others to just do it." Brent, USA
"Your website is a mecca of valuable information and the (video) series is informative, entertaining, and inspiring!" Jennifer, Canada
"Your worldwide organisation and events are the Go To places to for all serious touring and aspiring touring bikers." Trevor, South Africa
"This is the answer to all my questions." Haydn, Australia
"Keep going the excellent work you are doing for Horizons Unlimited - I love it!" Thomas, Germany
Lots more comments here!

Diaries of a compulsive traveller
by Graham Field
Book, eBook, Audiobook
"A compelling, honest, inspiring and entertaining writing style with a built-in feel-good factor" Get them NOW from the authors' website and Amazon.com, Amazon.ca, Amazon.co.uk.
Back Road Map Books and Backroad GPS Maps for all of Canada - a must have!
New to Horizons Unlimited?
New to motorcycle travelling? New to the HU site? Confused? Too many options? It's really very simple - just 4 easy steps!
Horizons Unlimited was founded in 1997 by Grant and Susan Johnson following their journey around the world on a BMW R80G/S.
 Read more about Grant & Susan's story
Membership - help keep us going!
Horizons Unlimited is not a big multi-national company, just two people who love motorcycle travel and have grown what started as a hobby in 1997 into a full time job (usually 8-10 hours per day and 7 days a week) and a labour of love. To keep it going and a roof over our heads, we run events all over the world with the help of volunteers; we sell inspirational and informative DVDs; we have a few selected advertisers; and we make a small amount from memberships.
You don't have to be a Member to come to an HU meeting, access the website, or ask questions on the HUBB. What you get for your membership contribution is our sincere gratitude, good karma and knowing that you're helping to keep the motorcycle travel dream alive. Contributing Members and Gold Members do get additional features on the HUBB. Here's a list of all the Member benefits on the HUBB.
|
|
|


 Linear Mode


