|
|

9 Nov 2007
|
|
Registered Users
Veteran HUBBer
|
|
Join Date: May 2007
Location: Nairobi Port Alfred London
Posts: 210
|
|
|
"Make your own" XT 600 Dakar fairing
I want a bit more weather resistance for my XT 600 for European motorway use, so I looked around on everyone’s forums, and I cant bring myself to buy one of those ceebee screens that mount on the handle bars, they look truly awful.
I like the tenere headlight mount of the 89 tenere (3aj I think), but they don’t mount onto my tank. The 1VJ just doesn’t quite have it. I looked at the Dakar bikes and like the idea of an elongated race number screen. This could also be used to protect the GPS from most of the elements.
I did look at the Suzuki DR600 dakar screen, it is handle bar mounted and has a small fly screen, which I think looks magic. So does anyone know where I can buy one? and will it fit?
The other idea is to buy some Perspex and to make my own… (ordered sheet and on its way)
Anyone any tips, its going to be a real hash job, wish I had access to some blue or yellow tinted polycarbonate, now that would look great.
Also need to figure out how to post more pics
Watch this space.
|
11 Nov 2007
|
 |
Gold Member
Veteran HUBBer
|
|
Join Date: Jul 2006
Location: Coventry
Posts: 126
|
|
Secdem do a screen for the bike.
Great range of colours !!!
Bullster
Order through Baglux. Baglux UK
|
11 Nov 2007
|
|
Registered Users
Veteran HUBBer
|
|
Join Date: May 2007
Location: Nairobi Port Alfred London
Posts: 210
|
|
|
Bingo
Exactly right Yellow is so cool
|
12 Nov 2007
|
|
Registered Users
Veteran HUBBer
|
|
Join Date: Dec 2005
Location: Birmingham,England
Posts: 140
|
|
|
Screen for XT....
Hi All, I too wanted something to make high speed motorway slogs a little less tiring and offer some protection at lower speeds. I finished up with a Givi A602 screen, not too ugly and it survived without any problems (did not come loose etc).
Last edited by jimmy46; 17 Nov 2008 at 10:55.
|
15 Nov 2007
|
|
Moderated Users
Veteran HUBBer
|
|
Join Date: Oct 2005
Location: Umtentweni, Kwa Zulu Natal, South Africa
Posts: 182
|
|
|
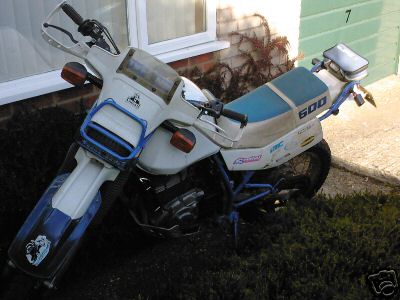
fairing
Hi
I would have a fairing for the 1VJ wasting space under my garage roof.
Here in south africa, I could email you pics of the fairing
regards
Thomas
|
16 Nov 2007
|
|
Registered Users
Veteran HUBBer
|
|
Join Date: Apr 2003
Location: Manchester UK
Posts: 235
|
|
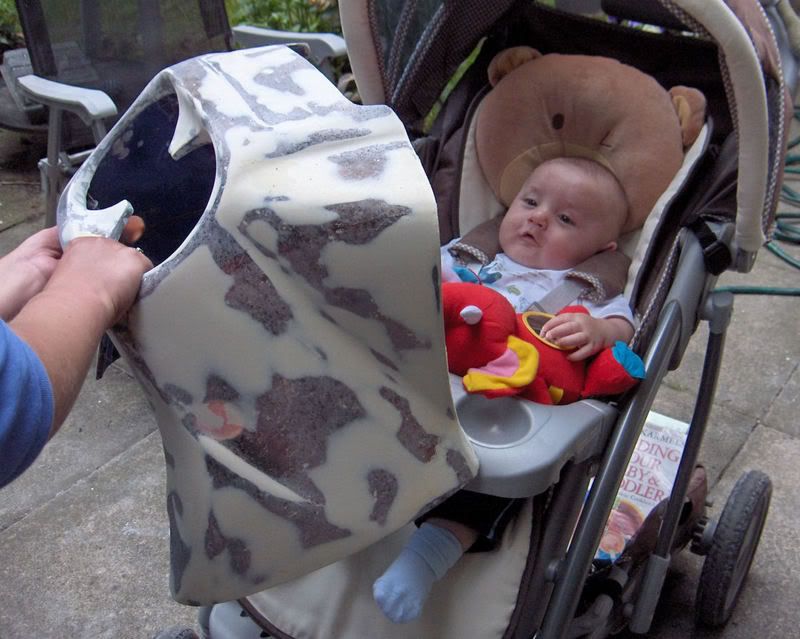
 Make your own using blue foam and fibre glass
|
16 Nov 2007
|
|
Registered Users
HUBB regular
|
|
Join Date: Jul 2006
Location: Bühl, Germany
Posts: 88
|
|
I like the camoflauge effect - does that help the pram go faster? 
|
16 Nov 2007
|
|
Registered Users
Veteran HUBBer
|
|
Join Date: May 2007
Location: Nairobi Port Alfred London
Posts: 210
|
|
Hey Ghost rider, it looks Like Bruken has been doing some research... 
That book in the Pram: "Building your Baby & toddler streamlined push chair"! Pretty impressive stuff.
I believe that the matt finish creates micro pockets of turbulent air that the free flowing air glides over to give an enhanced slipstream effect by reducing air-to-surface tension enduced drag.
Seriously, Bruken thats a grand idea...
only I... well err :confused1: I supose I could do that... But it, hmmm I guess there is no excuse. About that blue foam, is it soft sponge foam, or is it a harder formed foam, and how do you:
a) Mold it into the shape
b) Is it part of the fairing, or does it become the mould.
c) Where do you buy it
Clearly I know nothing about free forming fiberglass, but it is bringing back memories of surfboards, now that foam was more solid, and you layer the glass around it. Yes I suppose that is the answer, but I honestly wasnt looking for anything that difficult (workwise yet simple idea-wise)
Brilliant answer Brucken. Now I'm confused as to where to go, Man I can now make my 3  cooler in the fairing. on one side and a cubby on the other WOW the possibilities are endless.
Thank you
However I have now started burning myself with my piece of perspex, and I am extremely happy with the results. Once I have it mounted on the bike I will post a pic, but it looks good initially.
I have opted to mount it onto the front number plate plastic, but I should give it a metal support down to the number plate bracket, another day, when I attack some steel pipes with the neighbours arc welder to make my Pannier bracket. (Neither of can drive his oxyacetalene welder so will give that a miss, way to much scope for disaster!) 
Had some fun forming the perspex, for £6.45 It does seem to be the cheapest option (excluding 3 booboo plasters and 8 hours labour) Pic to follow on Sunday
|
19 Nov 2007
|
|
Registered Users
Veteran HUBBer
|
|
Join Date: Apr 2003
Location: Manchester UK
Posts: 235
|
|
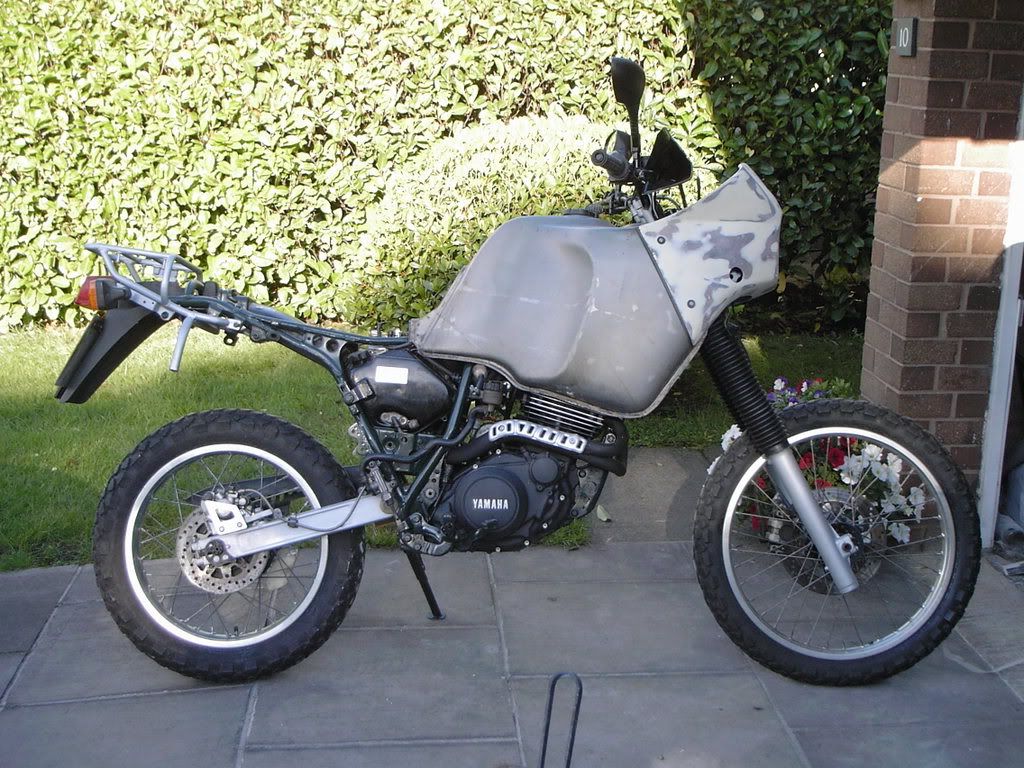
 Dimwit!
Quote:
Originally Posted by Ghost Rider

I like the camoflauge effect - does that help the pram go faster? |
Blue foam formed the positive mold so the exterior finish was the rough finish. The lighter colours are epoxy filler to form the contours.
Hint. Use epoxy which is more flexible and "rubbery" than resin which is brittle and will crack.
As for Mr PGS's questions. The foam is friable and easily shaped. Fit it to the front of the bike and then shape (sculpt) accordingly. It sound a lot harder to do than it is. Mine took about 12 hours to knock out and saved me the £175 it would have cost to replace with the original plastic unit.
BTW. The pic was taken by the Missus as a laugh, because whenever it was my turn to look after baby.... the only way he would settle down was if he accompanied me to the garage and I switched on a power tool. The sounds of a pillar drill would send him to sleep instantly :-)
|
20 Nov 2007
|
|
Registered Users
Veteran HUBBer
|
|
Join Date: Aug 2007
Location: Sax, Spain
Posts: 901
|
|
|
Well done Bruken!
Firstly... 
and secondly.....PLEASE, PLEASE show us some step by step photos of how you made that fairing.........that is a work of Genius. 
and I really want to have a go at making a twin headlamp fairing for my XT. 
|
21 Nov 2007
|
|
Registered Users
Veteran HUBBer
|
|
Join Date: Apr 2003
Location: Manchester UK
Posts: 235
|
|
|
Step by step photo's I dont have...sorry. Notice the model hanging from the roof? I use the technique for creating engine cowls.
Here is the process tho..
Get some pink or blue foam. Double sided tape it together to get the correct thickness you need. Mount it to the front of the bike with the tank on. (If you use florists green foam for the back interior of the plug, it is so soft and friable you can literally push fit it into place)Carve it to the shape you need. Remove plug. Cover it with LOW TEMP film. Wax the film well (about 10 - 12 coats of wax). Cut some strips of fiberglass. LIGHTLY spray the fiberglass with 3M spray and apply to the plug. You will want at least 2 to 3 layers of cloth. Mix up some epoxy resin so you have about a 30 minute "pot life". Thin it about 25% with acetone if using resin, though I prefer to blow hot air from a hair dryer for epoxy. This will thin epoxy to an almost penetrating oil like state. Use a "flux" brush, apply it to the fiberglass - make sure you "work it in" so all the layers are wet. Squegee off any excess resin/ epoxy and let dry for a couple of hours. Sand it. Trim any excess overhang from the back and pop it off of the plug. If it doesn't pop out, cut an opening in the film and, OUTSIDE, put a little petrol in the opening (a little goes a long way!!!). The foam will disolve into a sludge in about 30 - 45 minutes. Remove the sludge and film. Rinse the cowl well and let sit for another 2 or 3 days to "harden up". Fill with epoxy automotive filler and sand down. Not too hard to do, ....
|
21 Nov 2007
|
|
Registered Users
HUBB regular
|
|
Join Date: Nov 2006
Location: Middletown, PA, USA
Posts: 52
|
|
The process has been around for several decades, and it does yield a fairly heavy (for an off-road cycle), if easy to construct, body part. For more info on the general process see Using Fiberglass/Foam Sandwich Composite If you had access to carbon fiber sheeting, it would be lighter than fiberglass (but much more expensive).
If you had an electric oven of sufficient size, you could also experiment with constructing wooden "bucks" (the technical name of the foam molds above) and using the oven heat to form some polycarbonate over the "buck". Doesn't need to get real hot, but it would need to be fairly large.
Another option could be to glue-up pieces of polycarbonate (i.e., old windshields) into the desired shape, then painting with a spray paint with plastic adhesive (e.g., Krylon Fusion). Probably would be fairly light, but take some time to get all the pieces correct (matching left-to-right, curve-to-curve, etc.)
|
25 Nov 2007
|
|
Registered Users
Veteran HUBBer
|
|
Join Date: May 2007
Location: Nairobi Port Alfred London
Posts: 210
|
|
|
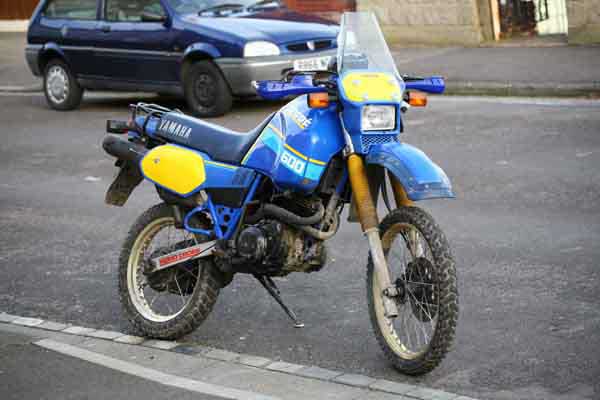
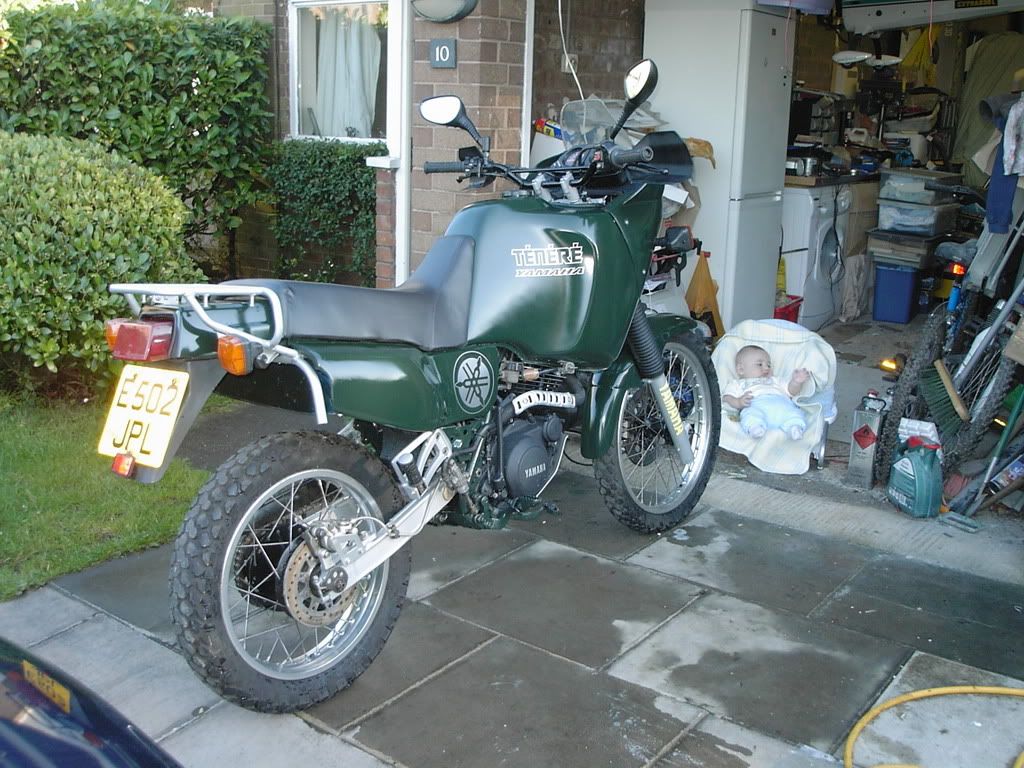
Finished!
Bruken, I thought that the plane in the background was for your kid...
Here are the finished shots.
From the front:
Not as big a job as it looks at the end of the day, and I am really happy with the resistance it provides. You cant see it from here, but its quite a rough job.
I used a butane/propane heater gun to heat things up to a state that I could bend the sheet by hand. I used Tin foil to direct the heat and protect my book shelf... did you know that tin foil burns?
I used a soldering iron to cut/melt the general shape, and then rounded off the edges to a point I was happy with.
Next time around I will use a jig saw to cut the general shape, then place the whole sheet into the oven to warm it to a plaible state, with some wood shaped underneath it, so that it forms around the wood. by doing half and half at a time you should get a better bend.
With more control over the heat you wont get the bubbles, but it is sort of easy, once you get the knack.
From the rear
As you can see it is actually quite thin, so will not provide anywhere near the level of protection that my BMW does. But its purpose was to cut the wind blast to my chest for longer journeys, and it does just that.
In truth it is probably a little too thin and could have been wider, but this is not a necessity. One quick blast onto the dual carriage way proved that it keeps the GPS dry and blast off my body.
Total cost £10!
Cheers G
|
25 Nov 2007
|
|
Registered Users
Veteran HUBBer
|
|
Join Date: Aug 2007
Location: Sax, Spain
Posts: 901
|
|
|
not bad at all!
I wouldnt moan too much at that for a tenner! thats well cool.
can you post some close up pics of how you fixed it on please?
cheers
Martyn
PS Is it Perspex or Polycarbonate?
Poly sheet is MUCH stronger than perspex and wont shatter if hit with a stone or tree branch. also cuts without cracking but is a swine to bend!
|
25 Nov 2007
|
|
Registered Users
Veteran HUBBer
|
|
Join Date: May 2007
Location: Nairobi Port Alfred London
Posts: 210
|
|
I was sold it as Acrylic plexiglass. it is 6mm thick, and I think is Polycarbonate, knowing me it is the worst of the two options for the job.
I brought it from these chaps: SIM stores on ebay
When i come a cropper and find out what it is I will post pics. My thoughts are that it was too thick, and the material too soft, but bloody strong.
However it is optically very clear, but that wont last long, the material is easily scratched.
I fitted it directly to the number plate bit, with a huge washer at the rear, and then a 1/4 of a plastic wine cork as a sponge absorber.
Then the screen, then another huge washer and finally nuts with end caps on them. Actually looks really neat. I used a 1inch 1/4 roofing bolt and compressed the corks to fill all the threads (I think) on the nuts.
I am still trying to get head or tail of this whole photo thing, but will email you a close up of how it all went together through PM.
But yeah fro a tenner all in not bad!
|
|
Currently Active Users Viewing This Thread: 2 (0 Registered Users and/or Members and 2 guests)
|
|
|
| Thread Tools |
|
|
| Display Modes |
 Linear Mode Linear Mode
|
 Posting Rules
|
You may not post new threads
You may not post replies
You may not post attachments
You may not edit your posts
HTML code is Off
|
|
|
|

Check the RAW segments; Grant, your HU host is on every month!
Episodes below to listen to while you, err, pretend to do something or other...

2020 Edition of Chris Scott's Adventure Motorcycling Handbook.
"Ultimate global guide for red-blooded bikers planning overseas exploration. Covers choice & preparation of best bike, shipping overseas, baggage design, riding techniques, travel health, visas, documentation, safety and useful addresses." Recommended. (Grant)

Ripcord Rescue Travel Insurance™ combines into a single integrated program the best evacuation and rescue with the premier travel insurance coverages designed for adventurers.
Led by special operations veterans, Stanford Medicine affiliated physicians, paramedics and other travel experts, Ripcord is perfect for adventure seekers, climbers, skiers, sports enthusiasts, hunters, international travelers, humanitarian efforts, expeditions and more.
Ripcord travel protection is now available for ALL nationalities, and travel is covered on motorcycles of all sizes!
What others say about HU...
"This site is the BIBLE for international bike travelers." Greg, Australia
"Thank you! The web site, The travels, The insight, The inspiration, Everything, just thanks." Colin, UK
"My friend and I are planning a trip from Singapore to England... We found (the HU) site invaluable as an aid to planning and have based a lot of our purchases (bikes, riding gear, etc.) on what we have learned from this site." Phil, Australia
"I for one always had an adventurous spirit, but you and Susan lit the fire for my trip and I'll be forever grateful for what you two do to inspire others to just do it." Brent, USA
"Your website is a mecca of valuable information and the (video) series is informative, entertaining, and inspiring!" Jennifer, Canada
"Your worldwide organisation and events are the Go To places to for all serious touring and aspiring touring bikers." Trevor, South Africa
"This is the answer to all my questions." Haydn, Australia
"Keep going the excellent work you are doing for Horizons Unlimited - I love it!" Thomas, Germany
Lots more comments here!

Diaries of a compulsive traveller
by Graham Field
Book, eBook, Audiobook
"A compelling, honest, inspiring and entertaining writing style with a built-in feel-good factor" Get them NOW from the authors' website and Amazon.com, Amazon.ca, Amazon.co.uk.
Back Road Map Books and Backroad GPS Maps for all of Canada - a must have!
New to Horizons Unlimited?
New to motorcycle travelling? New to the HU site? Confused? Too many options? It's really very simple - just 4 easy steps!
Horizons Unlimited was founded in 1997 by Grant and Susan Johnson following their journey around the world on a BMW R80G/S.
 Read more about Grant & Susan's story
Membership - help keep us going!
Horizons Unlimited is not a big multi-national company, just two people who love motorcycle travel and have grown what started as a hobby in 1997 into a full time job (usually 8-10 hours per day and 7 days a week) and a labour of love. To keep it going and a roof over our heads, we run events all over the world with the help of volunteers; we sell inspirational and informative DVDs; we have a few selected advertisers; and we make a small amount from memberships.
You don't have to be a Member to come to an HU meeting, access the website, or ask questions on the HUBB. What you get for your membership contribution is our sincere gratitude, good karma and knowing that you're helping to keep the motorcycle travel dream alive. Contributing Members and Gold Members do get additional features on the HUBB. Here's a list of all the Member benefits on the HUBB.
|
|
|