 |
|

14 Apr 2010
|
 |
Contributing Member
Veteran HUBBer
|
|
Join Date: Jul 2005
Location: Wirral, England.
Posts: 5,656
|
|
|
Making your own screen. What thickness Perspex to use ??
Hey all
I'm going to make my own screen but before I buy the perspex, I was wondering what thickness to buy.
Im just going to bolt it to the top fairing with no support arms.
From what other have said, If it's too thick, it will put more strain on the bolts and be harder to shape and be too stiff but too thin and it will bend/flap/crack etc !!
All advice welcome 
__________________
Did some trips.
Rode some bikes.
Fix them for a living.
Can't say anymore.
|
14 Apr 2010
|
 |
Seek and thou shalt find.
Veteran HUBBer
|
|
Join Date: Feb 2006
Location: Midlands/UK
Posts: 231
|
|
|
Screen
Hi.
made a screen a few years back with some tinted plastic I recycled from work.
It was around 4-5 mm thick and I was able to shape it with careful use of a hot air gun.
Getting too close with it burned the surface but luckily I found this out on a test sheet.
Not sure exacly what type of transparent plastic it was but the thickness worked well.
Dave
|
15 Apr 2010
|
|
Registered Users
New on the HUBB
|
|
Join Date: Mar 2010
Location: Grenada MS
Posts: 15
|
|
|
For cars 1/4in for the windsheild and 1/8 for the side pieces seems to work fine if you are using Lexan, add a 1/16th for Plexi. I have not made one for a bike yet but will be doing one soon for a Crotch Rocket I traded for - the one on my Harley is about 3/16 but not sure of the material. Shaping the Lexan is pretty easy with a heatgun and if you hold the heat below the piece you can tell when its about to go soft. If you dont need a very big piece I would check with a local supplier to see if they have any 'drops' or cut off pieces from a past project
|
15 Apr 2010
|
 |
Contributing Member
Veteran HUBBer
|
|
Join Date: Jan 2008
Location: England
Posts: 649
|
|
|
Ted,
How big a screen do you need ?
Does it need to be clear ?
On my naked road bike, a small fly-screen upped the comfy cruise speed by 20mph.
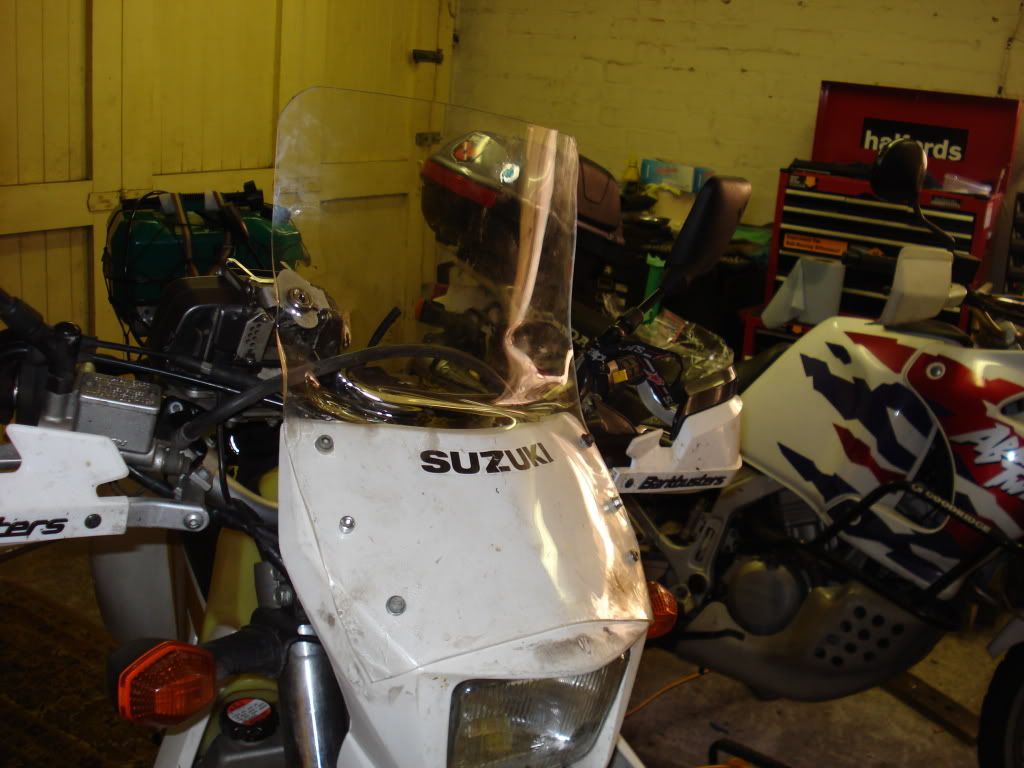
I have made a screen blank from epoxy-fibreglass for my Dr. Zed and will trim it to fit the existing light surround. I've just stuck it on with some tape so you can get a (really) rough idea.
If you don't need a really tall screen, a bit of pretty thin polyprop would do the trick. It will take up the curve of your headlight surround when you fix it and will have some flexibility when you dump the bike.
The third pic is the bike I might build if I won the lottery
BYT
Last edited by Big Yellow Tractor; 15 Apr 2010 at 09:18.
Reason: Missed a bit
|
15 Apr 2010
|
|
Contributing Member
Veteran HUBBer
|
|
Join Date: Jul 2005
Location: Wirral, England.
Posts: 5,656
|
|
|
Cheers for the replies... Nice looking screen that tractor ! Just the right height too.
Ebay is full of perpex off-cuts so im going to pick up a 4mm 450x300 piece. £5 to the door. Can't complain !
Now I need to find a heat gun
__________________
Did some trips.
Rode some bikes.
Fix them for a living.
Can't say anymore.
|
16 Apr 2010
|
|
Registered Users
HUBB regular
|
|
Join Date: Dec 2009
Posts: 24
|
|
|
Hey Ted
Finished the screen on my KLR before I set off for my test run around Europe.
Went for 6inches above the KLR stock screen - I'd say that gives about an overall 11 inch screen. Used clear, 5mm perspex. Cut the shape based on a card outline and stuck it straight into the oven. 110 degrees for 8-10 minutes and its as mouldable as you like.
Try to add a top lip if you can - its a pain trying to bend a lip and the convex curve on your own if you're using the oven. If you use a heat gun it could end up taking forever, as you don't want to apply too much heat to one area else the perspex will blister.
I'll stick a picture up when i can find one.
T
|
16 Apr 2010
|
|
Registered Users
HUBB regular
|
|
Join Date: Dec 2009
Posts: 24
|
|
|
there... amazing what you can do with a spare evening, a hack saw and some plumbing washers.
|
16 Apr 2010
|
|
Registered Users
Veteran HUBBer
|
|
Join Date: Feb 2006
Posts: 1,598
|
|
Quote:
Originally Posted by *Touring Ted*

Cheers for the replies... Nice looking screen that tractor ! Just the right height too.
Ebay is full of perpex off-cuts so im going to pick up a 4mm 450x300 piece. £5 to the door. Can't complain !
Now I need to find a heat gun
|
Think you will find a decent hair dryer will work fine.
Now just to please me. When it is all done, install some car trim beading along the outer edge. This could save you considerable discomfort in the event of an unexpected halt  You don't really want to be riding with your head just above a guillotine.
PS, I got the Panasonic camera yesterday, it is brilliant. See reduced image from 3.5mb to 50k taken at about 150 yards.
|
16 Apr 2010
|
|
Registered Users
Veteran HUBBer
|
|
Join Date: May 2008
Location: Glasgow
Posts: 296
|
|
|
Hi, i have made numerous screens / headlight protectors over the years. i normally use 4mm perspex and for large curves i heat the whole piece in an oven then form it around something that shape. For smaller areas heat that section under the grill until it gets floppy and bend to shape (wear gloves).
Drilling the holes requires great care as they will crack easily. Andy B
|
17 Apr 2010
|
|
Registered Users
HUBB regular
|
|
Join Date: Jun 2006
Location: Northumberland UK
Posts: 36
|
|
I have made few screens for my xt660x, these two pictures are the latest, the first has its base behind the headlight surround, the second has the base in front of the surround, with the base behind I get a sort of forward suction effect to my jacket, with the base in front of the surround, with a gap of a three quarters of an inch there is no suction. The screen is quarter inch thick perspex, which drills well and cuts easily with a jig saw, finishing the edge with a belt sander, bending is done with a hot air gun.

|
17 Apr 2010
|
|
Registered Users
HUBB regular
|
|
Join Date: Jun 2006
Location: Northumberland UK
Posts: 36
|
|
this is the only way to get the second photo on

|
13 May 2010
|
|
Contributing Member
Veteran HUBBer
|
|
Join Date: Jul 2005
Location: Wirral, England.
Posts: 5,656
|
|
|
I'm just about to plonk it in the oven.....
Iv put in on foil on a large baking tray.
As for drilling !! Do you recommend a drilling it fast or slowly ???
Would melting through be a better idea ?? (Screwdriver and blowtorch method) and then cleaning the hole up with the drill !
__________________
Did some trips.
Rode some bikes.
Fix them for a living.
Can't say anymore.
|
13 May 2010
|
 |
Registered Users
Veteran HUBBer
|
|
Join Date: Mar 2008
Location: Creator of Joroinen Community Finland / All Oceans
Posts: 219
|
|
I used 2mm polycarbonate made shape with cardboard template saw with jigsaw and just bend it and bolt it with three M 5 with large washers and that's the result. :confused1:

Works fine and it's strong and durable
__________________
...You know it's a bit windy when you get passed by your own dust...
|
13 May 2010
|
|
Contributing Member
Veteran HUBBer
|
|
Join Date: Jul 2005
Location: Wirral, England.
Posts: 5,656
|
|
Well...
That wasn't fun !! LOL.
I got it all maluable and shaped it around my BBQ gas bottle. The problem is that i need to bend it in the middle too so it will sit more upright when bolted to my front cowl. When I bent it, it deformed at the bend. It's not pretty but it's just as strong.
Heating in the oven then shaping by hand just doesn't give you enough time to shape it as it cools VERY FAST !! I had to use the heat gun which makes it hard to do large adjustments...
You get about 10 seconds to shape it before it becomes stiff again.
Anyway, it's on the bike now and does the job. It's not going to win any prizes for style but it only cost £5 in total !!
TBC....
__________________
Did some trips.
Rode some bikes.
Fix them for a living.
Can't say anymore.
Last edited by *Touring Ted*; 13 May 2010 at 14:53.
|
28 Jun 2010
|
|
Registered Users
Veteran HUBBer
|
|
Join Date: Feb 2010
Location: Johannesburg, South Africa
Posts: 142
|
|
Hi all, I attached a visor to my xt this weekend. Bought it off ebay, think it was from an old cb400.
I took the bike to 60mph to see how it faired, it was noisy. I then adjusted the angle of the screen making it slightly more vertical and this improved the level of noise however I am still unhappy with my efforts.
The top of the screen takes me to nose/ eye height with my helmet obviously collecting the full brunt of the airflow off the screen. I have left a slight gap between the headlight cowling and the bottom of the screen, as I saw some beemers like that so it must be for a good reason. 
- is it better to have the screen take you below the helmet, or above. Above would surely make for a very unstable odd looking structure ?
- would a perm screen be better than a screen one can remove. I wasnt happy riding the bike through slow traffic though, the screen gave some very odd depth of field distortions - or should the screen just be shorter so you look above it? - any clever ideas ??
- Should the screen be flush with the headlight cowling ?
Cheers
-
|
|
Currently Active Users Viewing This Thread: 1 (0 Registered Users and/or Members and 1 guests)
|
|
|
 Posting Rules
|
You may not post new threads
You may not post replies
You may not post attachments
You may not edit your posts
HTML code is Off
|
|
|
|

Check the RAW segments; Grant, your HU host is on every month!
Episodes below to listen to while you, err, pretend to do something or other...

2020 Edition of Chris Scott's Adventure Motorcycling Handbook.
"Ultimate global guide for red-blooded bikers planning overseas exploration. Covers choice & preparation of best bike, shipping overseas, baggage design, riding techniques, travel health, visas, documentation, safety and useful addresses." Recommended. (Grant)

Ripcord Rescue Travel Insurance™ combines into a single integrated program the best evacuation and rescue with the premier travel insurance coverages designed for adventurers.
Led by special operations veterans, Stanford Medicine affiliated physicians, paramedics and other travel experts, Ripcord is perfect for adventure seekers, climbers, skiers, sports enthusiasts, hunters, international travelers, humanitarian efforts, expeditions and more.
Ripcord travel protection is now available for ALL nationalities, and travel is covered on motorcycles of all sizes!
What others say about HU...
"This site is the BIBLE for international bike travelers." Greg, Australia
"Thank you! The web site, The travels, The insight, The inspiration, Everything, just thanks." Colin, UK
"My friend and I are planning a trip from Singapore to England... We found (the HU) site invaluable as an aid to planning and have based a lot of our purchases (bikes, riding gear, etc.) on what we have learned from this site." Phil, Australia
"I for one always had an adventurous spirit, but you and Susan lit the fire for my trip and I'll be forever grateful for what you two do to inspire others to just do it." Brent, USA
"Your website is a mecca of valuable information and the (video) series is informative, entertaining, and inspiring!" Jennifer, Canada
"Your worldwide organisation and events are the Go To places to for all serious touring and aspiring touring bikers." Trevor, South Africa
"This is the answer to all my questions." Haydn, Australia
"Keep going the excellent work you are doing for Horizons Unlimited - I love it!" Thomas, Germany
Lots more comments here!

Diaries of a compulsive traveller
by Graham Field
Book, eBook, Audiobook
"A compelling, honest, inspiring and entertaining writing style with a built-in feel-good factor" Get them NOW from the authors' website and Amazon.com, Amazon.ca, Amazon.co.uk.
Back Road Map Books and Backroad GPS Maps for all of Canada - a must have!
New to Horizons Unlimited?
New to motorcycle travelling? New to the HU site? Confused? Too many options? It's really very simple - just 4 easy steps!
Horizons Unlimited was founded in 1997 by Grant and Susan Johnson following their journey around the world on a BMW R80G/S.
 Read more about Grant & Susan's story
Membership - help keep us going!
Horizons Unlimited is not a big multi-national company, just two people who love motorcycle travel and have grown what started as a hobby in 1997 into a full time job (usually 8-10 hours per day and 7 days a week) and a labour of love. To keep it going and a roof over our heads, we run events all over the world with the help of volunteers; we sell inspirational and informative DVDs; we have a few selected advertisers; and we make a small amount from memberships.
You don't have to be a Member to come to an HU meeting, access the website, or ask questions on the HUBB. What you get for your membership contribution is our sincere gratitude, good karma and knowing that you're helping to keep the motorcycle travel dream alive. Contributing Members and Gold Members do get additional features on the HUBB. Here's a list of all the Member benefits on the HUBB.
|
|
|


 Linear Mode


