Go Back   Horizons Unlimited - The HUBB > Technical, Bike forums > KTM Tech
KTM Tech KTM Tech Forum - For Questions specific and of interest to KTM riders only.
Photo by Ellen Delis, Lagunas Ojos del Campo, Antofalla, Catamarca

I haven't been everywhere...
but it's on my list!


Photo by Ellen Delis,
Lagunas Ojos del Campo,
Antofalla, Catamarca


Reply
 
LinkBack Thread Tools Display Modes
  #1  
Old 5 Jul 2010
Registered Users
Veteran HUBBer
 
Join Date: Apr 2009
Location: On the road ...
Posts: 262
LC4 Workshop at the HU Meeting Germany

As promised, I'll try to put up a short summary of some of the things we talked about in the LC4 workshop at the HU meet in Germany last week. If you have any questions, feel free to PM me or Spooky (who did the workshop with me).

Contents

Online ressources, links, etc
Tools, tool kits
Spares, helpers, bodge-aids
Valve adjustment LC4 quick guide/recap
Modifications


Online ressources, links, etc

Advrider is a great place to get mechanical advice. Imho the HUBB is superior when it comes to travel, country-specific, paperwork etc information, but advrider has more people inclined to help with mechanical issues. Make sure to ask in the right forum (Thumpers for the LC4, Orange crush for the LC8).

Advrider also has a huge collection of guides and useful discussions, and they have it nicely indexed right for the 640 and for the 690. Picture guides for everything from cleaning your carb to changing your fork oil!

There's a couple more forums you might want to have a look at: KTM talk (english, KTM), Thumper talk (english, single cyl. trail bikes), and for the German speaking crowd KTM LC4.net (german). Don't be put off by the outlandish design of ktm-lc4.net, it does have a lot of knowledgable people.

Need part numbers, but don't have the parts manual with you? KTM World, microparts fiche has an online catalogue, just choose your bike model, year, etc and you can retrieve numbers for any part. Usually has diagrams too (unless you have a KTM Military). Having the part number is also a good way of comparing prices of online vendors, as otherwise the thing you might be looking for may be hard to find.


Tools, tool kits

Many people asked me who makes those tools that we showed around, so here we go:

The aluminium tyre-lever-hex wrench is made by "MotionPro" and called "T6-combo lever". In Europe you can get it e.g. from adventure-spec.com. For the LC4 you want the 27mm hex end, that'll do both front and rear (at least on pre-07 LC4's). If you need more torque, they are strong enough to put your foot on it. The blue 3/8 drive insert is also handy to have (especially if your front and rear nuts are different sizes). MotionPro also make a nice "TrailTool" and a lightweight chain-breaker.

Mini-ratchet wrenches are available from many companies, the ones I like and showed around are made by "Gedore". They are very strong, yet light and very good quality. They come in two varieties. I use the "7R" model, they are flat and ideal for reaching the valve cover bolts amongst other things on my KTM. Gedore also make another model called "7UR", with the wrench at an angle + reversible direction. Depending on your bike it might be better. Another alternative is the "Microspeeder" by Proxxon, in Germany available in OBI stores. Not as high quality as Gedore, but it comes with a hinge. I also had inserts for the 10mm ratchet wrench made by Gedore: a 1/4 drive and a bit holder. Very useful in my opinion, and very compact too. The ratchet wrenches come in all kinds of sizes, but I think 8mm and 10mm are the most useful. Bigger bolts are usually easier to reach, so you don't need the "gimmick tool", but for 8 and 10mm they are great.

The black/red tool roll I had with me is made by Touratech and has an inbuilt magnet to keep track of screws/bolts. It's nice, but many other things also do the job (I only bought it after my trip, so not neccessary by any means).

Feeler gauges: Buy a cheap set and take out the ones that you need. Usually that is the correct size for your setting (e.g. 0.18 on most LC4, or 0.20 on the KTM Mil, 0.15 on some KTM RFCs etc), plus one size larger and one size smaller. That way you can a) check how far off you are, and thus spot problems early, and b) maybe save yourself the hassle of adjusting the valves if they're not perfect, but close enough. Take out the blades and bend them in a Z-like shape so you have some kind of hope of getting them in, and then store them inside the spark plug tool so they don't get damaged.

For completeness sake, here is a pic of (most of my) current toolkit:


Contents (left to right), items marked with * are part of the OEM KTM tool kit:

1/4" drive and bit holder inserts for 10mm Gedore 7R ratchet wrench
small 8mm allen key (handle bars, engine top end)
Gedore 7R 10mm and 8mm ratchet wrenches
longer, stronger ball end allen keys 4mm, 5mm
* screw driver flat/Ph3
* KTM T-tool (6mm allen key) + sockets 6mm, 8mm, 10mm
* screw driver Ph2
Z/L shape flat blade screw driver (valve lash)
small Gedore 2B box wrench 10mm x 11mm (valve lash, brakes)
* open end wrenches 10mm x 13mm and 13mm x 17mm (I discarded the 8x10, Gedore 7R instead)
Flaig tyre pressure gauge (I am thinking of switching to a pencil gauge)
12V test lamp (can be improvised with an indicator)
KTM tyre levers with duct tape stored on them
KTM spoke wrench with more duct tape stored on it
* KTM spark plug wrench with feeler gauges (0.15, 0.20, 0.25) stored within
small vice grips
hemastat/roach clip (I am thinking about discarding this one ...)
* combination pliers (I am thinking about replacing it with a leatherman ...)
Bottom row:
sockets/bits for T-tool, ratchet wrench ...
Sockets 13mm, 19mm
Motion Pro T6 combo lever (27mm hex + tyre lever) + 3/8" drive insert, electrical tape stored on lever
Not in the picture: Topeak Mini Morph pump, valve stem tool, thread file, thread drills bits M6, M8


Some more info on my tool kit is on my blog (Moto Eurasia) under the "Bike" section.


There are many more discussions about what tools to take on the HUBB, but I'll reiterate a few important things here:
1. Take only the sizes that are found on your bike
2. Make sure the tool works on your bike (a 10mm socket is no good when you need an open end wrench and vice-versa), so you need to try this before you leave
3. Take only the minimum, and certainly don't take tools for jobs that you don't know how to perform. If you can't do the repair there's no point to take the tool for it, because the help you will need will most likely have its own tools.


Spares, helpers, bodge-aids

A very good thread and discussion of tools and aids is on advrider, have a look (but keep in mind that it needs to be bike specific, so take it as an inspiration, not a literal guide): ADV Rider toolkit thread

For comparison here's a picture of some of the bodge aids that I took with me to Nepal:

Neatly stored in this box:


Contents:


From left to right, and top to bottom, there is:

- zip ties, various sizes, some of the reusable kind
- little plastic bag with needles, thread, buttons, etc
- jubilee clips (hose clamps), two sizes, not only for hoses, but all sorts of repairs
- some spare bolts/screws M6, M8, longer ones, can be cut down if neccessary
- 3 film canisters (bit too big, but the best I could find at the time) with: talcum, grease, copper paste
- two shock and water proof spark plug cases (black) with spark plugs
- a spare inline fuel filter (in the meantime I use a washable one, plus they are available around the world so I don't carry this anymore)
- lock-tite (medium/blue) - KTM staple food!
- 2 sets brake pads, 1x front, 1x rear (in plastic wrap)
- high temperature silicone sealant paste (1/3 tube, no need to take a full one)
- a couple of gaskets (2-4 valve cover gaskets, some assorted copper washers etc)
- a universal throttle/clutch repair cable
- a couple of screw cable connectors
- a piece of silicone (high temp proof) insulated electrical cable
- wire thick and wire thin, ideally Ni plated so it doesnt rust immediately
- JB weld/metal epoxide or alike (blue thing in plastic bag)
- 2 miniature hack saw blades
- sand/grinding paper fine and medium (blue/black on top), ideally the kind that doesnt desintegrate when wet
- I did NOT take super glue (top right), because it's available everywhere and once open needs to be discarded as it usually spills and makes a mess. If you insist on taking super glue, take the smallest one time use version you can get, like the UHU minis (1g each) as shown in the pic
- little bag with 3 valve caps, 3 valve stems, 1 valve stem removal tool, 4 valve nuts

Not shown in the picture but also part of my kit:

- Magura blood (hydraulic clutch fluid, if you have an LC4 don't leave home without it!!! if you did, you can substitute mineral based baby oil ...)
- light bulbs (1x main beam, 1x tail light)
- carburetor jet needle and needle jet (Mikuni BST-40 specific)
- large syringe (reverse bleed clutch/brakes, remove engine oil if overfilled etc)
- piece of petrol hose (30 cm)
- piece of surgical tubing (50 cm)
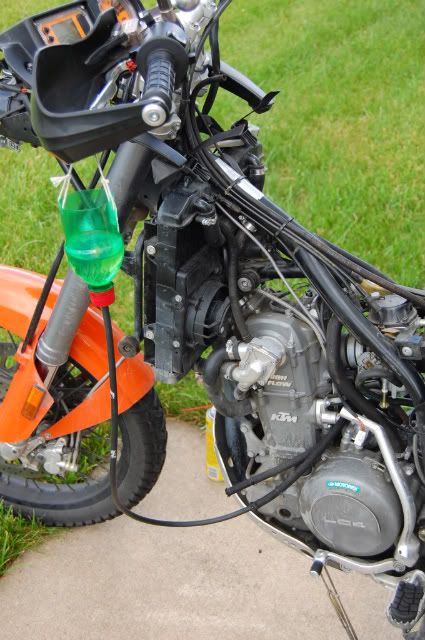
- small funnel with piece of tubing (7cm) for frame oil change on the LC4
- 1x spare tube (regular, front)
- tube puncture kit
- duct tape, electrical tape (stored on levers and wrenches in tool kit)
- fuses 3x 10A, 2x 20A
- oil filters (other people may prefer to use reusable metal filters made by Scott)
- nylon string (stored with camping gear)


Valve adjustment LC4 quick guide/recap

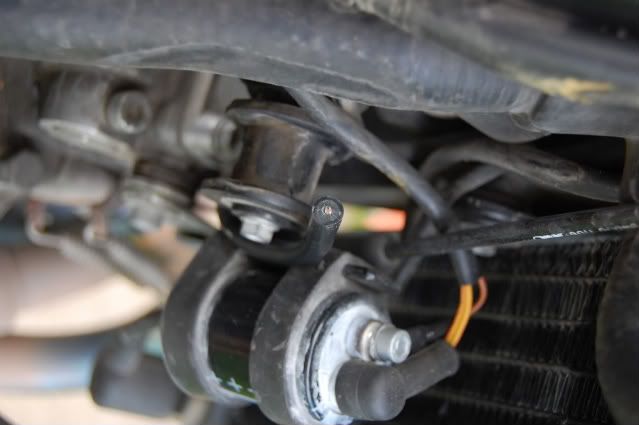
Top dead centre (compression) on the KTM Military the easy way (check that this applies to your bike, doesnt work on all LC4s!): Center stand, fifth gear, turn rear wheel forward very slowly until your hear the auto-decompressor (loud-ish "clack" sound) kick in. After that keep turning the rear wheel forward very very slowly and look at the stator on the right hand side (little glass window). As soon as the dead center marking reaches the window and is vertical in the window, you have reached top dead center (compression). Watch out it's only a short way from when the auto-deco clicks, if you go too far, the next time the mark comes up, it's the other top dead center. Double check with a screw driver or similar that the piston is at the top AND you can see the crank mark (where the fixing screw goes) AND check by hand that the valves (both inlet and outlet) have a tiny play to them. If they sit rock solid, either you messed up finding top dead center, or the manual decompression lever is not all the way back down.

Valve inspection recap on the KTM Mil: Take off the tank, frame breather hose and fan on the left side, unscrew the capacitor on the right, unhook the decompression cable, make sure the decompression lever is back all the way down, unscrew the spark plug, bring the engine to top dead center (very simple on the KTM, read above), ideally lock engine at top dead center with the crank shaft screw (special KTM part or make yourself), take off the valve covers (flat ratchet combo spanners like the Gedore 7R work very well here), slide in your feeler gauges. There also is a valve lash inspection guide on ADVrider, see the LC4 index page above to find it (or click here if you're lazy).


Modifications

I'll let Spooky fill in the gaps here, he had a much more comprehensive list than I do, but for now a few things I did on my bike:

- Neoprene fork gaiters, really a must on any USD fork. In addition (or if you dont have gaiters, you can also pack grease behind the dust cap). Remember we discussed fixing fork leaks by sliding something thin between seal and fork to clean it out. Sjaak also mentioned a special tool for this job, but I forgot what it is called. Maybe one of you knows?
- Reinforced rallye clutch springs (3 or 6, depending on how strong your left hand is): less clutch wear, more tolerance (less clutch slipping) with bad oil
- Ultra heavy duty innter tubes (e.g. Michellin), possibly in combination with "Slime" inside the tube.
- Hand adjustable fuel mixture screw if you plan on going to high altitudes. Fix it to the frame with a piece of wire or take the original, as some people have reported losing it on the road.
- in-line fuel filter and fuel line quick connectors (useful for maintenance, petrol stove filling etc)
- Sheep skin or self-made/after market seat ...

That's it for now, if I forgot something then please let us know!

Last edited by Sirakor; 8 Jul 2010 at 13:20.
Reply With Quote
  #2  
Old 7 Jul 2010
Grant Johnson's Avatar
HU Founder
Veteran HUBBer
 
Join Date: Dec 1997
Location: BC Canada
Posts: 7,226
Ben and Hanno - GREAT post! Thanks for the effort, and for doing the tech session in Germany, it's much appreciated. I've heard good reports already! Now what would you two like to do for the Autumn Meeting?
__________________
Grant Johnson
Seek, and ye shall find.

------------------------
Inspiring, Informing and Connecting travellers since 1997!
www.HorizonsUnlimited.com
Reply With Quote
  #3  
Old 7 Jul 2010
Registered Users
Veteran HUBBer
 
Join Date: Apr 2009
Location: On the road ...
Posts: 262
Quote:
Originally Posted by Grant Johnson View Post
Now what would you two like to do for the Autumn Meeting?
Haha ... I was thinking about how to hunt electrical gremlins, or some general information on bike electronics, but I'm not sure if I will be able to make it to the meeting in autumn. Plus I don't camp when it's cold - I like
Reply With Quote
  #4  
Old 7 Jul 2010
Registered Users
Veteran HUBBer
 
Join Date: Jan 2008
Location: St Louis, MO
Posts: 124
Thanx Guys for your effort. Great stuff!

I have an 07 640 Adventure, while I dream of riding RTW with it. It won't be anytime soon. But I've managed to rack up 25,000 miles thus far.

On the 07 the front axle nut and the rear are not the same size.

Several weeks ago, I had problems with the bike stalling when rolling on the throttle. It was the ignition system and this tool helped me to determine that it wasn't the carb. I had plenty of spark when at idle, but under any load, it was weak and sporadic. The connection between the plug wire and the spark plug cap was green with corrosion.

Amazon.com: Lisle 20610 Inline Spark Tester: Automotive

If the light looks bright and steady when the misfire occurs, then the problem is in carburetion. If it goes out when the misfire occurs, then the problem is with the ignition. There are all kinds of ways of doing this and you can use different tools, like plug caps with lights on them. The big thing is being able to see when the spark occurs... or doesn't occur.

I trimed about 1/4" off the wire and reattached the spark plug cap.


The soda bottle trick is great for a fuel cell when the tanks off.


The trick for clearing clogged jets does work as descsribe in the below link.
Randakk's Cycle Shakk - Honda GL1000 Specialist: GL1000 GL1100 Tech Tip#83

daryl
Reply With Quote
  #5  
Old 7 Jul 2010
Gold Member
Veteran HUBBer
 
Join Date: Jun 2008
Location: London, England
Posts: 141
Quote:
Originally Posted by dlh62c View Post
On the 07 the front axle nut and the rear are not the same size.
27m at the back, 32mm up front on my 07.
__________________
http://bigben.to/ London to....? The big bike annual rally.
http://www.mongolbikers.com 125cc London -> Mongolia.
Reply With Quote
  #6  
Old 8 Jul 2010
Registered Users
Veteran HUBBer
 
Join Date: Apr 2009
Location: On the road ...
Posts: 262
Alright, alright, you got me. I'll edit the post above - 27mm front and rear for pre-07 LC4's. If your bike has two different sizes, I'd recommend getting the MotionPro T6 lever in the bigger size of the two along with the 3/8" drive insert, and then take a socket for the smaller size.

dlh62c - thanks for your input, and nice pics. One thing I noticed is that you're missing the foam strips on the side of your radiator. No biggie, but should you run into overheating problems at some point, this might be the reason. Without the foam, not all the air is forced through the ratiator and may bypass it (along the tank). Here's a pic of my bike, note the foam strip on the radiator. Also note the KTM Military has 8mm hex bolts on the valve covers, rather than ?mm alan screws, which makes working with them a lot easier, because you don't need so much space. Maybe worth changing, especially if you're springing for the ratchet wrenches ...

Reply With Quote
  #7  
Old 9 Jul 2010
Registered Users
Veteran HUBBer
 
Join Date: Jan 2008
Location: St Louis, MO
Posts: 124
Sorry... I wasn't pointing out any type of error on your part.

Currently I carry the two Motion Pro T6-combo levers of 27mm and 32mm that you recommend. Using the tire spoon ends, I always....always pinch a tube. I never do using irons with the lip on the ends. I'm looking forward to Grant's tire changing DVD. I'm sure you can teach an old dog a new trick or too.

Other than a Rekulse auto clutch and a 17 tooth counter sprocket, the bikes stock regarding the carb, air box and exhaust. I plan to keep it that way.

I've had the fan kick in, while stopped, on very hot days. But the bikes never overheated. I'll keep the foam mod in mind.

You guys have done a great job!

daryl
Reply With Quote
  #8  
Old 19 Jan 2011
Registered Users
Veteran HUBBer
 
Join Date: Nov 2006
Location: NorthVancouver Island
Posts: 137
I'll add a couple thread links from Adventure rider that are not in the thread index ... These threads should be helpful to those who wan't to go beyond basic maintenance...

I documented my last service in this thread:640s 127,000 service - ADVrider

And Tseta has a very informative thread going here:Three times the fun! (LC4 HOWDID) - ADVrider
Reply With Quote
  #9  
Old 20 Jan 2011
Steve Pickford's Avatar
Contributing Member
Veteran HUBBer
 
Join Date: Jul 2003
Location: Oxford, UK
Posts: 994
Although not an LC4 640 owner, I serviced a friends 640 Enduro recently and showed him how to adjust the valves accurately without feeler gauges. It's a trick shown to me by a Husaberg owning friend which applies to many KTM's with screw & locknut valve adjustment, I use it on my 400EXC.

Find TDC on the compression stroke as normal.

The pitch of the adjuster screw is 0.75mm which means that for one full rotation of the screw, it will rise or fall by 0.75mm.

Slacken the locknut by a turn or two max and slowly wind the adjuster screw in until it just touches the rocker arm.

There's a slot in the top of the screw, whilst holding the screw in place, slowly rotate the locknut until a corner of the nut aligns with either end of the slot i.e. there are three "nut flats" either side of the slot.

Then holding the nut in place, slowly rotate the screw outwards (anti-clockwise" 1/6th of a turn i.e. until the slot aligns with the next set of nut corners. Hold screw tight and do the locknut up as normal.

If done correctly, you'll now have a valve clearance of 0.125mm i.e. 1/6th of 0.75mm is 0.125mm. I believe that KTM used to recommend a clearance of 0.15mm but that dealers are now recommending 0.12mm? The above method gives an extra 0.005mm (5/1000th) of clearance which is nothing.

My friend was sceptical until I asked him to check the clearance for himself. If I can produce an comprehendable diagram, I'll post it up.

Edit:

__________________
My photos: www.possu.smugmug.com

Last edited by Steve Pickford; 20 Jan 2011 at 13:13.
Reply With Quote
  #10  
Old 4 Feb 2011
HU Ecuador Meeting Organiser
HUBB regular
 
Join Date: Jul 2008
Location: Tumbaco, Tambillo
Posts: 87
Thanks

VERY USEFUL INFO, THANKS M
MUCHAS GRACIAS OBRIGADO GRAZIE MILLE!
rg
Reply With Quote
Reply


Currently Active Users Viewing This Thread: 1 (0 Registered Users and/or Members and 1 guests)
 

Posting Rules
You may not post new threads
You may not post replies
You may not post attachments
You may not edit your posts

BB code is On
Smilies are On
[IMG] code is On
HTML code is Off
Trackbacks are On
Pingbacks are On
Refbacks are On


Similar Threads
Thread Thread Starter Forum Replies Last Post
Live from the HU Meeting Germany! El Aleman - Jens HU Travellers Meetings - Europe 1 21 May 2009 13:13
2nd HU Germany Meeting(21.5.-24.5.2009) El Aleman - Jens HU Travellers Meetings - Europe 11 11 Apr 2009 14:24
HU Germany Meeting - A Big Thank You! Ghost Rider HU Travellers Meetings - Europe 14 12 Sep 2008 12:56
1st HU Meeting Germany/22-25 May 2008! El Aleman - Jens Motorcycle Events around the world 18 11 Jun 2008 00:30
HU Meeting Germany Vaufi HU Travellers Meetings - Europe 5 17 Jan 2008 21:44


Announcements

Thinking about traveling? Not sure about the whole thing? Watch the HU Achievable Dream Video Trailers and then get ALL the information you need to get inspired and learn how to travel anywhere in the world!

Have YOU ever wondered who has ridden around the world? We did too - and now here's the list of Circumnavigators!
Check it out now
, and add your information if we didn't find you.

Next HU Eventscalendar

HU Event and other updates on the HUBB Forum "Traveller's Advisories" thread.
ALL Dates subject to change.

2024:

Add yourself to the Updates List for each event!

Questions about an event? Ask here

HUBBUK: info

See all event details

 
World's most listened to Adventure Motorbike Show!
Check the RAW segments; Grant, your HU host is on every month!
Episodes below to listen to while you, err, pretend to do something or other...

2020 Edition of Chris Scott's Adventure Motorcycling Handbook.

2020 Edition of Chris Scott's Adventure Motorcycling Handbook.

"Ultimate global guide for red-blooded bikers planning overseas exploration. Covers choice & preparation of best bike, shipping overseas, baggage design, riding techniques, travel health, visas, documentation, safety and useful addresses." Recommended. (Grant)


Ripcord Rescue Travel Insurance.

Ripcord Rescue Travel Insurance™ combines into a single integrated program the best evacuation and rescue with the premier travel insurance coverages designed for adventurers.

Led by special operations veterans, Stanford Medicine affiliated physicians, paramedics and other travel experts, Ripcord is perfect for adventure seekers, climbers, skiers, sports enthusiasts, hunters, international travelers, humanitarian efforts, expeditions and more.

Ripcord travel protection is now available for ALL nationalities, and travel is covered on motorcycles of all sizes!


What others say about HU...

"This site is the BIBLE for international bike travelers." Greg, Australia

"Thank you! The web site, The travels, The insight, The inspiration, Everything, just thanks." Colin, UK

"My friend and I are planning a trip from Singapore to England... We found (the HU) site invaluable as an aid to planning and have based a lot of our purchases (bikes, riding gear, etc.) on what we have learned from this site." Phil, Australia

"I for one always had an adventurous spirit, but you and Susan lit the fire for my trip and I'll be forever grateful for what you two do to inspire others to just do it." Brent, USA

"Your website is a mecca of valuable information and the (video) series is informative, entertaining, and inspiring!" Jennifer, Canada

"Your worldwide organisation and events are the Go To places to for all serious touring and aspiring touring bikers." Trevor, South Africa

"This is the answer to all my questions." Haydn, Australia

"Keep going the excellent work you are doing for Horizons Unlimited - I love it!" Thomas, Germany

Lots more comments here!


Five books by Graham Field!

Diaries of a compulsive traveller
by Graham Field
Book, eBook, Audiobook

"A compelling, honest, inspiring and entertaining writing style with a built-in feel-good factor" Get them NOW from the authors' website and Amazon.com, Amazon.ca, Amazon.co.uk.


Back Road Map Books and Backroad GPS Maps for all of Canada - a must have!

New to Horizons Unlimited?

New to motorcycle travelling? New to the HU site? Confused? Too many options? It's really very simple - just 4 easy steps!

Horizons Unlimited was founded in 1997 by Grant and Susan Johnson following their journey around the world on a BMW R80G/S.

Susan and Grant Johnson Read more about Grant & Susan's story

Membership - help keep us going!

Horizons Unlimited is not a big multi-national company, just two people who love motorcycle travel and have grown what started as a hobby in 1997 into a full time job (usually 8-10 hours per day and 7 days a week) and a labour of love. To keep it going and a roof over our heads, we run events all over the world with the help of volunteers; we sell inspirational and informative DVDs; we have a few selected advertisers; and we make a small amount from memberships.

You don't have to be a Member to come to an HU meeting, access the website, or ask questions on the HUBB. What you get for your membership contribution is our sincere gratitude, good karma and knowing that you're helping to keep the motorcycle travel dream alive. Contributing Members and Gold Members do get additional features on the HUBB. Here's a list of all the Member benefits on the HUBB.


All times are GMT +1. The time now is 17:30.